Hasegawa 1/72 MiG 23S straight from the box


For a club project about fictitious shop displays, I built the old Hasegawa 1/72 MiG 23 straight from the box. I bought a second-hand model, the first edition, from 1977. The box was a bit dirty and weathered (see the box art scan), but the contents were like new.


Model and box

Hasegawa and Airfix were the first with 1/72 MiG-23 models, issued in 1977 and 1980 respectively. The aircraft would first visit the west in 1978 and 1981, but nevertheless the Airfix model is less accurate than the Hasegawa model. I won't list the errors - it's no use since there are much better models available now.

I wanted to build the model like Hasegawa saw it in 1977, when the model came out. The box art would be much of my inspiration to build this model. Another inspiration was the MiG 23 Flogger B 1/72 old tool Hasegawa by 'flagon21' on the ARC forum. He painted it silver, like the insturctions tell you, but in the end I could not bear doing that.


Construction

I built the fuselage and tail surfaces in one go, using CA glue throughout. I modified the wing attachment in the same way as in my other Hasegawa MiG-23 build, so they could be attached later.

To make it compatible with the other model, I also installed a 2x1 mm plastic tube inside the rear fuselage, so the model could be mounted on a 1 mm steel wire.
Here's the model with wings, inlets and radome, almost finished. I removed all of the fine panel lines, to make the model similar to the other one.
Construction drew to an end, so I sprayed the rear 2/3s of the model with Tamiya Surface Primer to check the build quality. I did some more work on the wheel doors panel lines to make them a bit more subtle.
I still hadn't decided what to do with the weapons: add them or not, glue them in place or use magnets. In the end I decided to mostly copy the idea of my modified Hasegawa MiG-23. I wanted to glue the weapons to the pylons, and install magnets in the pylons and fuselage.

Since the weapons on the first MiG-23 barely stuck, I decided to use more magnets, five or six 1x1 mm magnets per pylon. The centerline mounting for the gun pod allowed the installation of larger 2x2 mm magnets on the fuselage side.

A drawback of this approach is the number of magnets used: no less than forty-nine 1x1 mm and five 2x2 mm were consumed.
I'm happy to report that the pylons and stores attached with enough magnetic force to stay on the model. The missiles were painted according to the box art. I used small squares of red decal sheet, and touched up the edges with paint. I still have to apply a different color to the seeker heads. They were Blu-Tac'ed to the pylons for the photo.
Due to the intended purpose of the model, the plastic pitot tube had to be replaced with a similarly-shaped metal one. I built the simple shape from 0.75 mm spring steel wire and 1.0 mm Albion micro tubing. A piece of Albion tubing was also glued in the radome as a mounting. The pitot tube looks rather unsophisticated, but the original part is almost identical.
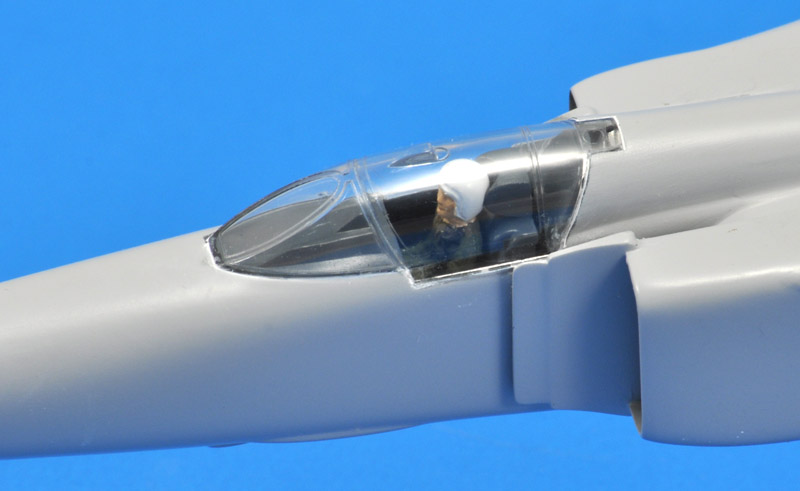
Following instructions, I painted the cockpit and seat a dark grey, using MRP-114 Extra Dark Sea Gray. I raised the seat by 2 mm to make the pilot sit a bit higher.

The pilot figure was first sprayed white (MRP-004), then used a pin to paint the skin (Humbrol HC5 and MC15 mix), a small brush to paint the overall (undetermined Humbrol Authentics green), the life jacket HM17, and again a pin to do the mask, hanging to the left (Revell 9 charcoal). The figure looked like crap, but that's how the instructions more or less want you to paint it.

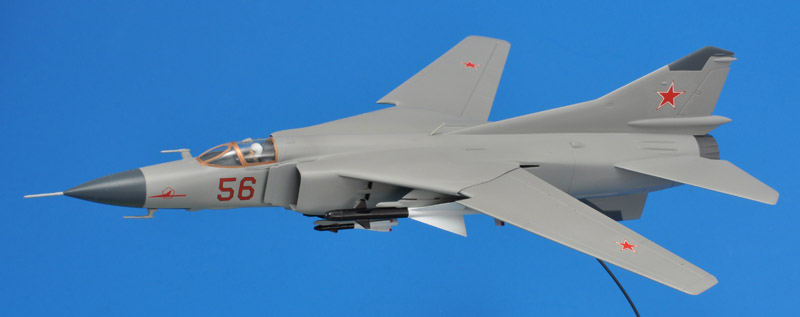
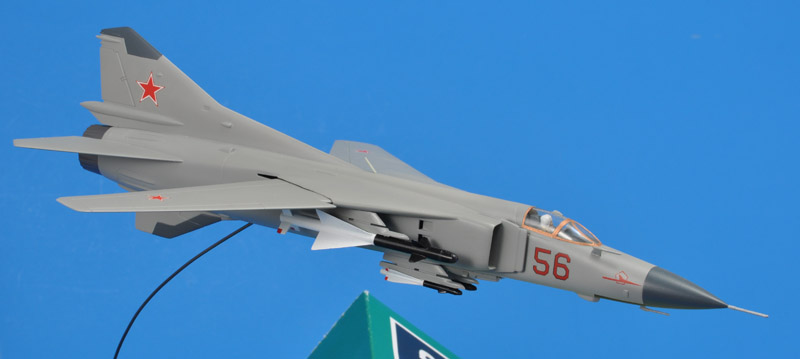
The windscreen's lower edge was painted black to prevent unwanted reflections, and then the canopy and windscreen were glued on, using epoxy. The lens effect of the canopy makes the pilot figure looking egg-shaped, sigh..
The last parts to be added were the landing lights in the lower sides of the intake ducts. They stuck out somewhat, therefore I added an 0.3 mm plastic card shim so they would be flush. A piece of Bare Metal Foil was added as a reflector.


Painting and decals

Here's the camopy masked with CCF. I used strip of black BMF to improve the mask around the rear view mirror.
I had two basic options for the paint scheme: that of the instruction sheet, or that of the box art. The instruction sheet says to paint the model silver lacquer. But I don't think a single 'silver' MiG-23 ever existed. My modeling friend Eric explained that Hasegawa had a habit of confusing light grey and silver in those years. The box art seems to show a light grey scheme, and that at least existed, in the early days of the MiG-23.

I decided to follow the box art. MRP-354 'AS1115 Russian Air Superiority Grey' was a logical choice, but this paint came out grainy - a first for me using MRP. Under pressure from a deadline, I took MRP-038 FS 36375, and mixed in some MRP-103 FS 30219, in attempt to sort-of match the box art. The mixed color was close to FS 26440.

Here's the model in that color, with the radome and tail antennas painted MRP-114 Extra Dark Sea Grey, again sort-of following the manual and the box art. Again following the manual and the box art, I painted canopy and windshield frames copper (Humbrol 12), a strange detail.
More mission creep: the kit decals didn't looked very nice. I decided to replace them with Superscale decals. I used 72-572 'Russian Numbers (Current) - Solid Color & Outlined' for the 'bort' numbers, and 72-573 'Russian Stars - WWII to current all styles' for the stars. The 'Excellent Maintenance' decals are from the RV Aircraft MiG-23MF (72001). Instead of the Microscale juices I used Future, as usual.
The last paint detail of the missiles was painting the 'seekers' a dark blue. It was a rotten masking job, and after applying MRP-237 FS 35042, it was a disappointment because it was hardly visible.


Finished model

The finished model is perfect for its purpose as a shop display model, but otherwise it's not my kind of model. Nevertheless, it was an interesting exercise to build a model this way.
The left side looks amazingly similar to the right side :-)


Shop display

I designed a wedge-shaped shop display for this model, to create more variety among the 33 shop displays for our club table at the 2023 Euro Scale Modeling event. I found inspiration in an old Hasegawa catalog for the text, fonts and colors. I used a 1 mm spring steel wire, and after a lot of bending and twisting, the MiG model hung in the perfect spot.


Return to models page