Monogram 1/72 D-21 'what if'
| I gathered a few 1/72 scale Lockheed D-21 models, made by Italeri and Monogram - still looking for the Hasegawa/Academy one. I haven't really studied which one is most accurate, or least inaccurate. But for a club project, I needed to build one fairly quickly. It was a good excuse for getting to know this model, for a future 'serious' build.
|
The challenge
Coen van de Heuvel, owner of Flash Aviation book and model shop, hosts the IPMS-NL regio Zuid meeting in January of every year. It usually attracts a good crowd, maybe 40 modelers. And every year, Coen holds a contest, and often goes so far to supply the required model! For the 2024 meeting, the contest theme was to be 'Fokker D21', and Pioneer Models 1/72 kits were kindly supplied. I'm not much of a WW2 builder, but I do like unmanned aircraft, so my thoughts drifted immediately to the Lockheed D21 supersonic drone. Could I bend the theme a bit to include that one too? I figured that a license-built Fokker-Lockheed D-21 could have existed, and its existence is still being denied. Stretching that idea even further, could it have been painted in the colors of the WW2 D-21, for some reason?
Construction
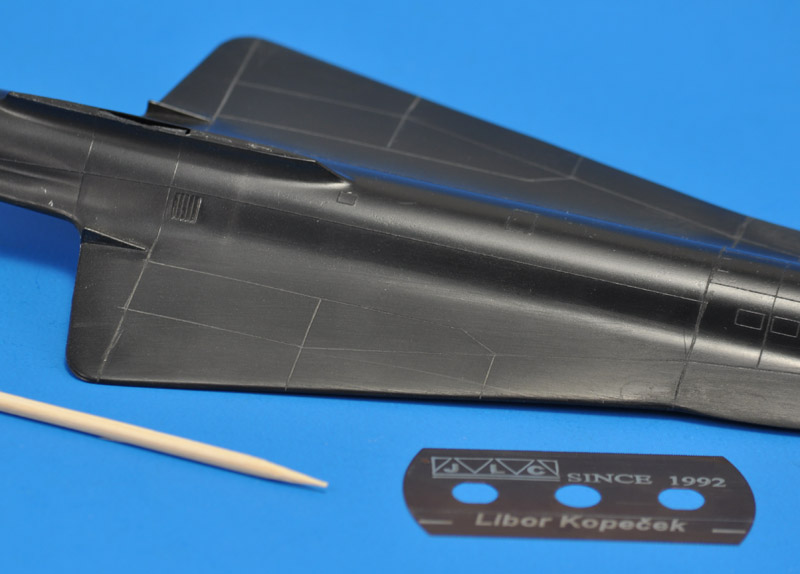
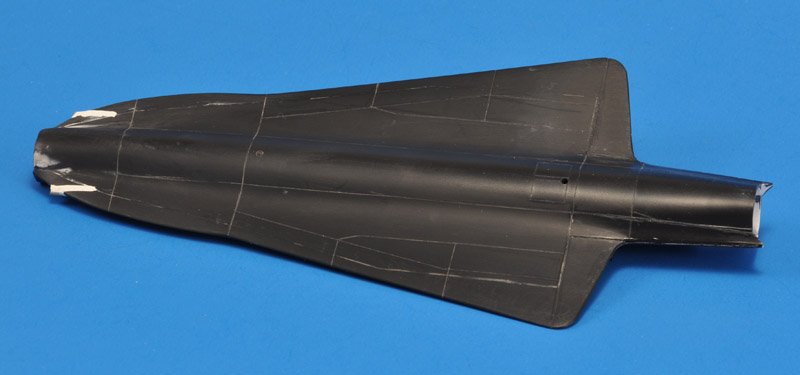
| The model was already partly built by the previous owner. I aggressively sanded the lower side to make things fit. The next job was my least favorite: panel line scribing. My standard tools are a JLC razor saw and a bamboo skewer. I used the existing raised panel lines as guides. The razor saw takes out a tiny strip of plastic, and I run the skewer through it to round the edges a bit.
| 
|
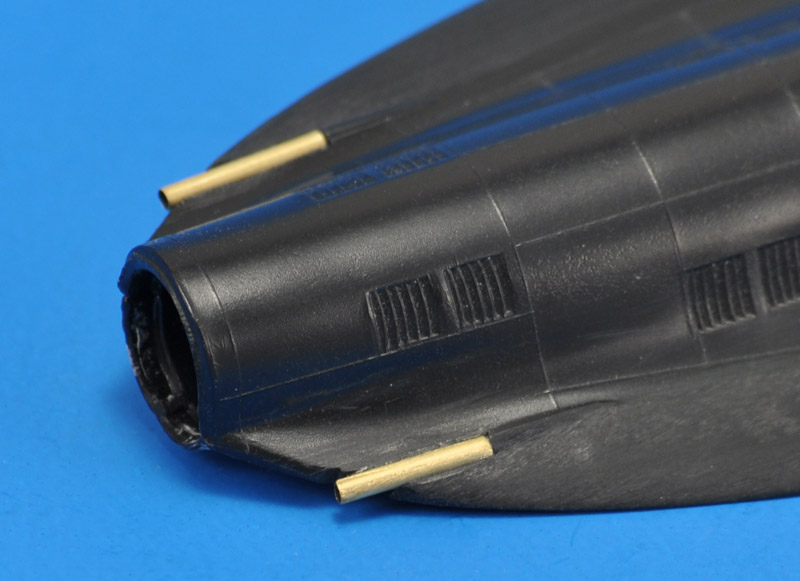
| The two pitot tubes were too thick, and in the way of the building process. I installed two brass Albion tubes to serve as mounting points of new pitot tubes later.
|
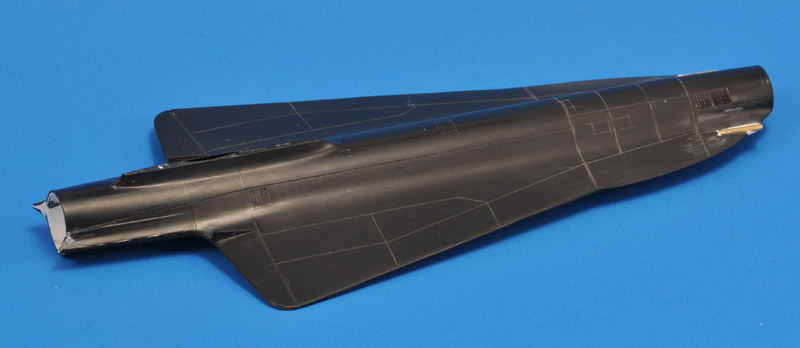
| More progress on the rescribing. Did I mention I hate rescribing? It's especially difficult in the concave areas on the forward fuselage.
| 
|
| For the lower side, I mostly copied the panel lines of the top side. The camera hatch looks very flat, I think it should have a bulge and at least one camera window. I'll save those improvements for the next one, being on a tight time schedule.
|
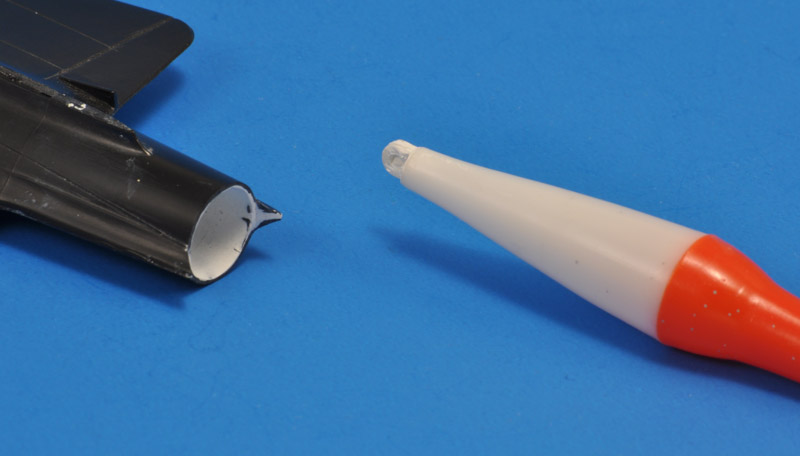
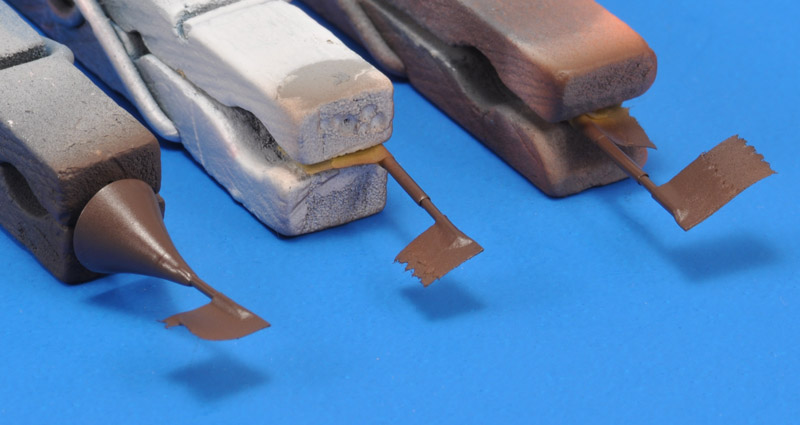
| I used Apoxie Sculpt and a fishing float to sculpt a ramjet exhaust. I found out later that it should taper more strongly.
| 
|
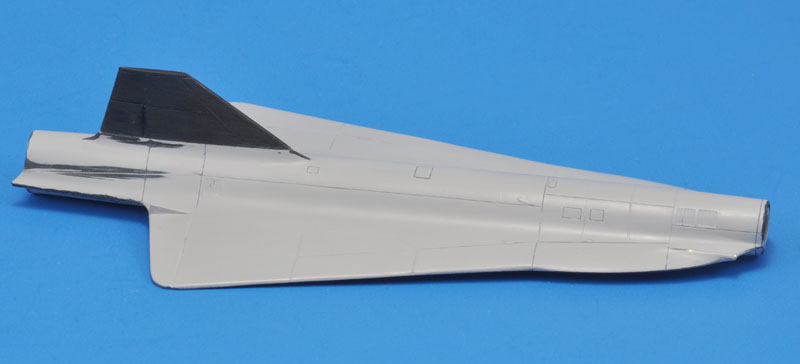
| To check the quality of the build, and the rescribing, I painted it with Tamiya Surface Primer. A lot of corrective work followed. The vertical tail was added last.
|
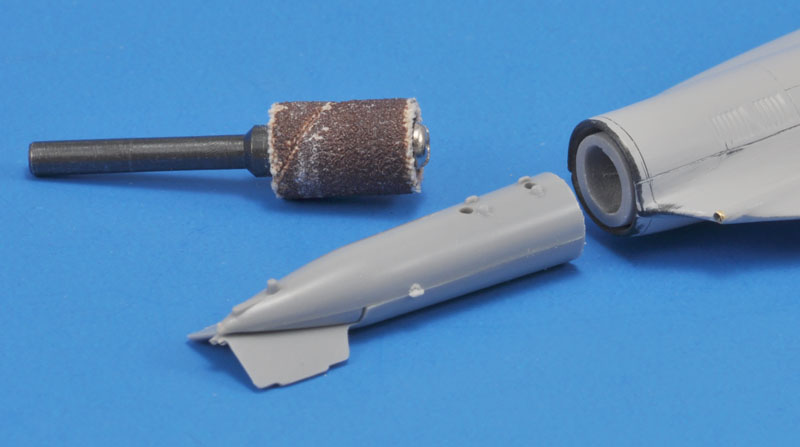
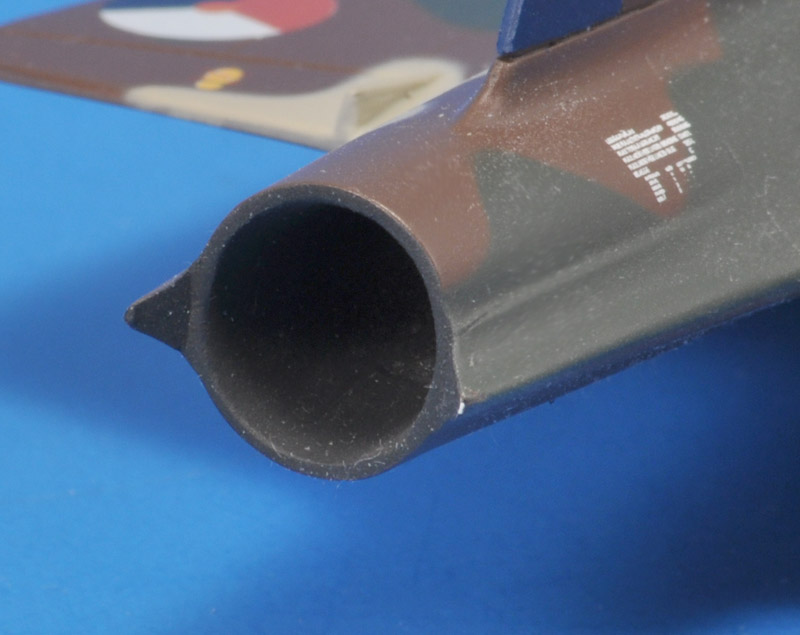
| To refine the inlet a bit, I used my motor tool to open up the inlet until a thin lip remained. The black plastic responds rather differently to sanding than the usual grey plastic. Next, I cut off the flange of the inlet cone (not shown here) and measured an 8.5 mm diameter. I found a slightly tapering tank in my spares box, and cut it at 8.5 mm diameter. And I was lucky when I test-fitted the tank nose: it touched the fuselage top deep inside, so I didn't have to build a support structure deep inside, just a dab of CA glue.
| 
|
Painting and decals
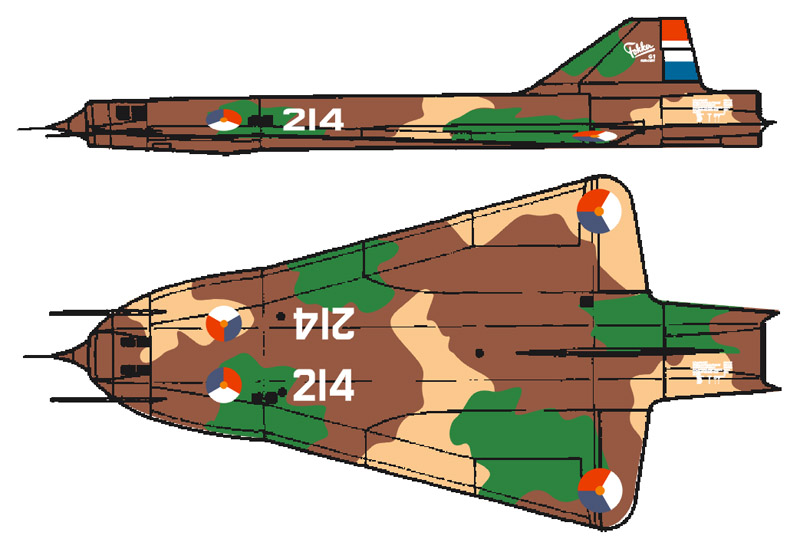
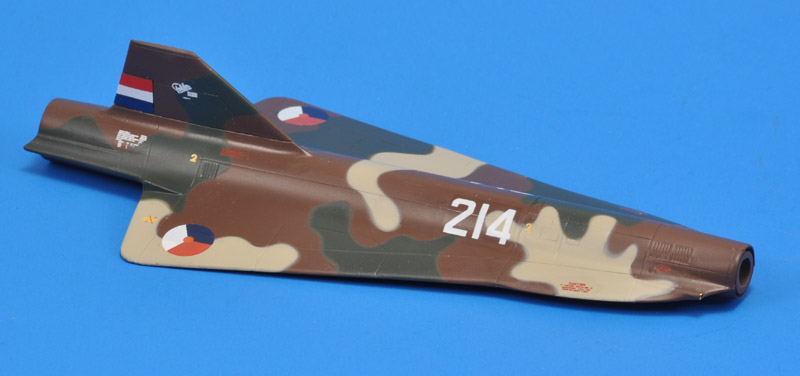
I decided to give my D-21 a camouflage like that of the 1936 Fokker D-21, in brown, green and sand. I tried to sketch a typical LVA three-color camouflage scheme, but I don't think I'm there yet.
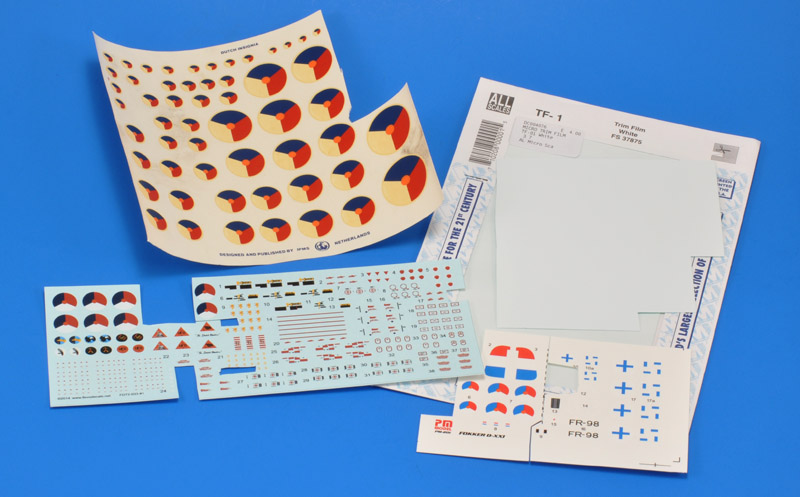
For the decals, I plan to use the Pioneer Models decal sheet. A sketch in CorelDraw showed that the decals fit reasonably well.
| 
|
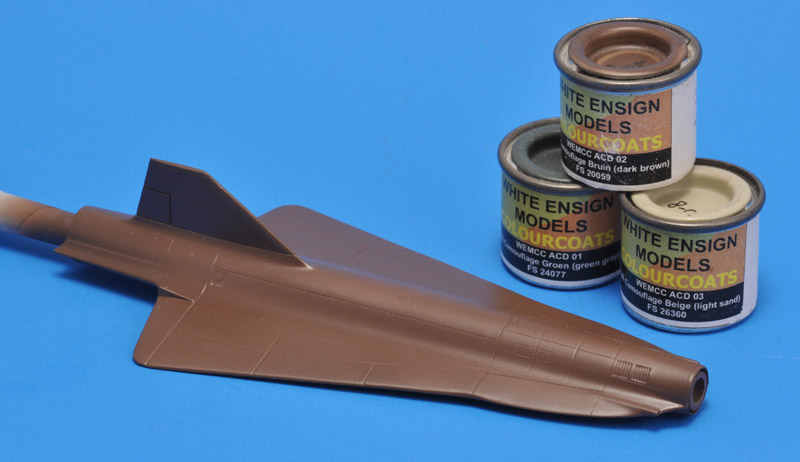
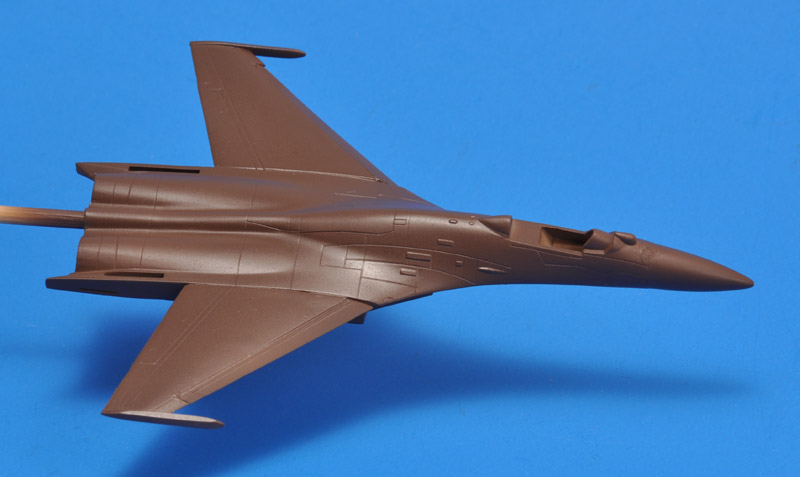
| The model was first painted with White Ensign Models ACD-02 'LVA Camouflage Bruin' enamel, mixed 1:1 with lacquer thinner. That mix was a bit of an experiment, based on my 'Donn Yost' experiences, but sprayed nicely. I also did it because my tin was 15+ years old, and because I lack experience with WEM paint.
I cured the paint in a hot box at ~40°C, because I had only a few days left to finish the model. Some enamels take several days to cure at room temperature, and 40°C would reduce cure time to 1/3rd of the time. After 4 hours I declared the paint cured. Interestingly, the hot-curing of this particular paint smells like the plumbing had sprung a leak. The sand colored paint had it too, but the green color didn't.
Note to myself: if I ever need to paint something to resemble milk chocolate, this is the paint to use!
|
| Despite having just a few days left, I decided to paint a parallel model, so I could experiment a bit with the decals and weathering. I had almost thrown away this Italeri/Dragon not-quite 1/144 Su-27, but repurposed it.
| 
|
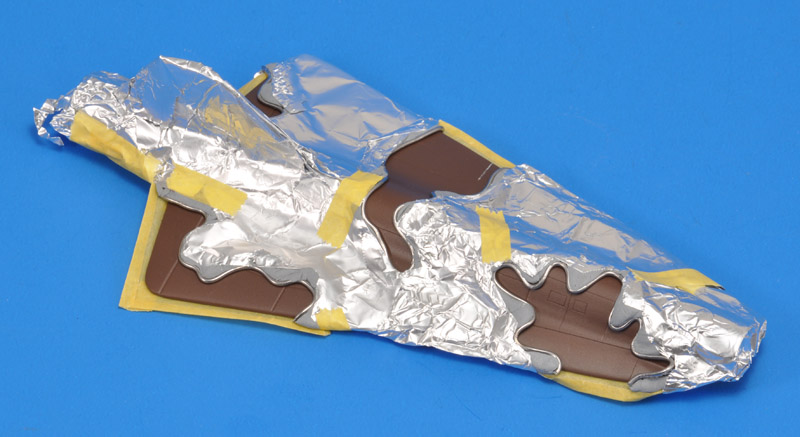
| I used my standard technique for masking: solder wire (1 mm this time) held in place by Blu-Tack, and filled in with kitchen aluminium foil. I aimed for roughly equal areas of brown, sand and green. I left the lower side brown overall, as was standard on WW2 Fokker D-21s and G1s.
I did make one mistake: I did all sand patches in one go, and that was too much. While working on the next patch, you disturb the previous one(s). It's better to do it in two or three sessions.
|
I had planned to use the PM sheet almost exclusively, until I noticed that the roundel colors were far off. In the end I only used the serial numbers and the 'Fokker DXXI' decals.
I used a few decals each from several other sheets: a Flevo Models F-104 sheet, a very old IPMS-NL roundel set and MicroScale white trim film. I used the latter two to make the red-white-blue flag on the rudder, but they were horrible: they broke oh so easily, and were extremely frustrating to use. Both were probably far too old. I should have tried Liquid Decal Film, but forgot it.
| 
|
| As usual, I used Future under all decals. Here's the model right after decaling. It still has lots of gloss stains from the use of Future, but they don't show in this view.
|
| A clear coat with Alclad ALC-313 Klear Kote Matte tied everything together. It made the glossy Future stains around the decals disappear. Later I applied Alclad ALC-312 Klear Kote Semi-Matte for slightly more gloss. But that made the model sticky, something I had experienced before.
| 
|

| All decals except one were perfect: the large serial number on the left side. I remember moving it around too many times, that must have been the reason. I hope I can repair this flaw one day.
|
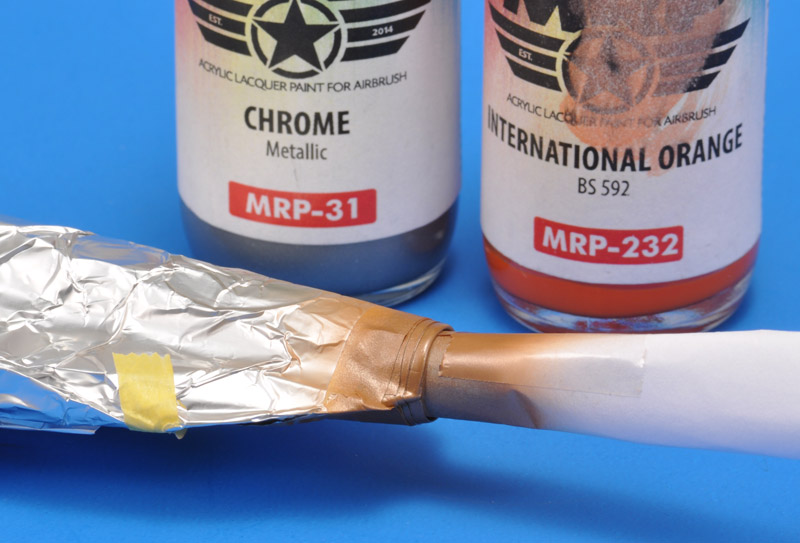
| My modeling friend Eric suggested painting the inlet ring a copper or brass color, just like the exhaust ring on the Mercury engine of the Fokker D21. It took (again) a lot of masking. For the color, I wanted it done quickly, and mixed MRP-031 Chrome with MRP-232 International Orange to create a copper/brass color. It's probably a bit too monochromatic and glossy. And you can put your bets on whether anyone will ever spot that detail :-)
| 
|
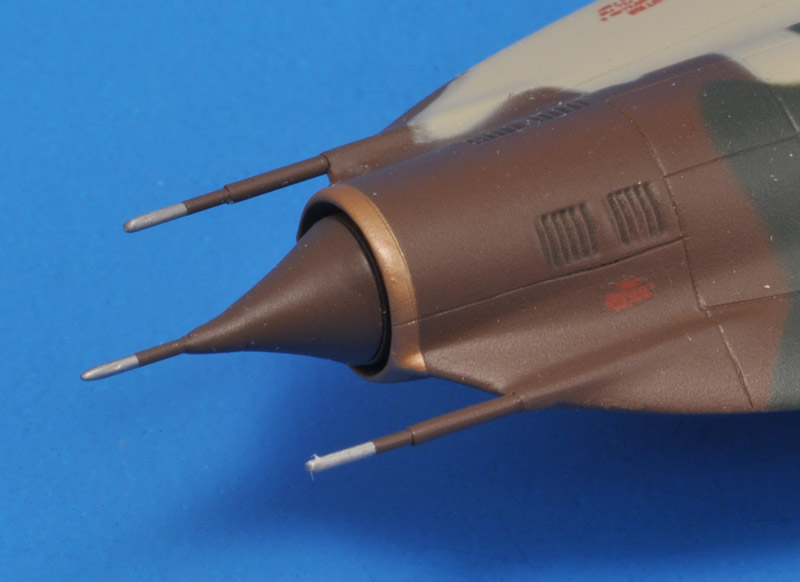
| The last parts: two pitot tubes and the inlet shock cone with pitot tube. I used 1.1 x 0.9 mm Albion micro tubing and 0.75 mm spring steel wire. Maybe a bit too massive, but smaller than the kit anyway. I painted all ACD-02 'LVA Camouflage Bruin' enamel, leaving the tips of the pitot tubes bare steel.
|
| The last parts were installed and overcoated with Alclad ALC-312 Klear Kote Semi-Matte to give them the same sheen as the rest of the model. I think they enhanced the model considerably, although they are not perfect.
| 
|
| I painted the ramjet exhaust Revell 9 coal black. As you can see, it gathered quite a bit of dust and fuzz between painting and photography..
|
Transport trailer
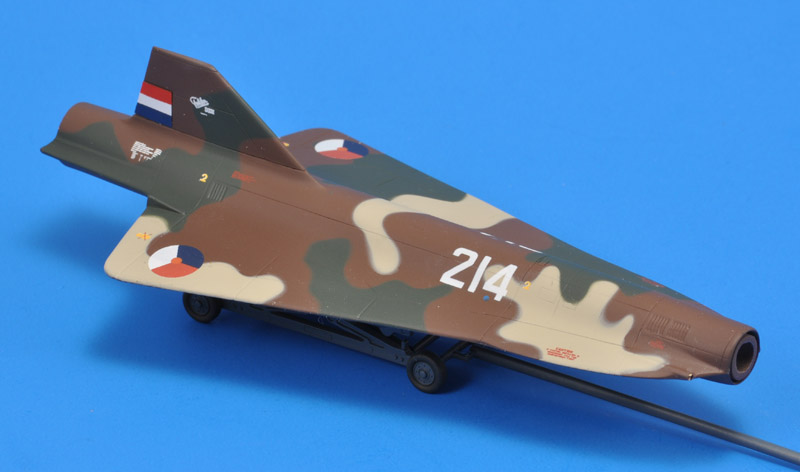
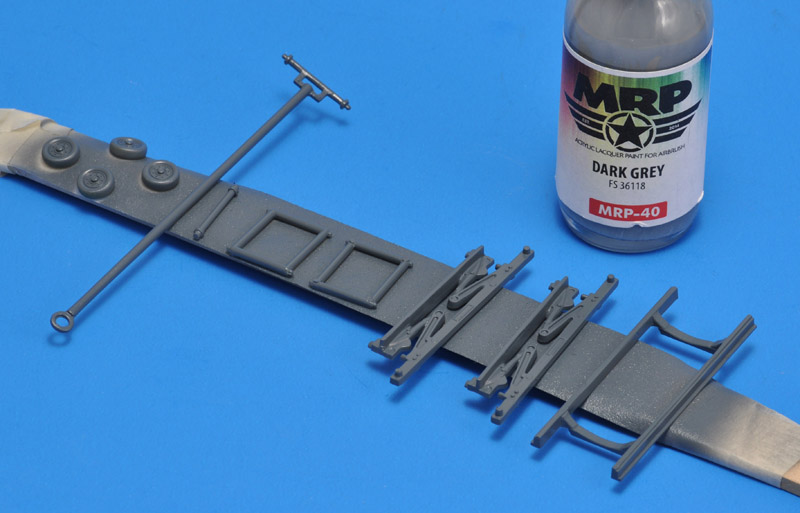
| To illustrate the size of the vehicle, I decided to put it on a transport trailer, and a tractor in front of it. But I didn't like the trailer that Monogram supplied. Luckily I had a 'hydraulic' engine trailer left-over from my two Revell 1/72 F-16s (see #1 and #2). This trailer's tow bar was way too short for this large drone, so I repurposed the separate tow bar from the same kit. My spares box yielded a set of more realistic wheels. Everything was painted in a boring 'Fokker grey' like medium grey, using MRP-040 FS 36118.
| 
|
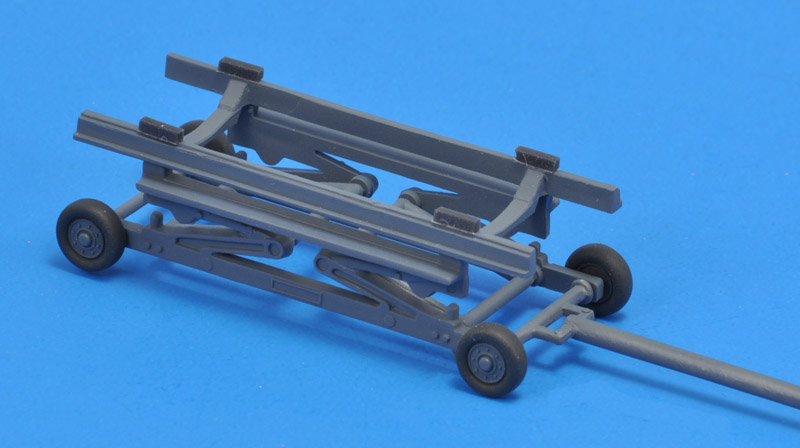
| Here's the assembled trailer, clear coated with Alclad ALC-314 Klear Kote Flat, to match the tractor from the old Revell F-16 kit.
|
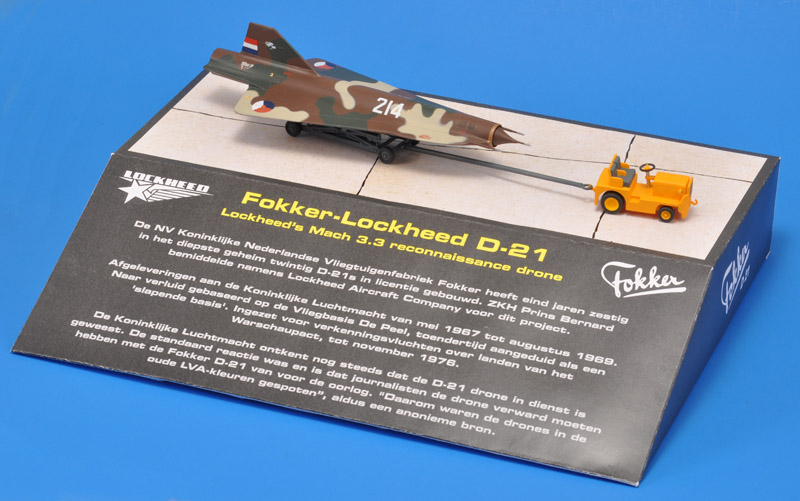
Display
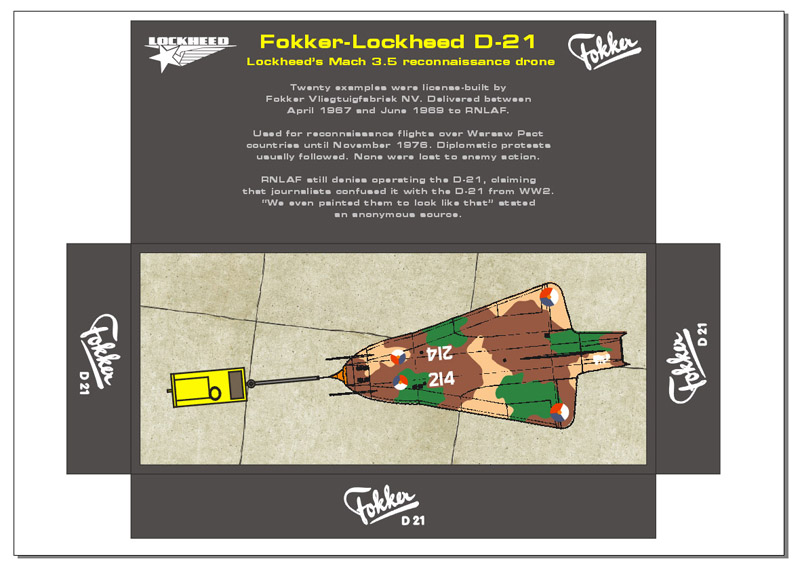
I reasoned that my model required a display to explain it to the viewers. Here's the first design, with bogus text about the Fokker license built examples used by RNLAF to perform Warsaw Pact overflights.
Twenty examples were license-built by NV Koninklijke Nederlandse
Vliegtuigenfabriek Fokker, under great secrecy. ZKH Prins Bernard
lobbied for this project on behalf of Lockheed Aircraft Company.
Delivered to the RNLAF between 1967 and 1969. Reportedly stationed
at Vliegbasis De Peel, under the cover of being a 'reserve base'.
Used for reconnaissance flights over Warsaw Pact countries until
November 1976. Diplomatic protests usually followed. None were lost
to enemy action, but several operational accidents occurred.
The RNLAF still denies operating the D-21, claiming that
journalists confused it with the Fokker D-21 from WW2. "We even
painted the drones to look like that", an anonymous source stated.
|
| 
|
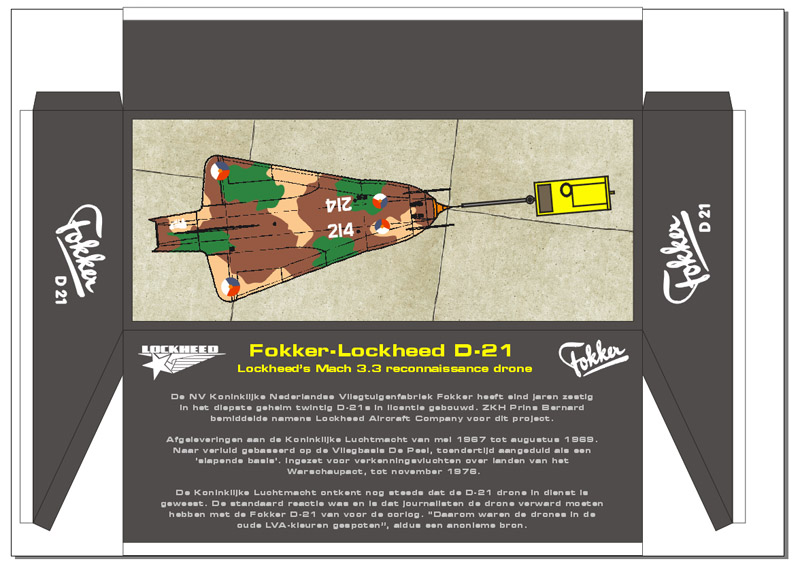
| I changed the layout of the display, and changed the text to Dutch.
|
Finished model
| With one day to spare, the model was ready for the Flash Aviation contest. I turned the right side to the viewer, to keep the silvered decal out of sight. I'm happy with the result, it turned out just as I had hoped.
|
|
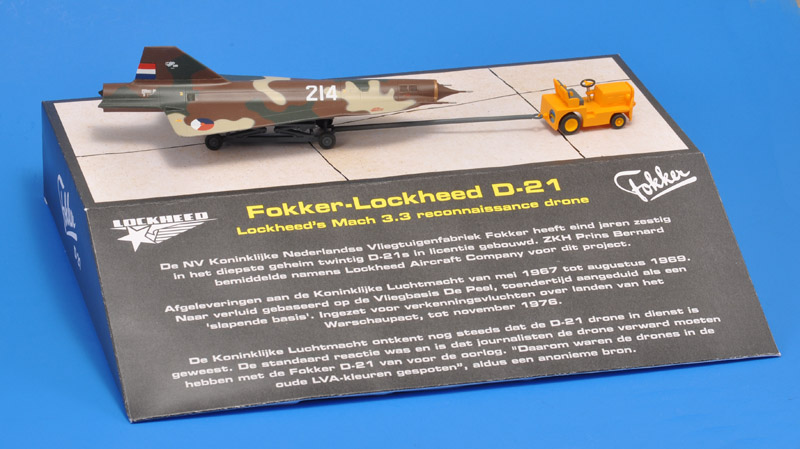
| The eagle-eyed viewer can see a 306 squadron emblem on the rear fender of the tractor. It was, and now again is the only recce squadron of the RNLAF. I took the decal from Modeldecal sheet 43.
The heavy paper display got a bit moist during the trip back home from the copy shop, and it's a bit wavy. I hope to iron that out, one day.
|
Lessons learned
the model's wing is too thick for a high-Mach aircraft. It can be seen especially seen at the pitot tube mounts, and along the leading edges
masking for multiple patches of the same color simultaneously is not a good idea. While working on one patch, you disturb the others. It's best to do them one by one, if time allows
moving a decal multiple times after applying it is a recipe for silvering
Model links
Return to models page