[ page 1 ]
AVRO Vulcan in 1/72 scale: modelling the old Airfix kit
page 2
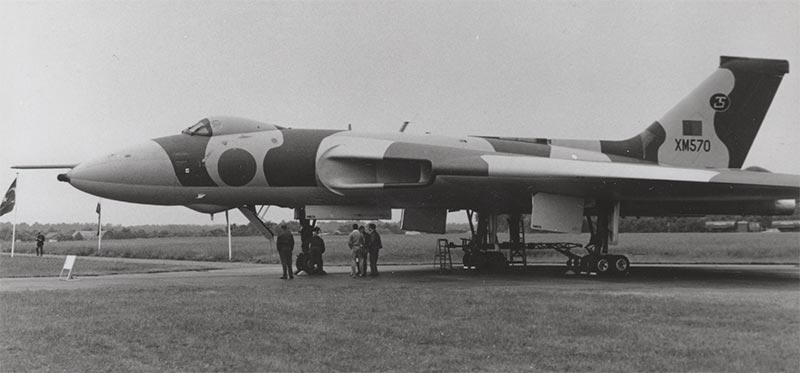
photo of XM570 made by me at Deelen show, 1978 with my old camera
The A.V. Roe & Company (Avro) model 698 (later named Vulcan) was a jet-powered delta wing strategic bomber to meet Air Ministry Specification B.35/46. The first prototype flew on 30th August 1952 at Woodford and a second prototype September 1953. It had a huge delta wing layout and a crew of 2 pilots and 3 navigators/ system operators.
The Vulcan would become part of the strategic "V-force" nuclear deterrent force along with the Vickers Valiant and Handley Page Victor during the Cold War. The nuclear bombs were carried in a huge bomb bay with constantly a few aircraft ready at full alert to fly the mission at high altitude.

The first operational version was the Vulcan B.1 came into Royal Air Force service in 1956 and it was powered by 4 Olympus 101 jet engines. It got the "phase 2" wing and some 45 B.1 Vulcans were manufactured. From 1953 these were modified to B.1A standard with ECM and different tail cone. The B.1A was retired with the RAF by 1966 and by that time missions were also to be flown at lower flight levels to avoid Soviet SAM missiles.
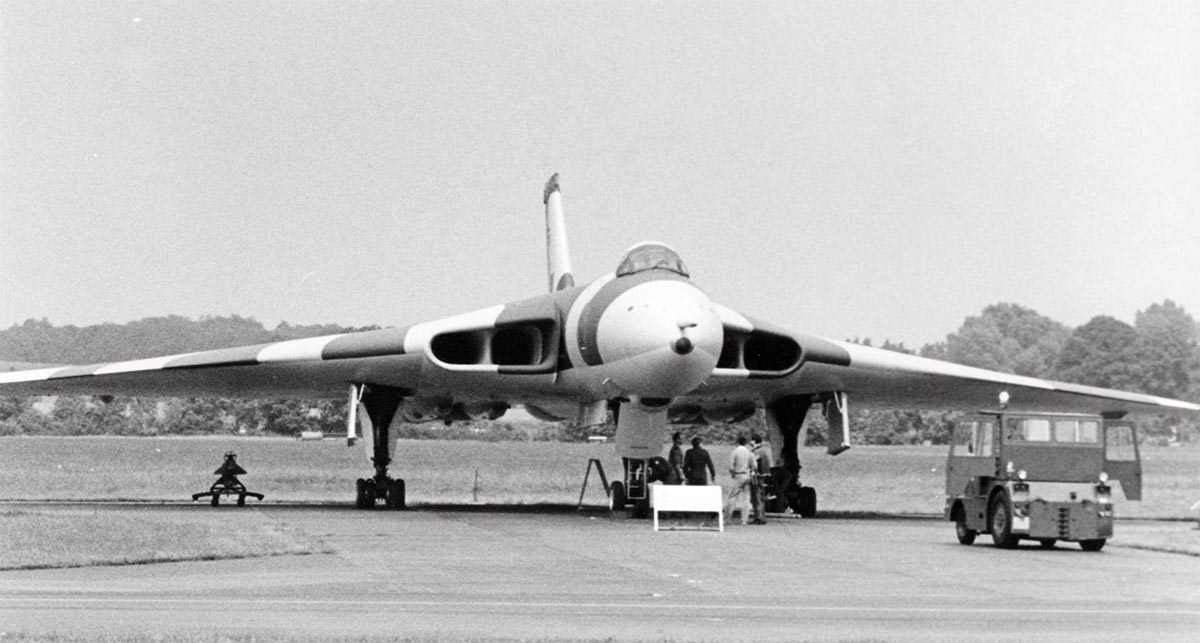
again the XM570 at Deelen show, showing the big intakes
During these years the A.V.Roe company became part of the Hawker Siddeley consortium.
The B.2 version had another larger wing with different planform and larger span, new systems and several other changes like bigger intakes for the Olympus 201 (and later 301 engines). First flight was on 4 March 1959 and it entered RAF service in 1960 at RAF Scampton. It also was often fitted with terrain following radar and could be fitted with a tank boom on the nose. Some 89 B.2 Vulcans were manufactured. Many B.2 were modified to fire the Blue Steel stand-off missile at the main weapons bay that was operational from 1963 till 1970 when the Royal Navy Polaris submarines took over the nuclear deterrent role.
(The intended B.3 was a version with 6 externally fitted long range "Skybolt" ALBM strategic missiles but only some test flights were done).
With the new role, the Vulcans B.2 were now to be used for low level conventional bombing. During their service life, some Vulcans got re-enforcements with large stiffener plates in front of and next the bomb bay at the lower surfaces. Some later on got also what seem to be re-enforcement/ inspection plugs on top of the wing and between tail pipes.
B.2 data: wing span 33,83 m, maximum speed 644 mph (1,037 km/hr), range 4000 miles (7,400 km);
Some 9 Vulcan B.2 were modified for a maritime reconnaissance role (MRR) or Strategic Recon (SR2).
From 1982, 6 Vulcans were modified as K.2 tankers with mark 17 system below the tail cone. The tankers flew with RAF no.50 squadron only a few years until 1984, being the last Vulcans to fly operationally.
In 1982 the Vulcan was to be put out of service. But the South Atlantic Falklands War of Spring 1982 required some Vulcan to fly out long-range 15 hours missions against the occupied Falklands from base station Wideawake airfield, on Ascension Island in the mid-Atlantic. Five aircraft were modified. Refuelled many times by various Victor tankers during each flight during Operation Corporate the so called "Black Buck" missions from end April till mid June. Sorties were flown to bomb the runway at Port Stanley Airfield and against radar sites on the islands. Some of these Vulcans were fitted with 2 external wing pylons quickly made at Waddington to enable the carrying either 4 Shrike missiles or if desired an ECM AN/ALQ-101 pod and 2 Shrikes.
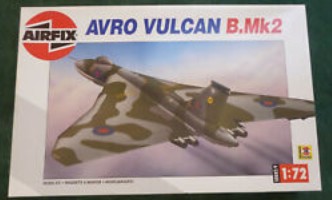
End 2020 Airfix released a brand new 1/72 Vulcan B.2 kit #A12011 of the Vulcan. But almost 40 years earlier Airfix released in 1983 a 1/72 Vulcan B.2 kit #09002. At that time, it was an impressive injection moulded kit with previously only Rareplanes and Formaplane vacuforms being available. This kit appeared in various boxes over the years til kit #A50097 in 2010.
Still, a few old Airfix Vulcan kits were in the loft so it was decided to build the old Airfix kits!
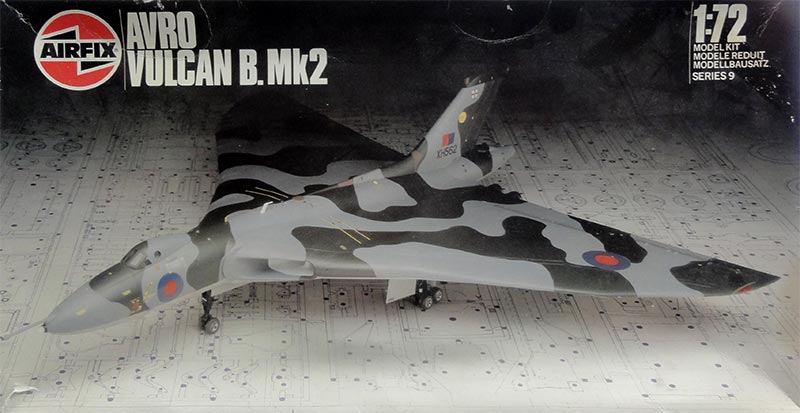
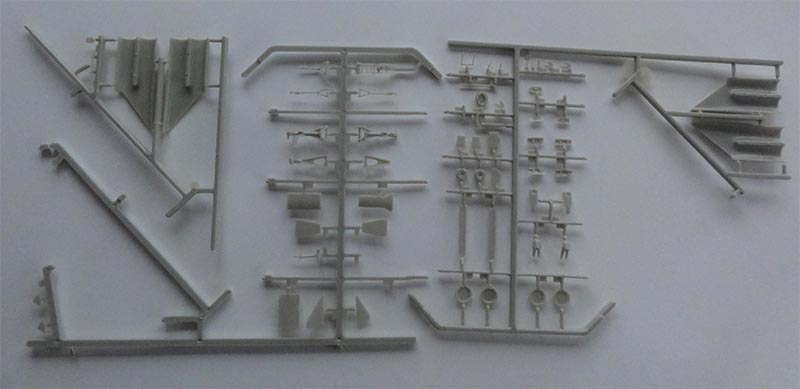
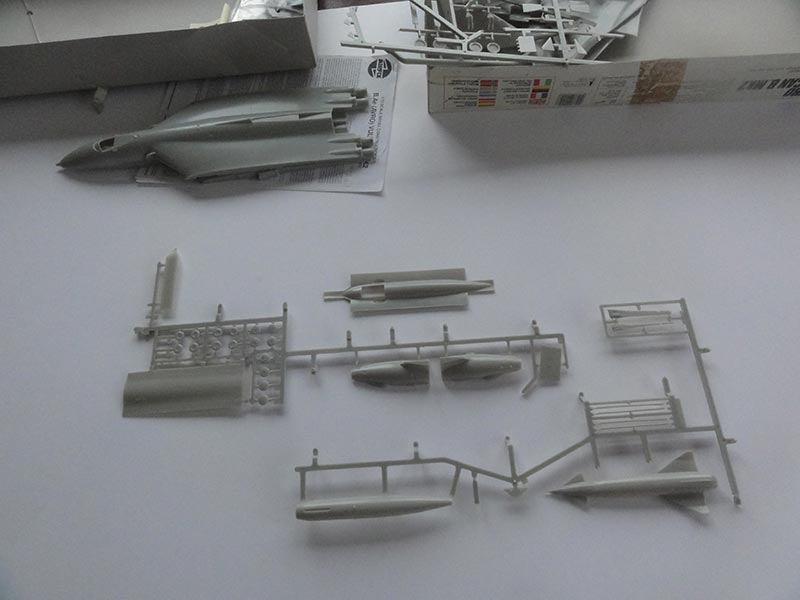
The kit is for a Vulcan B.2 with the later Olympus 301 jet "short" exhausts and the "wide intakes". There are in the kit about 110 parts in hard plastic and a few transparant parts.
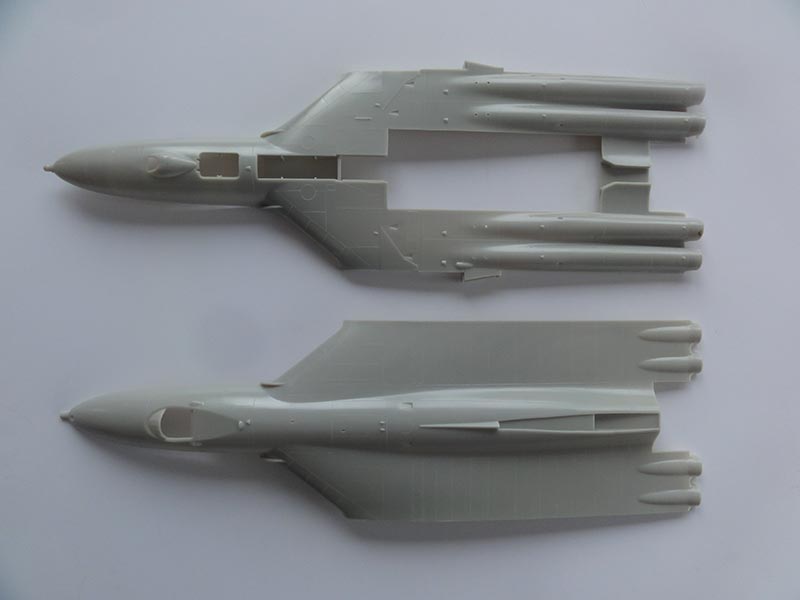
Some parts seen here, separated from their thick sprues.
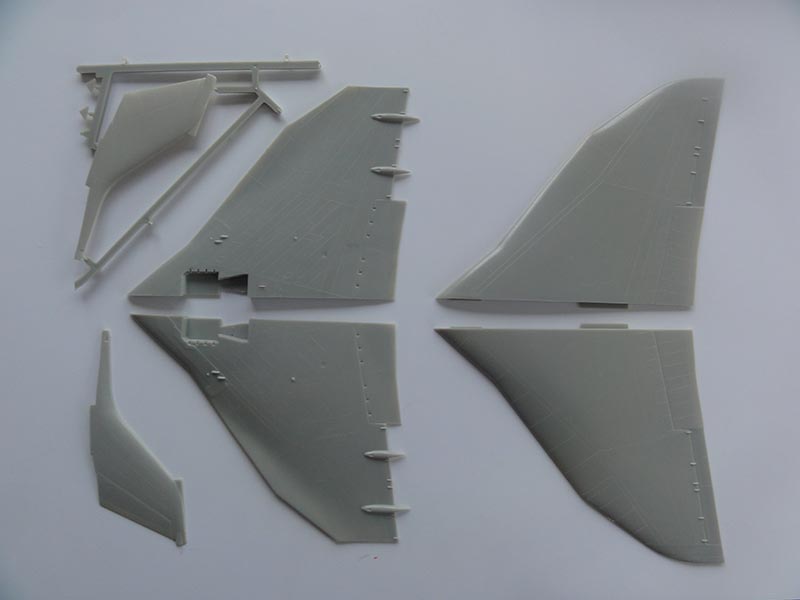
The vertical tail has the ECM fairing and on the nose the "red steer" Terrain Following Radar (TFR) knob is present below an in flight refuelling probe.
There is in the kit no bomb bay interior and the bomb doors can only be set closed with part #64. (If you want details in the bomb bay, a lot of scratch building inside is needed). For the scheme/ kit option with Blue Steel missile, you get a different lower panel #67.
The old instructions are a bit unclear with tiny decal drawings and need careful studying. Please note the options with different Vulcans for the different schemes such as the extra wing pylons.
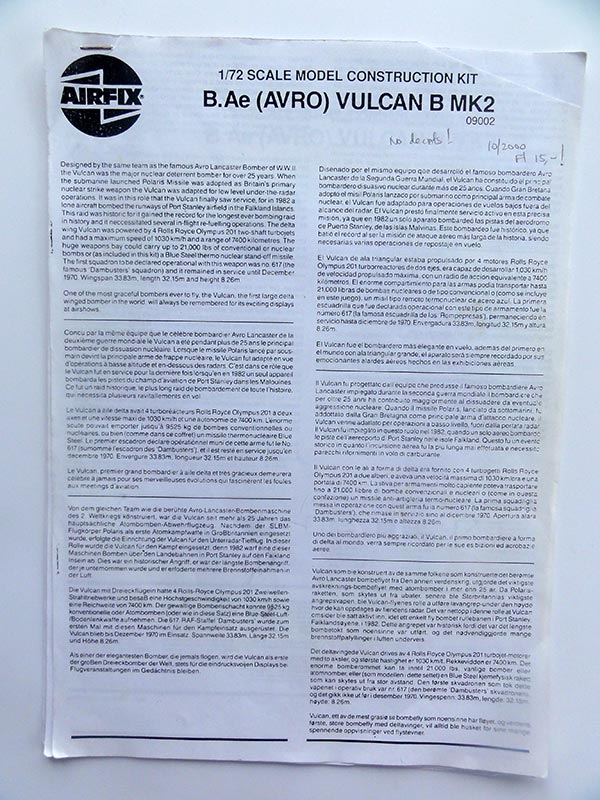
This old Airfix Vulcan kit #09002 had decals for 3 schemes....
(1) overall white Vulcan B.2A with Blue Steel missile of "XL321" of no.617 squadron at RAF Scampton, 1963;
(2) camouflaged "XH562" of no.9 squadron at RAF Coningsby, 1977;
(3) camouflaged "XM607" used for "Black Buck" missions by RAF no.44 squadron, 1982.
It includes stencilling and the early V-bomber low vis RAF Type D roundels and later style roundels. You will need more info on which stencils to set on your desired Vulcan scheme.
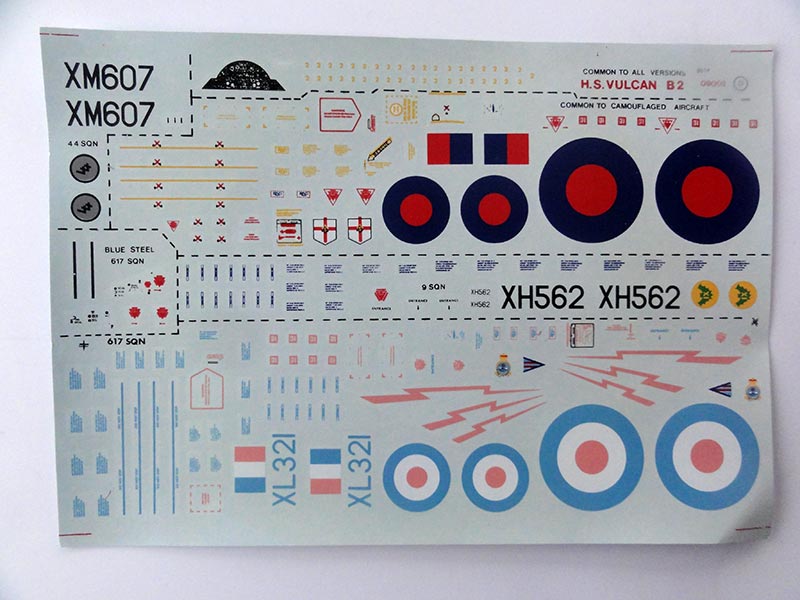
The indicated Humbrol enamel paint numbers are: "163" for dark green BSC 641, "164" for BSC 637 medium sea grey, and lower surfaces "64" for BSC 627 light aircraft grey; paint "79" is for the "Black Buck" mission Vulcan which had indeed BSC 638 dark sea grey lower surfaces.
The interiors of gear bays and doors are all indicated as being "64" which is light aircraft grey but I am not sure if this is correct for early overall "white anti flash" Vulcans like XL321. Off white or very light grey seems more appropriate. Some panels are indicated as "26" which is medium brown.
Some suggestions when building this rather big kit:
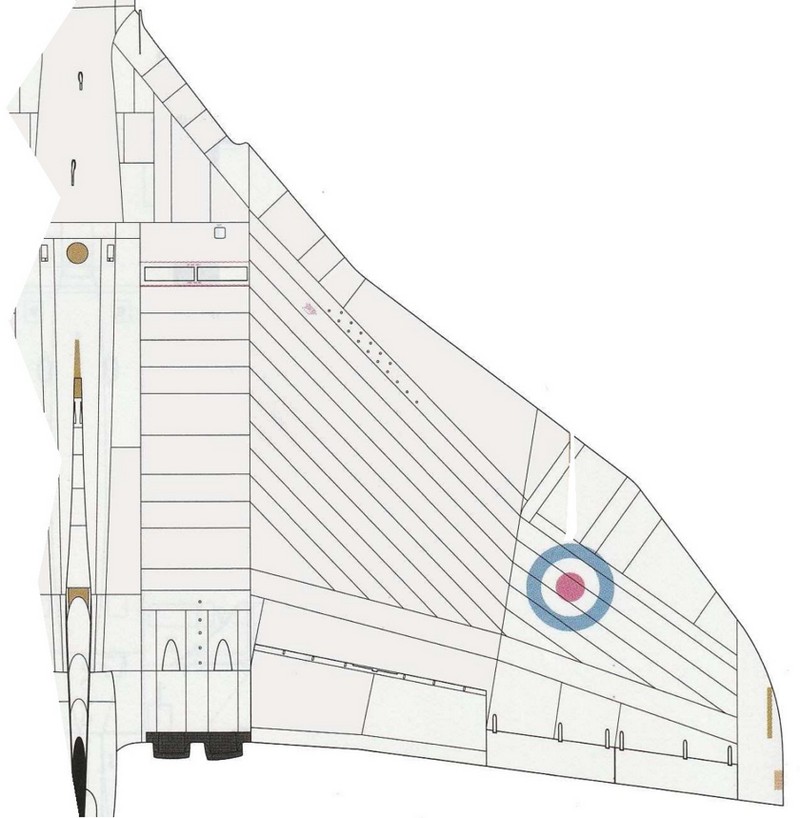
-a- the panel lines are fine but "all raised"; a better effect in scale is to re-scribe these using a flexible ruler and using the raised lines as guide; than sand all raised lines to get flat surfaces. Do this before starting assembly; I also enscribed extra panel lines at the inboard wing as shown on this drawing below....
(the kit has the raised stiffener anti-fatique plates in front and next to the bomb bay for the later Vulcan B.2; if you want an early B.2, these can be sanded off though it is a lot of work).
-b- the 2 small crew windows/ports aft of the cockpit are strangely forgotten by Airfix; these are shown closed only with raised lines but not open. They can easily be opened up and filled later on with clear plastic or Microscale Kristal Kleer;
-c- the kit cockpit and crew interior is simplified with only 2 pilots with supposedly Martin Baker mk.3 seats; a floor is provided but not any of the 3 rear crew stations. But this is no issue as hardly anything is visible through the small windows. It was kept as per kit.
-d- if the lower crew entry hatch is to be set open; it is recommended to add sort of boxed in interior; all is black inside though; the entry ladder #70 is a bit crude;
-e- the intakes and trunking need considerable amounts of putty and sanding to get a smooth result.
-f- the 3 small wind screen wipers are missing and can be made from stretched sprue.
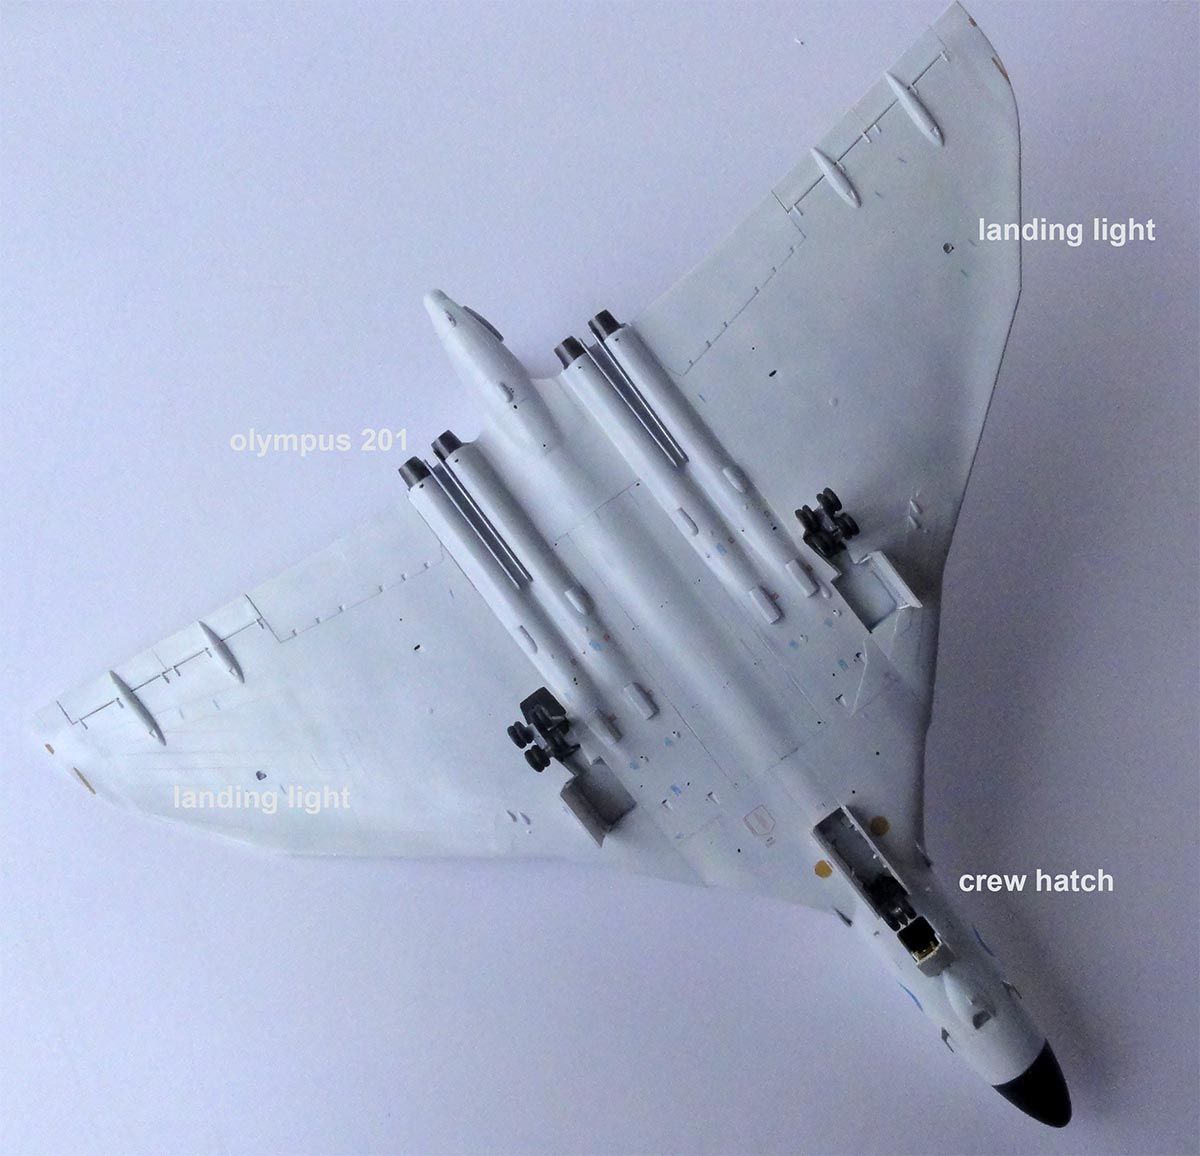
-g- on some Vulcan aircraft, the shapes of the smaller antennas may be a bit different; the closed moulded landing lights in the lower wing can be opened up if desired.
-h- aerial "counterpoise" plates shown in step 15 may vary per aircraft but mostly only one plate either #96 or #100 is installed.
-i- for the early Vulcan B.2A with Blue Steel the ECM fairings on the fin top should be carved off; the nose tank boom is not installed and "red steer" TFR knob should be removed and all sanded smooth; this is all indicated in a tiny drawing in the instructions in step 9 but thus depends on the particular Vulcan number and period;
-j- only on later Vulcans (to cope with fatique), the moulded raised structural strips on the lower wing surfaces are applicable; so for kit scheme XL321 sand these off and also sand off the "Decca doppler" antenna strips beneath the port side wing;
-k- the rather crude kit exhaust openings are for the later Olympus 301 engines; it is better to refine these and close up the jet openings inside; read also this....
-m- Note that first B.2 Vulcans had the Olympus 201 engines with different jet exhausts; a few B.2 aircraft also apparently had the "narrow intakes". So check the particular Vulcan number and time period desired if a conversion here is needed;
Strictly speaking for kit scheme white "XL321" the "wide intakes" are correct but the kit exhausts are I think incorrect as they do not represent the Olympus 201 engine type as fitted on this particular Vulcan;
Making a different "white Vulcan" with any of the aftermarket decal sheets can be considered as some Vulcan B.2A aircraft with Blue Steel got retrofitted from 1963 with the later 301 engines (such as XL384 to XL390); references suggest Blue Steel Vulcans XM574, XM575, XM576, XM594 and XM595 were fitted with Olympus 301 engines right from factory delivery;
-n- Airfix also provides decals for the "Black Buck" mission scheme with the 1982 Vulcan "XM607" that made bombing raids at Stanley airfield.
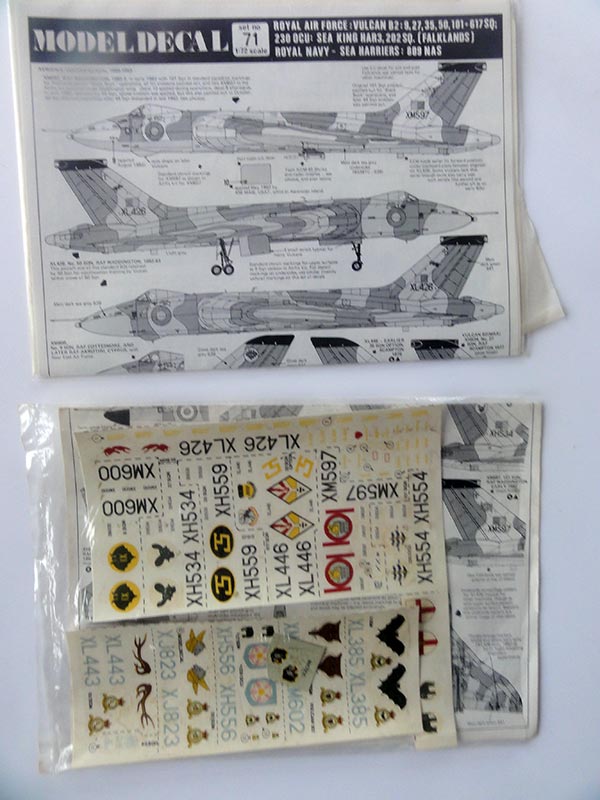
- Modeldecal sets #70, 71 that with markings for almost all Vulcan squadrons;
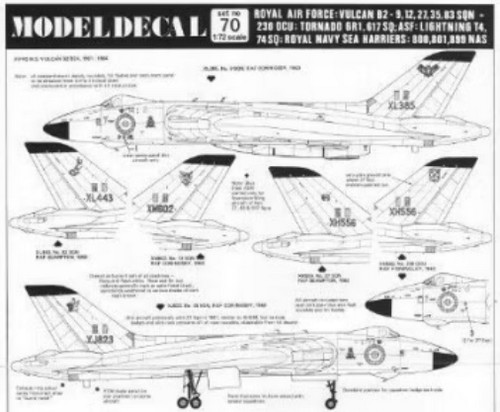
Note: Modeldecal set 70 has markings for no. 27 squadron at Scampton. "XH556" is for a Vulcan B.2 with Olympus 201 jets but this Vulcan had probably still the "narrow intakes".
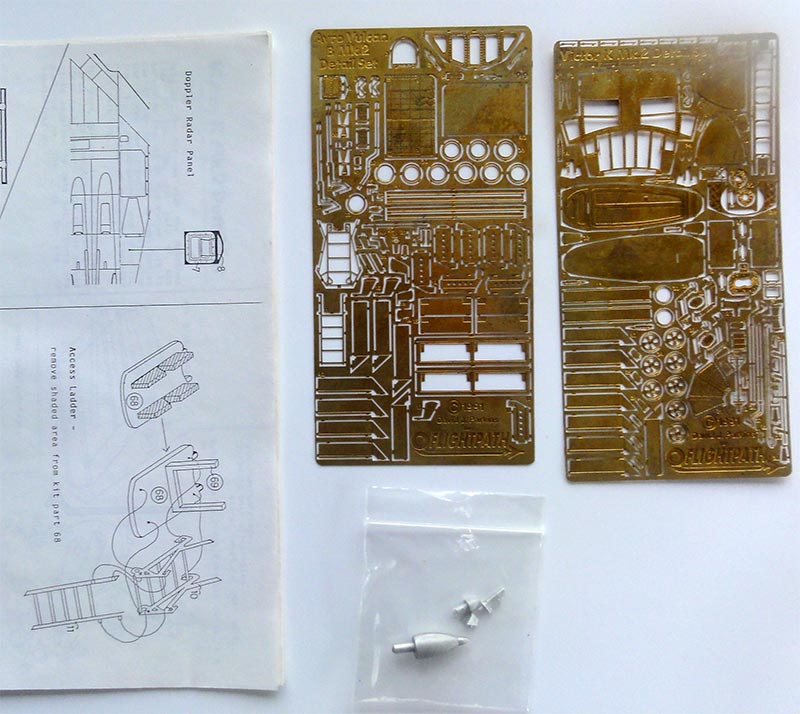
- Flightpath etched metal set #FP-72-050 of 1991;
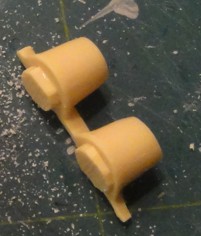
- I also had a resin pair of what seems to be small Olympus 201 jet pipes but could not see the "source" of these. (may be from "Final Touch" ?). These are probably for early Vulcan B.2 aircraft.
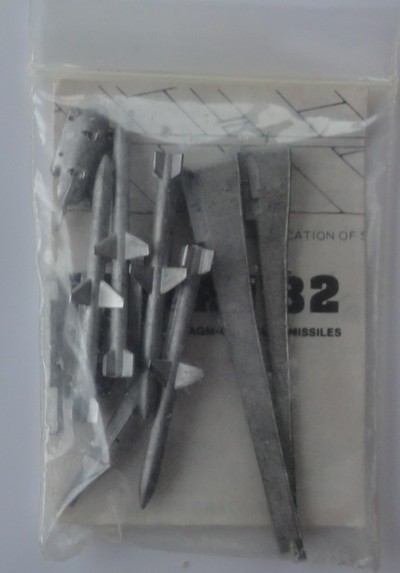
- "Harrier" soft casted metal set #HR05 for the Shrike missile armament of the "Black Buck" missions with their pylons and carriers; (no ALQ-101 ECM pod is in the set which was often installed during bombing raids).
- "Seamless intakes" sets have been released from e.g. Two Mikes resin and Wolfpack but I was unable to buy these. I recommend one of these if you can find a set.
I had 2 old Airfix Vulcan kits and it was decided to make these despite the newer Airfix Vulcan kit #A12011 released in 2021.
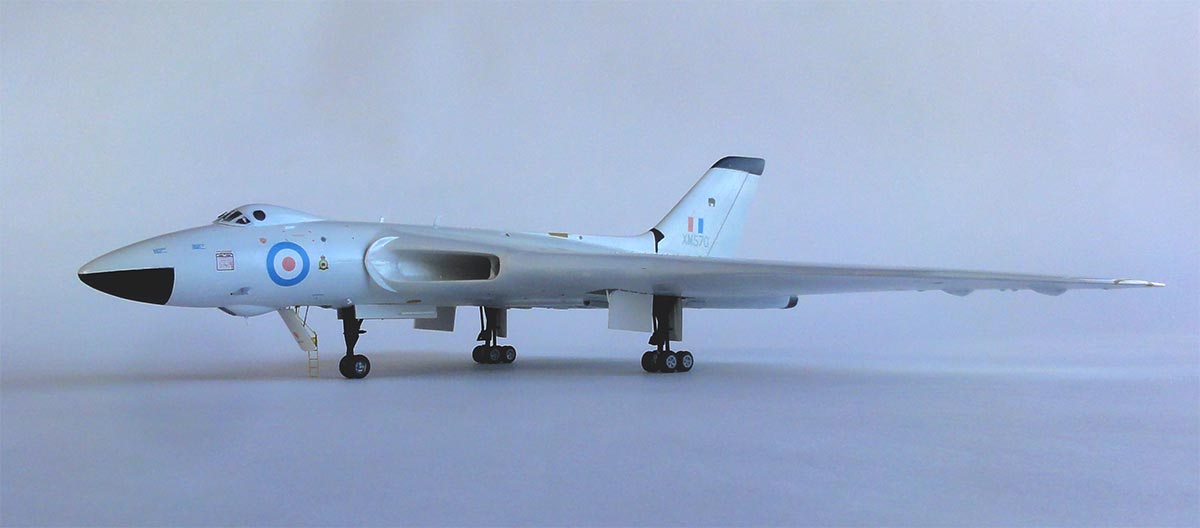
My first old Airfix Vulcan kit was to be made for the early overall white Vulcan B.2 "XM570" as it first appeared. It was flown by no.27 squadron (not fitted with Blue Steel) and it had the smaller early Olympus 201 engines. So the kit needs to be modified here: the after market resin set for probably the Olympus 201 engine jet exhausts will be installed.
Modeldecal set 70 has markings for no. 27 squadron at Scampton "XH556": but this is for a Vulcan B.2 with Olympus 201 jets but this Vulcan had probably still the "narrow intakes". So another number such as white "XM570" is more appropriate as being an early Vulcan B.2 of no.27 squadron as well, with still Olympus 201 engines and exhausts but with the later standard "wide intakes".
Note: my black and white photos of "XM570" on top of the article shows the same aircraft after it had gotten the Olympus 301 engines, upgrades and the camouflage scheme in the 1970s.
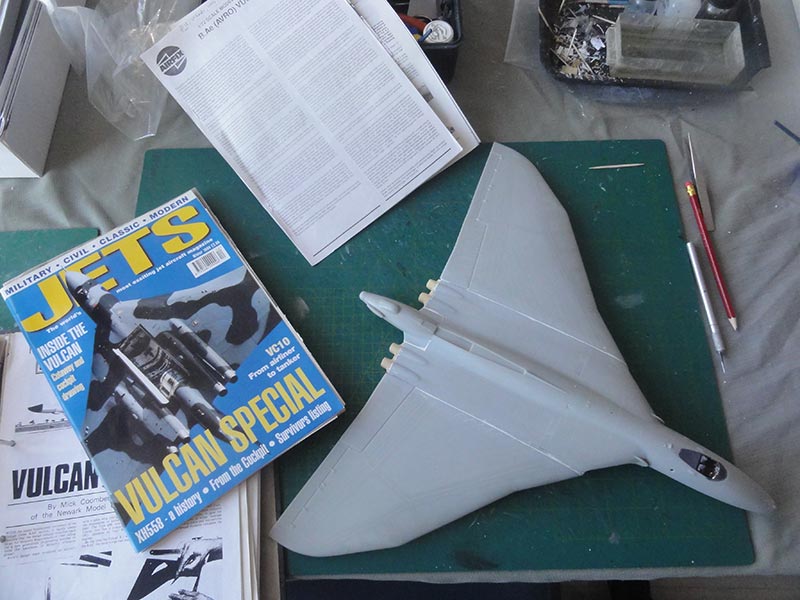
STARTING THE KIT
Prior to the old Airfix Vulcan kit assembly it was decided to remove the raised panel lines and to re-scribe all new panel lines. I used the kit raised lines as guide to inscribe with a flexible ruler using an Olfa scriber. It is better done at this stage. The 2 pairs of air brakes on the upper wing and the lower wing near the front of the bomb bay were also re-enscribed deeper. (Some modellers suggested these were incorrectly positioned/ engraved at the Airfix kit but looking at drawings and photos, they seem to be a the correct position).
Note: I did not bother to sand off and flatten the anti-fatique stiffener strips in front of and next to the bomb bay as these are at the lower model surfaces anyway. But strictly speaking, for early Vulcans these were not present.
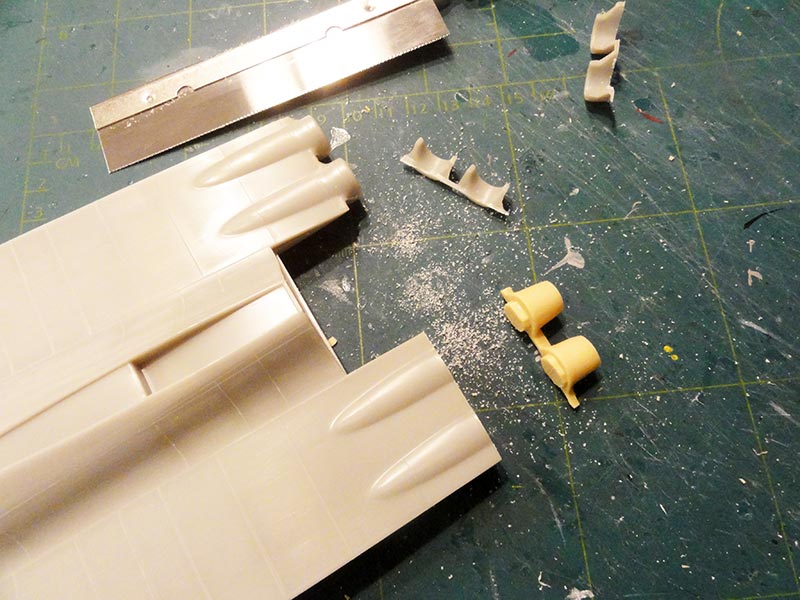
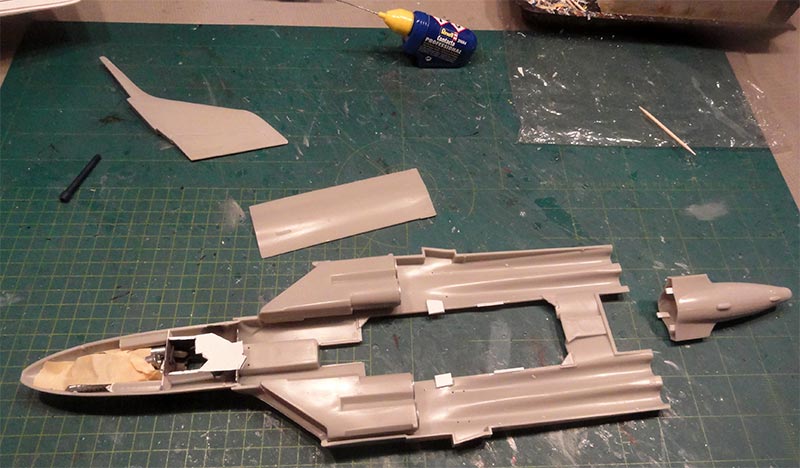
For the resin set for the old Olympus 201 jets, the rear kit wing exhaust areas were cut off with a razor saw at 90 degrees:
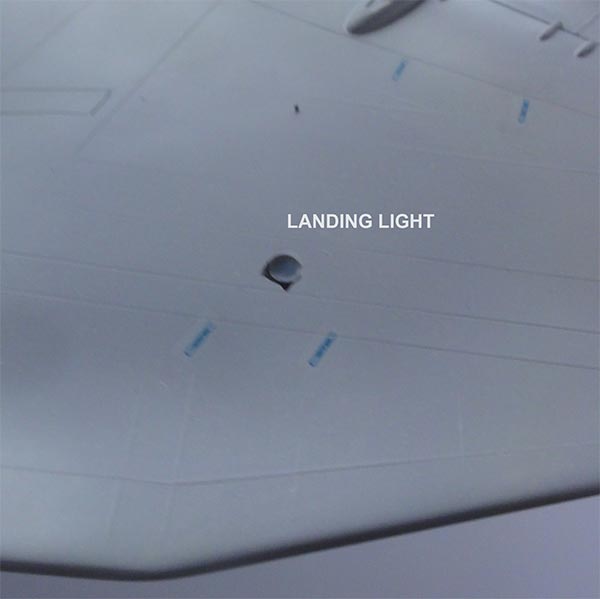
In each lower wing halve, a landing light opening was drilled open and will be filled later with Micro Kristal Kleer.
Note: do not drill open the indicated wing holes for the pylons! These are not indicated at the accurate station position!

Kit assembly STEPs 1-3:
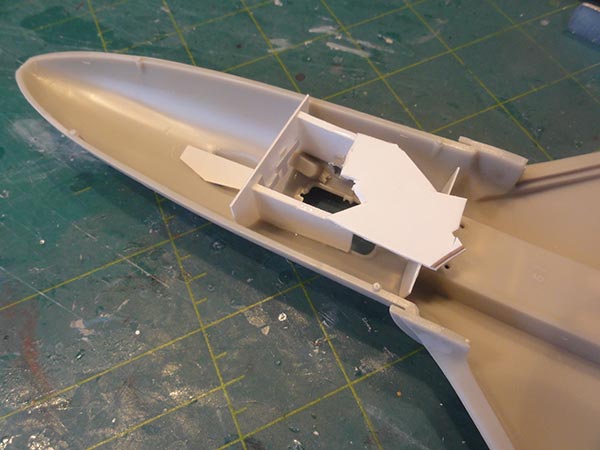
Some plastic card was used to suggest a bit interior as the crew entry hatch was to be set pen. The bomb window #18 area was also blanked off with card to avoid see through. Paint interiors black near the windows and hatch. Also, paint the cockpit glazing black on the inside where there are no windows.
The intakes and trunking was assembled as per Airfix kit in steps 2, 3. I did not have any after market resin intakes. So all was puttied and smoothened before installment inside the fuselage with sanding sticks. The large moulded intake boundary layer plates are rather thick but can be sanded a bit thinner as well.
STEP 4: add at least 35 grams of nose weight to avoid tail sitting before closing up the fuselage. That is a lot of weight but there is enough space here.
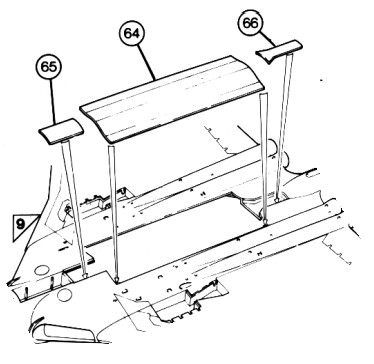
This model would get a closed bomb bay. I recommend to install at this stage, so before fuselage closure, the (closed) bomb panel #64 and smaller part #65. Alignment to avoid "steps"/ tiny ridges is much easier than and I also glued plastic strips inside to get stronger joints.
Clamps were used as set all to dry.
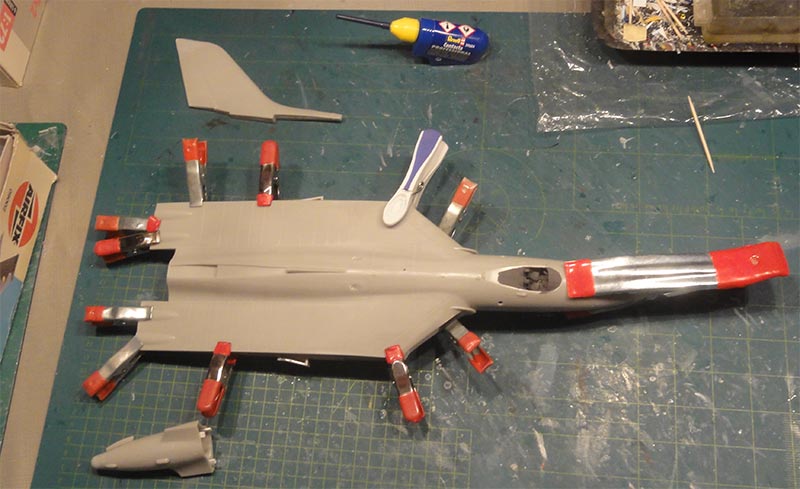
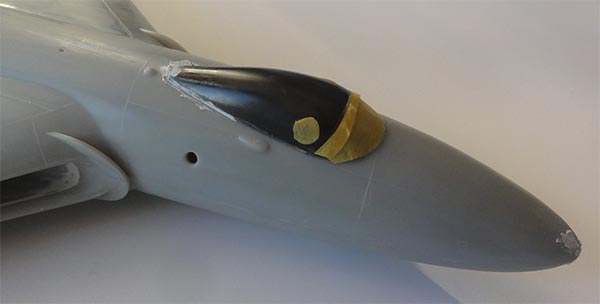
NOTE: for early Vulcan B.2 "XM570" no tank boom and no TFR knob was applicable, so the nose was sanded in a streamlined shape. Some putty was needed to fill up the boom recess.
STEP 5 required for the early B.2 the removal of the ECM fairing from the vertical fin -i-. The kit tail was to be fitted at a later stage to have better handling to allow sanding.
STEP 6: for the tail cone assembly use some internal plastic strip to get stronger joints as sanding is needed; do this before adding the vertical fin which fortunately fits quite good.
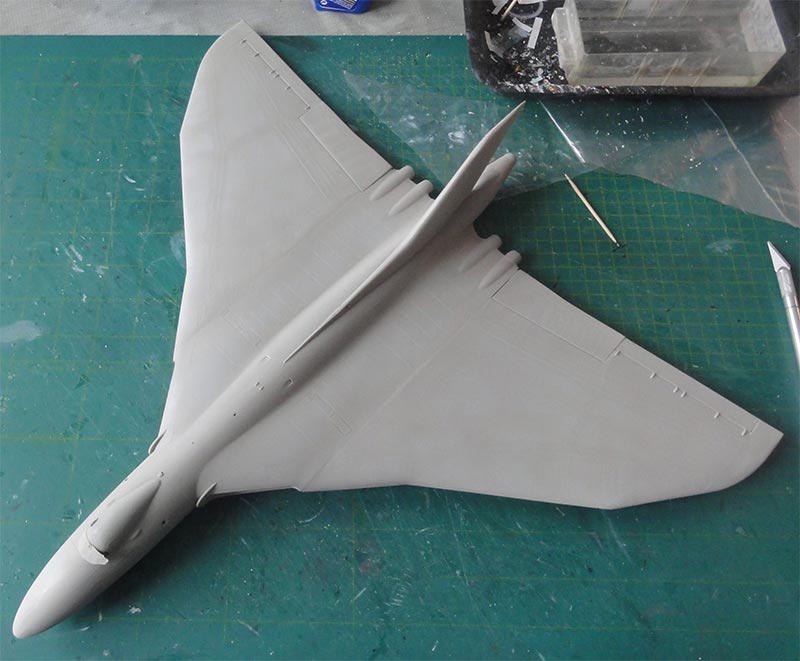
STEPs 7, 8: the wing has simply 4 large parts. Check if you want to refine the jet exhaust (see above) prior to wing assembly.
The wing shells can be dented in. So before closing up each wing halve, I set a few pieces of sprue and card inside each wing halve to get strength. Some putty is needed at the wing tips.
STEP 9: the wing- fuselage joints will leave a step/ ridge so remove a bit from the wing locating lugs. This will give a better joint though some putty was needed but fit was than not that bad.
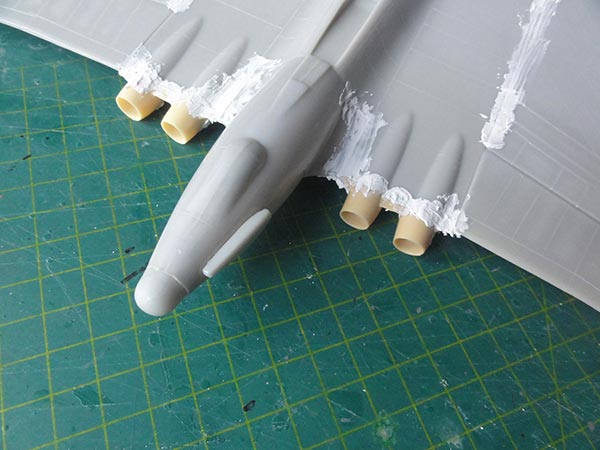
As noted, kit modification was required for "XM570" as this Vulcan initially had the old Olympus 201 jets and the "wide intakes"; so the resin jet exhaust set was set with super glue and putty was needed with sanding.
(STEP 13 was dealt with earlier).
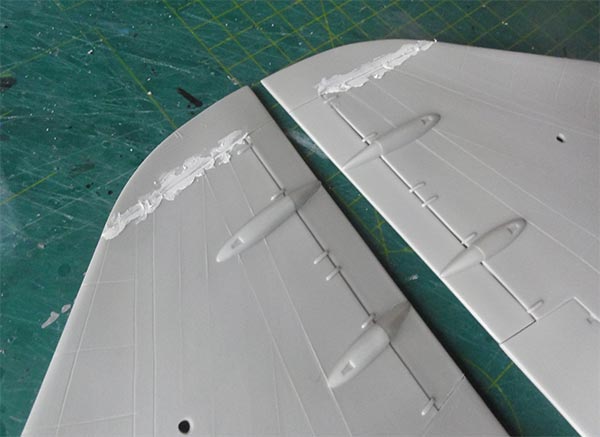
Now putty all gaps and after all dried sand the big assembly flush. See note above about the stiffener plates....
It was also needed to fill some large gaps in the intakes, and it is not an easy task to get flush results. Use sanding sticks here and take your time.
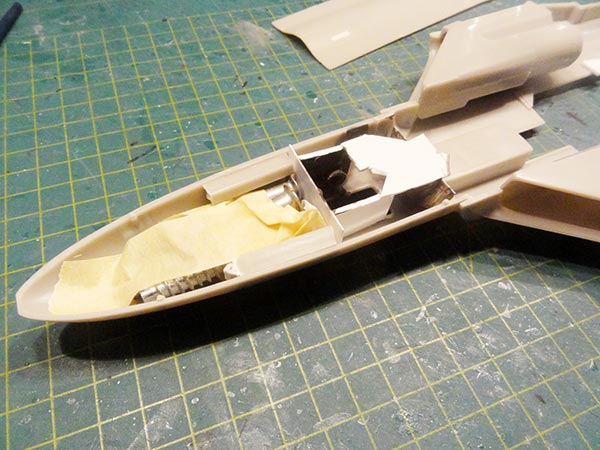
The large lower crew entry hatch will be set open, so add some tissue paper inside for the time being to avoid paint. Some details were added in the nose gear bay from scrap card.
The cockpit seats were set and some harnesses suggested with paint. Almost nothing will be seen later on, so limited effort done here.
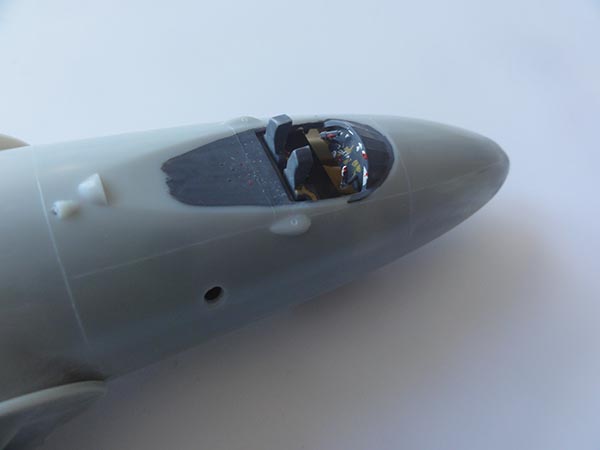
The large jettisonable cockpit fairing as seen in STEP 16 was installed. Some white glue and putty was needed to close the tiny gaps. Note that all had been painted black on the insides. The nose without TFR for this early Vulcan needed some putty as well. The tiny cockpit windows were masked for protection.
When sanding was all done, the in STEP 5 modified vertical tail was fitted and the tiny gaps puttied and sanded.
STEP 14: the smaller lower aux intakes and exhausts on the Vulcan are very thin edged, so try to sand the part edges #82 - 89 thin. Any small gaps can be filled with white glue.
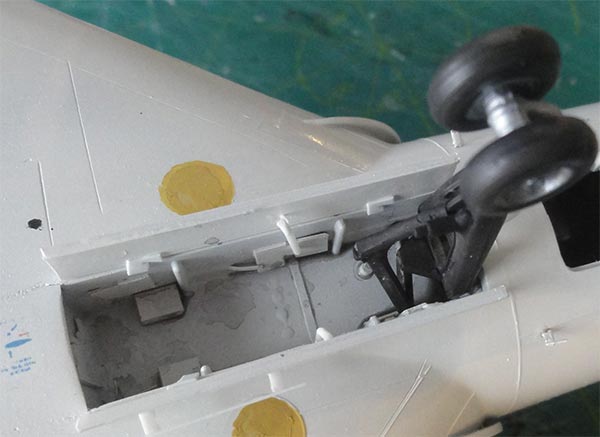
I was unsure about the appropriate landing gear bay colours, but assumed these to be "off white" with some details of hydraulics in metal. Leave landing gear/ undercarriage installment for later stages after painting to avoid breaking the landing gear.
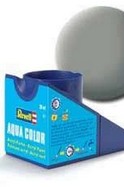
The overall sanded model got a base grey primer coat with the airbrush to check for any flaws. I used acrylic paint Revell Aqua 75 steingrau as primer. Alternatively as the model is large, it may be an idea to use a grey base primer rattle can to save time used outdoors.
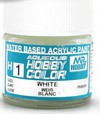
The smoothness was checked and putty and sanded again as needed. Any missing or inconsistent panel lines were again re-scribed. After all looked fine, the overall gloss white was airbrushed as for the early Vulcan B.2 "XM570". First a semi matt white paint was airbrushed with Revell Aqua 05 "weiss" to adhere coverage, followed by Gunze Sangyo H1 gloss white but any white paint will do. (or use white paint rattle cans to save time used outdoors).
The black areas on the nose and tail tip were masked and airbrushed matt black.
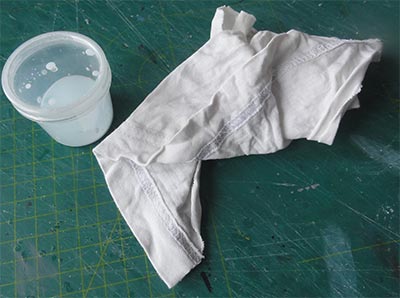
The model was polished with polishing paste (such as Tamiya polish or any other brand) and cleaned up under the water tap.
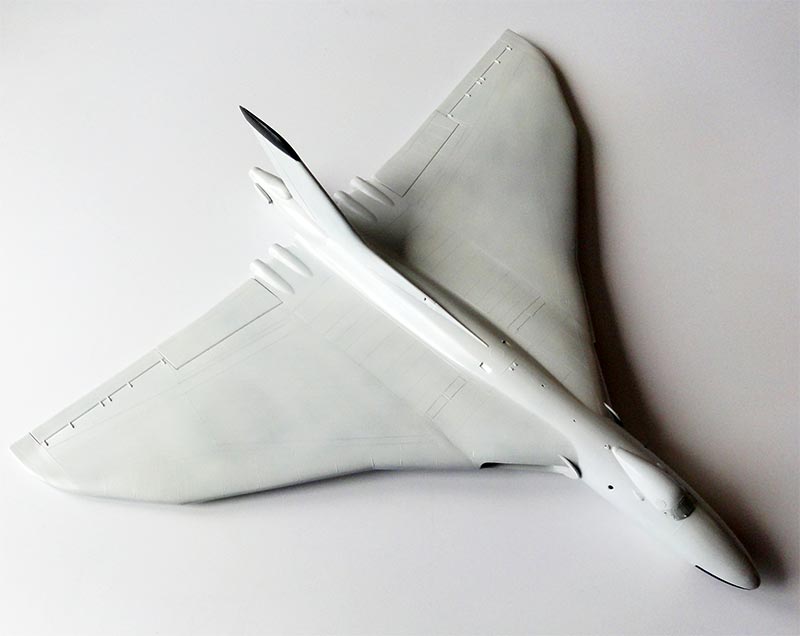
On the Vulcan various "mid brown coloured" panels are seen as well such as on the wing tips and various "circular" panels; these were painted with a brush in Revell Aqua 17 "braun". On the upper fuselage and tail base, various panels were also brush painted.
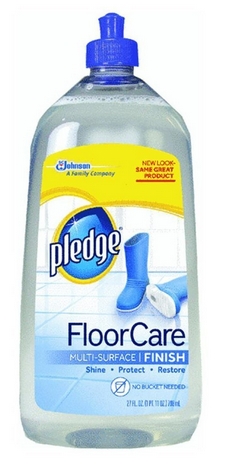
Than several layers of gloss varnish were airbrushed before any decalling was attempted. This will avoid any decal "silvering". I airbrushed Johnson Pledge/ Future acrylic varnish.
Decalling was done now for the early white Vulcan "XM570" of the Royal Air Force no.27 squadron with the Elephant badge as based at Scampton in 1962. The decals came from Modeldecal set 70 and the stencilling as per Airfix kit. The aircraft numbers were a combination of other numbers on the sheet and the "7" in "XM570" was made in 2 bits.
The decal instructions of the Airfix kit are rather unclear. Best to study photos of the various references as to avoid mistakes.
Note that the smaller stencils are different between white and camouflaged Vulcans, so use the drawing for the white Vulcan shown of 617 squadron (but not the Blue Steel). I added a few extra stencils such as the yellow "no step ? " from the spare decals box in the center of each wing halve.

The white finished Vulcans had the low visibility pale "Type D" roundels and the lower wing has no roundels.


After decalling was done, the remaining parts like the landing gears were installed. The dominant gear struts colour is black with metal wheel hubs.
Start with the nose gear.....
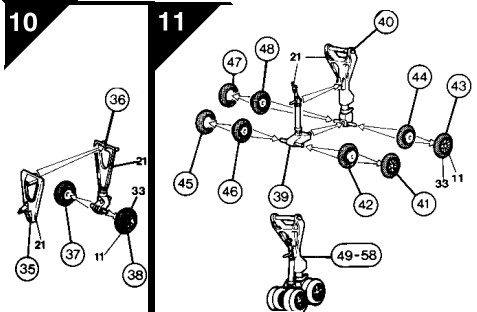
The best way to have all 16 main gear model "wheels" touching the ground is:
- first assemble each gear as indicated in STEP 10 and STEP 11; make sure the wheels are glued parallel and vertical.
- find a flat surface to set the model on;
- fix the nose gear with glue;
- for fixing the main gears: use a tiny drop of super glue and normal glue on each gear top and set in position in each wheel bay, the super glue will hold the gear... than turn the model and set it on the flat surface; quickly align all gears to have all wheels to touch the surface.
I had some trouble to install the gear support struts #75 and #78 at a correct angle. It was decided to cut off the anti-torque scissors, install the struts and re-position the bits. The kit gear door parts seem thick but the real Vulcan has quite thick doors. I added a pair of retraction rods on each door and a few hydraulic lines were set as well.
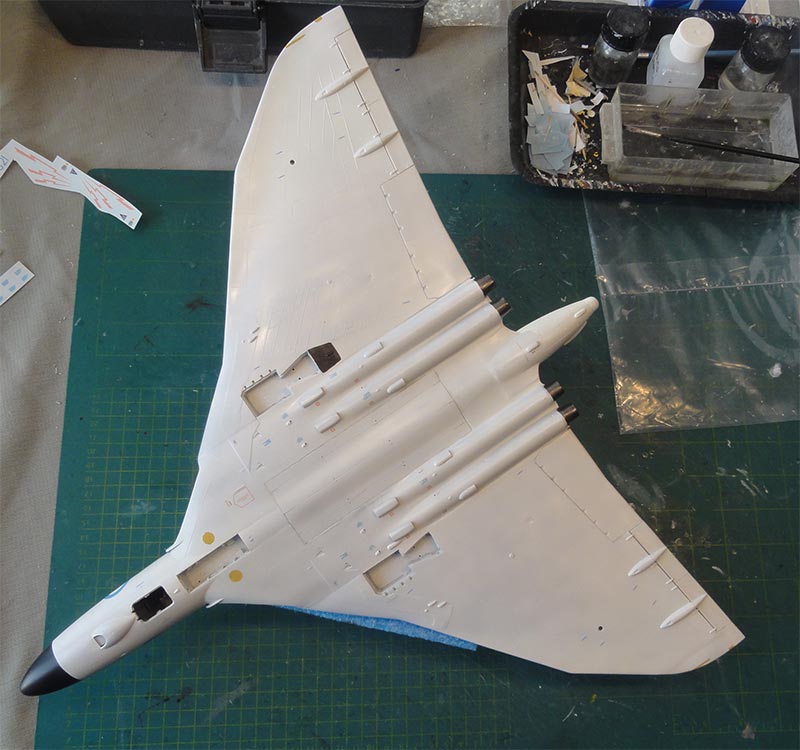
STEP 15 deals with the lower aerial "counterpoise" panels between the jet pipe fairings and installment depends on the particular Vulcan desired. Try to find photos of the desired Vulcan. Combinations of one or both aerial panels #96, 100 were used as well as varying smaller antennas #97, 98.
For Blue Steel capable Vulcans, an aerial panel was fitted on the port side. For this early "XM570" model it was decided not to set the panels #96 and #100.
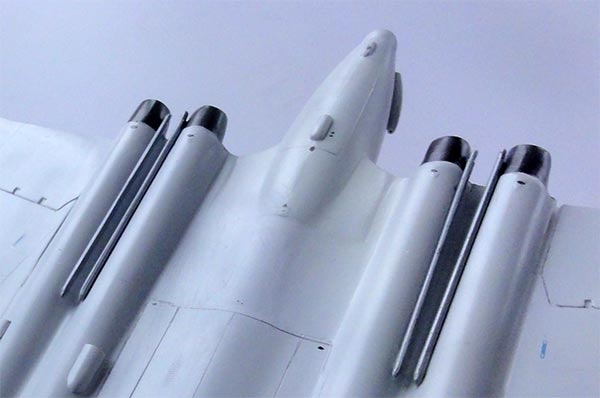
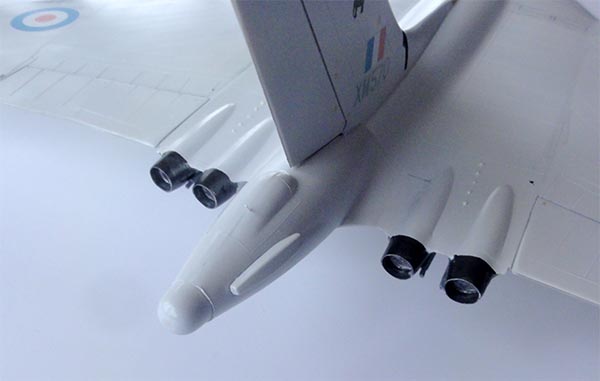
The long tubes #91 - 94 were installed on to the jet pipes fairings after these had been painted in metal.
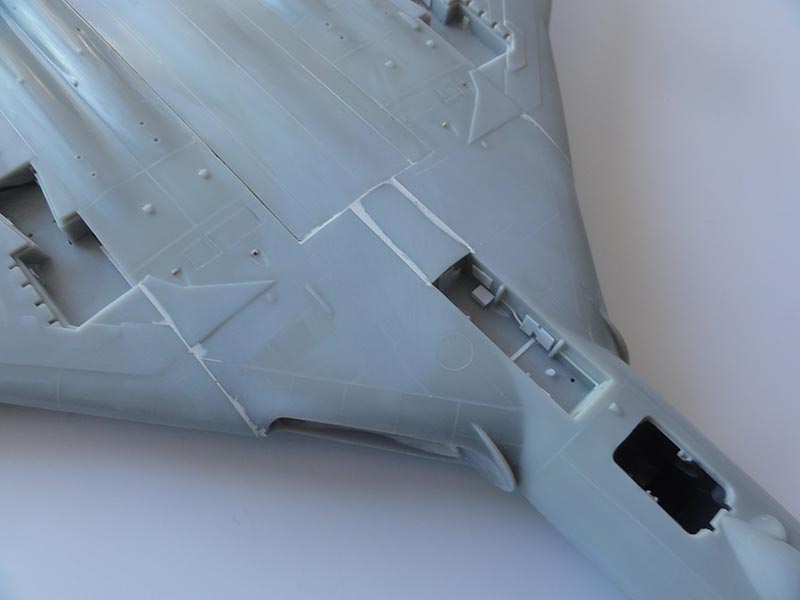
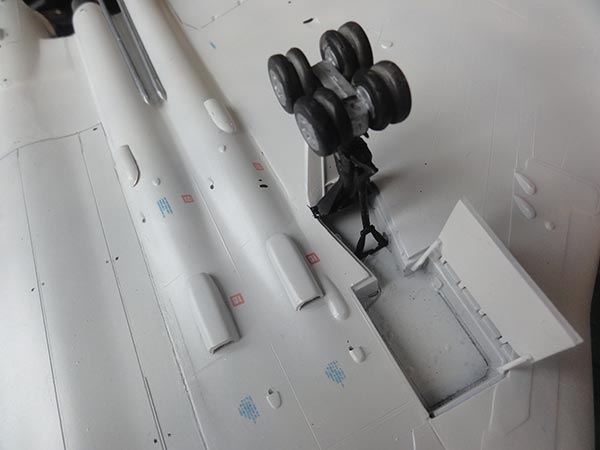
On the photo below outside of each main gear bay, 2 small blisters are seen for the Skybolt mounting with a small blister situated more aft. Blisters were removable covers and removed when pylons were installed.
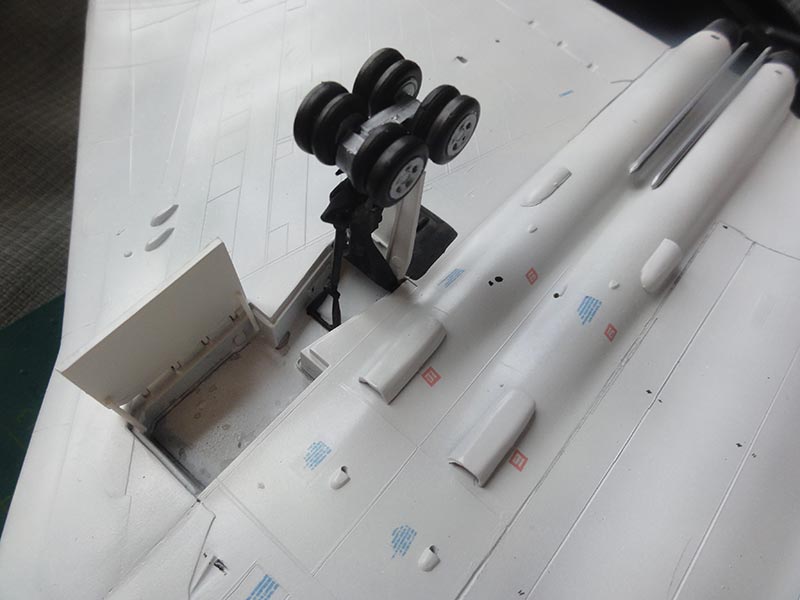
The previously drilled open landing lights on the lower wing got white glue glass panels and a black edge painted.
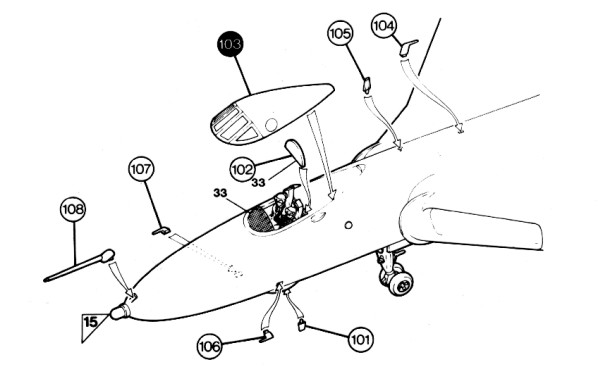
In STEP 16 the various antennas are to be installed. For the white Vulcan "XM570" the tank boom #108 was as indicated earlier not applicable.
I refined the pitot tubes #106, 107 and made thinner antennas for #101, 104 and 105 from card. NOTE: for the early white "XM570" a differently shaped antenna #104 was made as was the antenna #101 below the doppler radar nose. Most antennas are painted in white.
I added a few tiny pressure tubes as well from scrap between nose gear bay and each large intake. On the lower ECM fairing tail fairing, a small bit was also installed (this is not a "bumper" it seems).
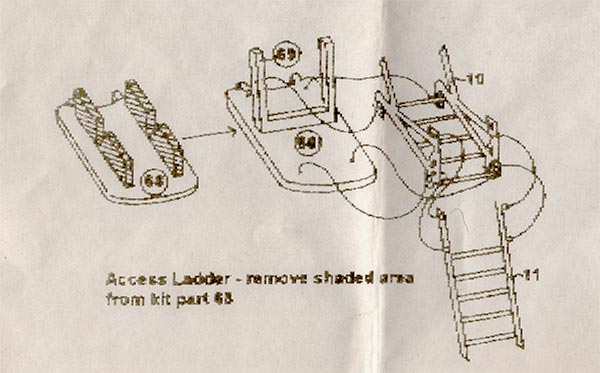
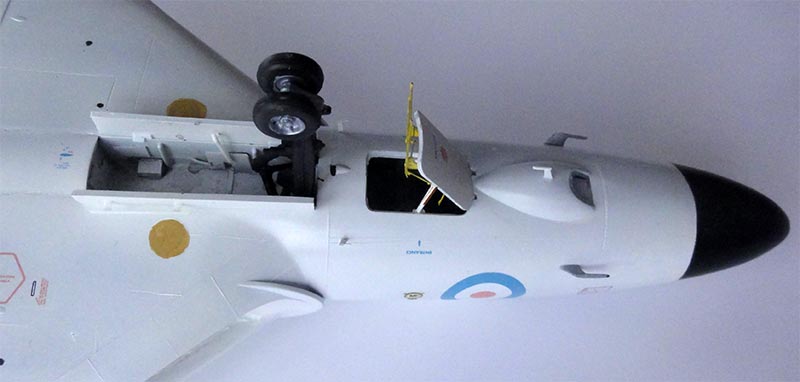
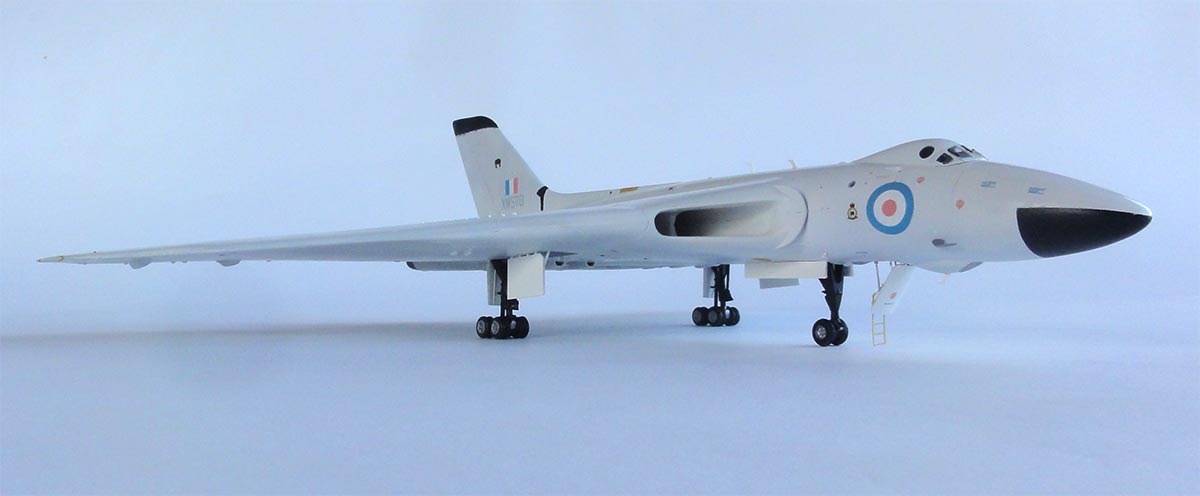
On this model, the crew door was set open and not the kit ladder but the Flightpath fine etched metal crew entry ladder installed. The inside of the hatch kit part was sanded flat and ladder set with super glue. It was painted yellow.
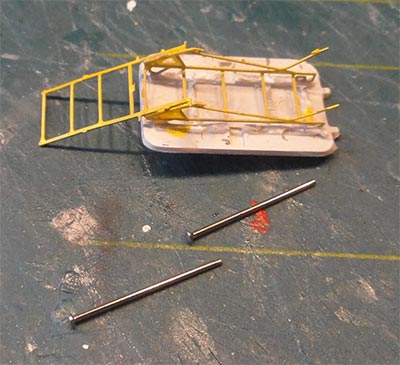
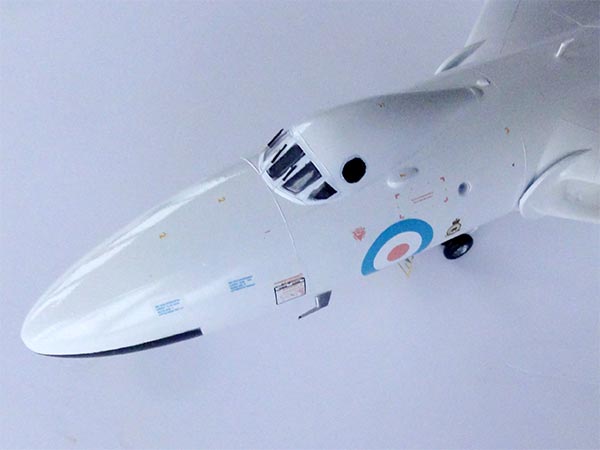
The actuator jacks were made from metal needles and a section painted in white. The smaller antennas and probes are seen here as well as the forward lower window fairing with window for probably the F95 strike camera. Note the differently shaped antenna on this one made from scrap. The small blister between the nose bay and crew hatch is for the periscope.
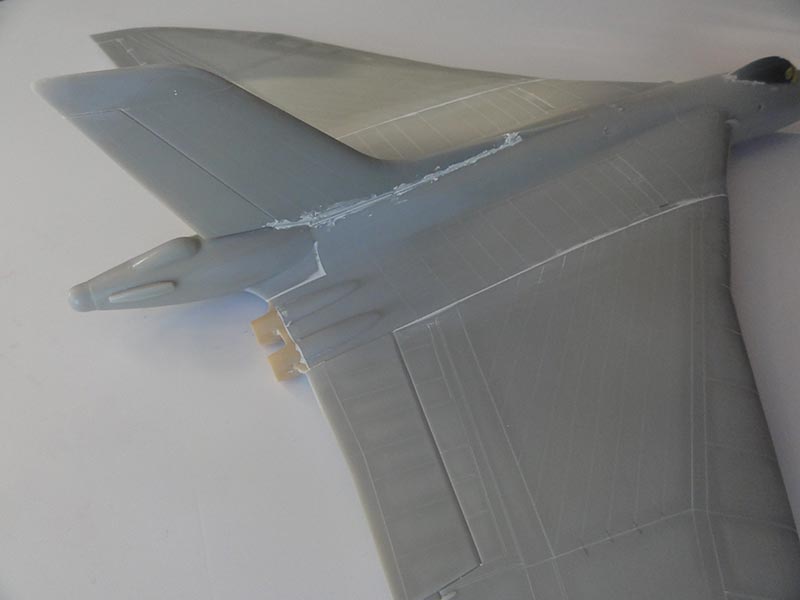
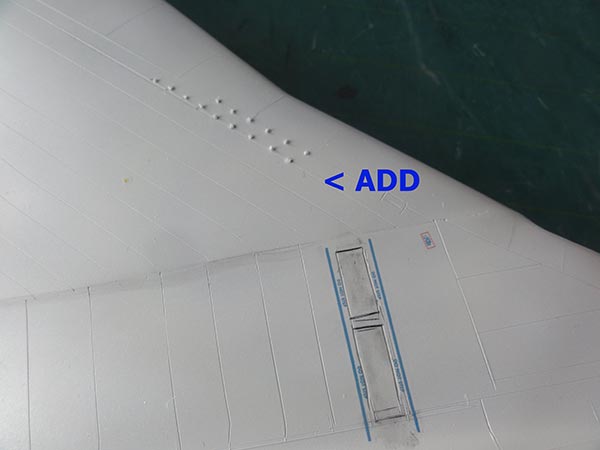
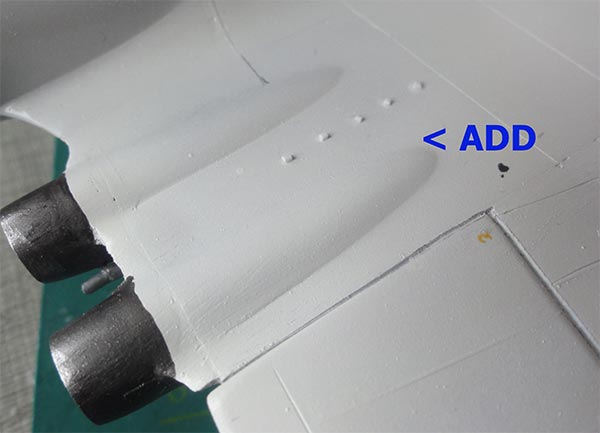
At the front areas of the upper B.2 wing some later service Vulcans had two rows of 6 + 10 tiny of what seem to be re-enforcement/ inspection lugs at in 1/72 5 mm separation distance on each mid span upper wing side. Also 5 were set between both tail pipes (see reference on Britmodeller);
These lugs are tiny and not moulded in the old kit. They were made from thin plastic strip and situated using the new Airfix Vulcan kit drawing: these are the tiny dots drawn....
Between the engine fairing, on the rear upper wing 5 vortex generators were added as well. All were painted white with a tooth pick.
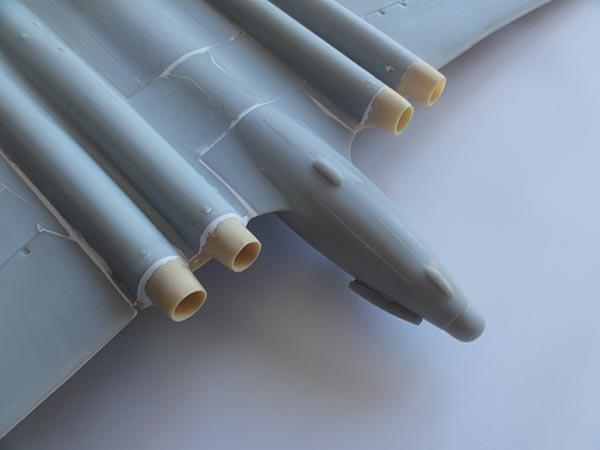
A view on the presumably Olympus 201 jet exhausts and the rear tail ECM fairing with heat exchanger.
On the Vulcan front cockpit screen 3 rain screen wipers are seen, these are provided in the Flightpath set but can also be made be scrap.
The model recessed control surfaces got a bit wash, some panels with a pencil drawn lines to suggest a few more.
Finally overall the model got a gloss clear varnish coat airbrushed.
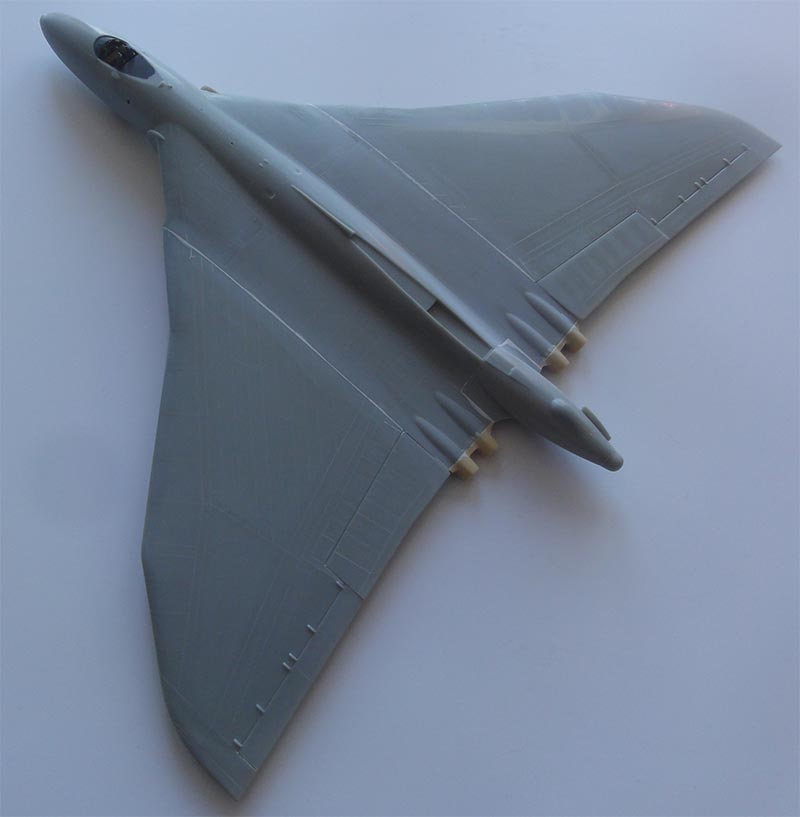
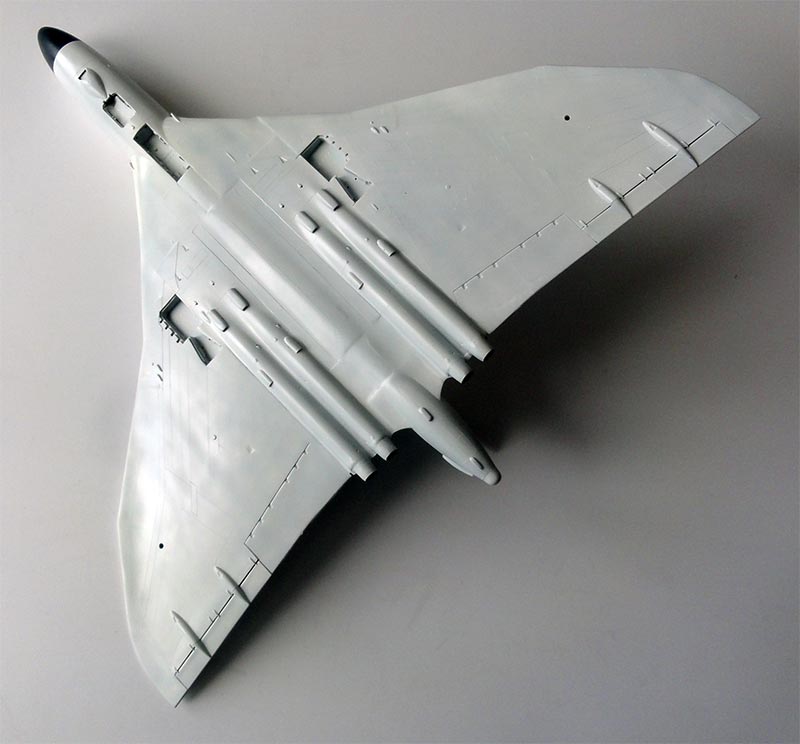
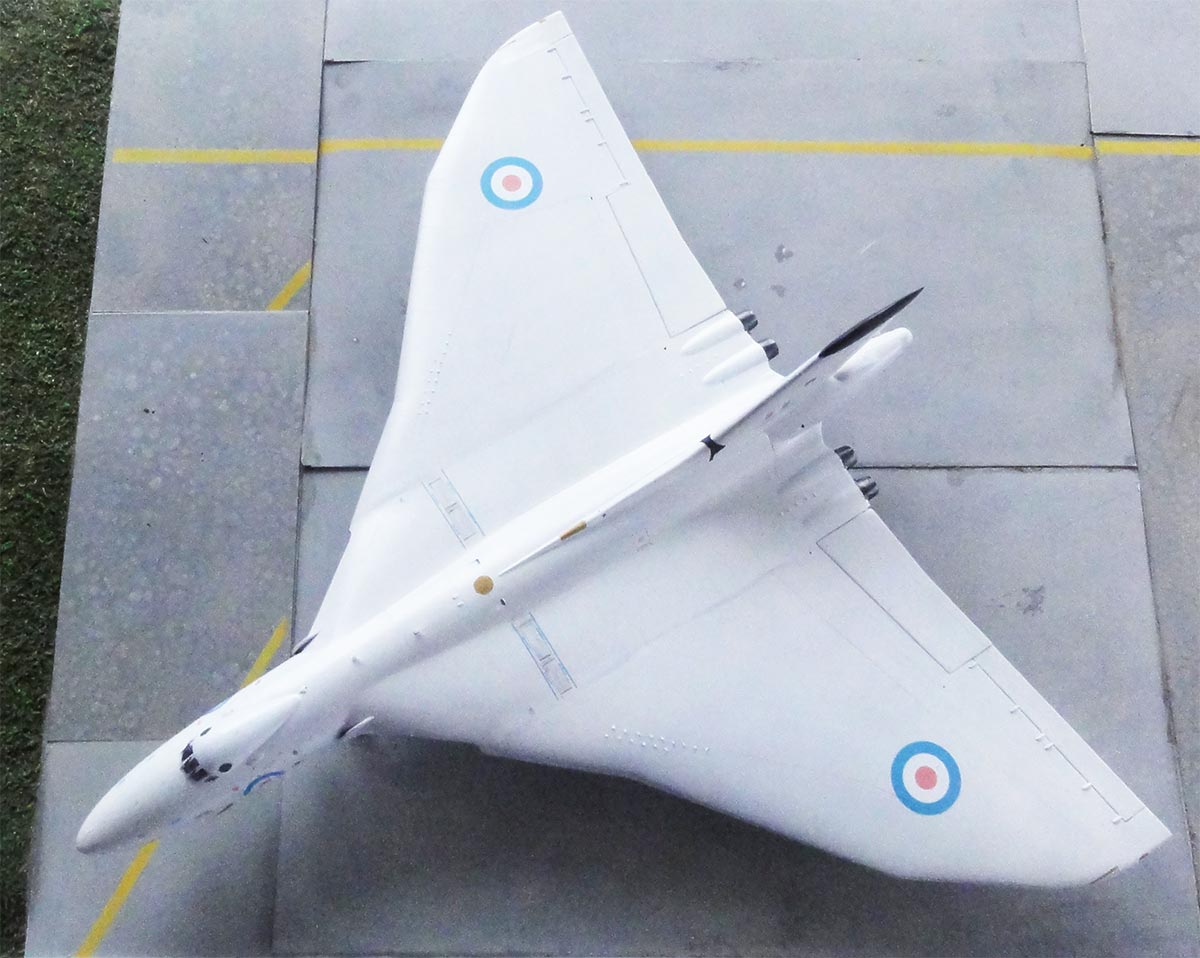
A view of the lower model surfaces:
... and upper view... Note the painted upper fibreglass fairing at the tail base for the Collins ADF.

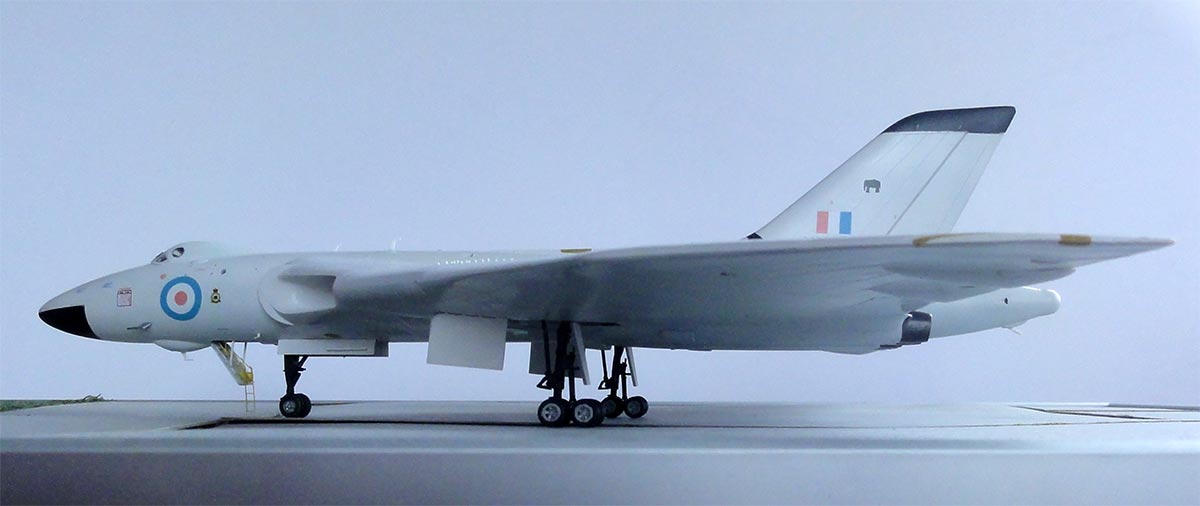
A nice early white Vulcan B.2 is in the collection along with my previously made V-bombers.
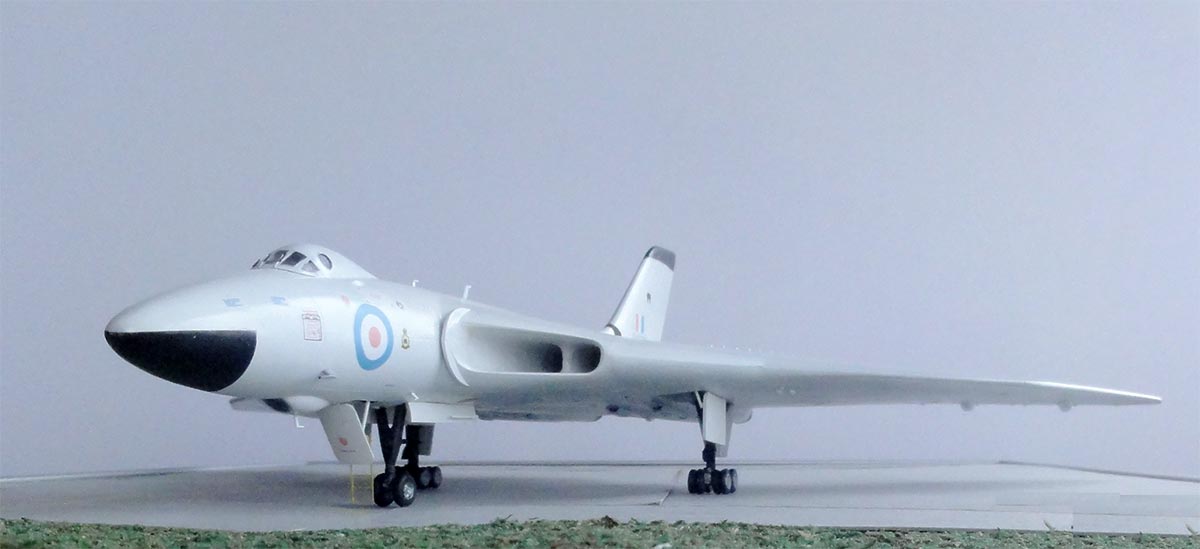
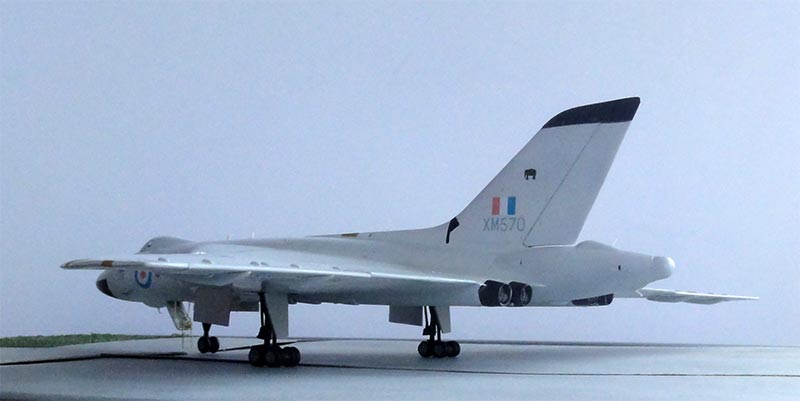
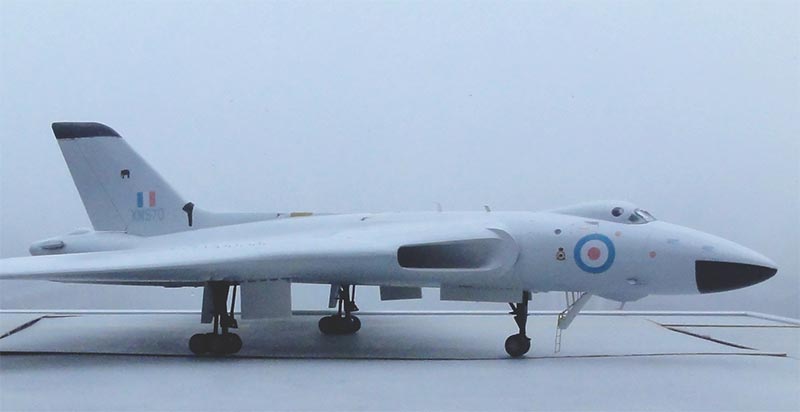 early Vulcan B.2, XM570 of Royal Air Force no.27 squadron as based
at Scampton in 1962.
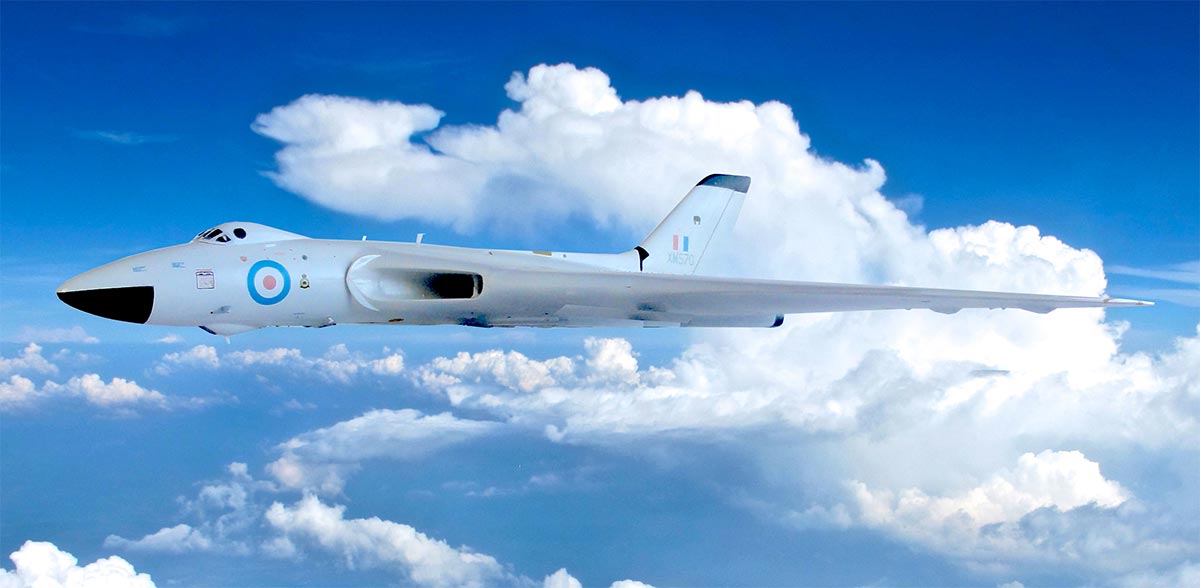
early Vulcan B.2, XM570 of Royal Air Force no.27 squadron as based
at Scampton in 1962. 
en route....
On to next [ Page 2 with Black Buck Vulcan... ]
References:
history:
- Vulcan, Profile number 162.
- Avro Vulcan, Warpaint no. 30, Kev Darling, Alan Hall-Park books
- V-bombers, warbirds, Ian Allan publications
- Vulcan, Osprey classic
- Vulcan, Aeroguide 6
- Avro Vulcan, Warbird tech volume 26, Specialty Press, 1999
- Air international, magazine, Vol.66 page 30, Vol.72 june
- Wings of Fame, volume 3
... and many others!
--------------
modelling:
- IPMS UK magazine, 1984/1 includes Vulcan special
- Scale Models international, magazine, incl. scale plans by J.F.Henderson, December 1984
- Scale Aircraft Modelling, magazine, various incl. April 1984
- Modell magazine, Vulcan K.2, 19984/9
- article about old Airfix Vulcan kit, written by Derrick Winters on old internet forum rec.models.scale
- Britmodeller discussion on Vulcan B2 lugs [PDF]
---------------
internet:
https://avrovulcan.com/
my postings and answers about XM597 on Britmodeller forum...
Back to 1/72 Models
(c) Copyright Meindert "designer"/ All rights reserved. Your comments are welcomed by webmaster
Created June 2, 2022