Static 3D-model building for Aleph One
05-05-2002 | update 28-12-03
|
Intro |
Meshwork (Classic) |
shareware 3D modelling application, when unregistred anything under 200 vertexes is save-able, excellent for low-poly building |
Amorphium 1.0 |
registerware 3D-application from a
MacAddict-cd, also on a computerArts cd (Issue CD60 August 2001). I use it in a clumsy way to convert meshwork's dxf into an wavefront obj-file. Anyone knows a better, easier way to convert dxf into wavefront-obj? I might infringe severly Amorphiums copyrights, but for the life of me, I can't find Amorphium 1.0 (the MacAddict CD-version) on the net, so... here is the link(2.1mb) to a stripped-down version... IF this is illegal, please say so immidiatly: |
UVMapper Mac 0.2.9 |
freeware texture-mapping tool, undispensible |
Pfhormz |
Loren Petrich's 3d-model pre-viewer, Pfhormz at a whooping 81K. |
Map Exporter |
Loren Petrich's mapexporter (not nescessarily, but you could turn a whole level into one model for scenery-effects, think holograms on a briefing table, or... use Forge as your own limited low-budget 3D-modelbuilder :) ) |
PhotoShop |
(or any other application which can convert a bitmap into rgb images and edit them) |

|
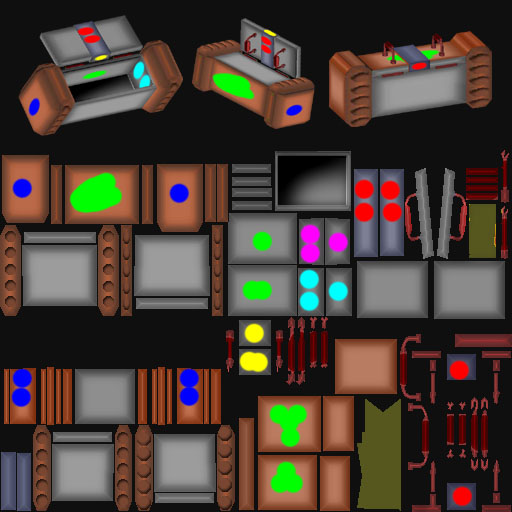
Build something simple and smallish. note: Take care with the UNDO-function, sometimes Meshworks undoes much more than you intended and scrambles the model too. Save (often) and nuttin gets hurt. 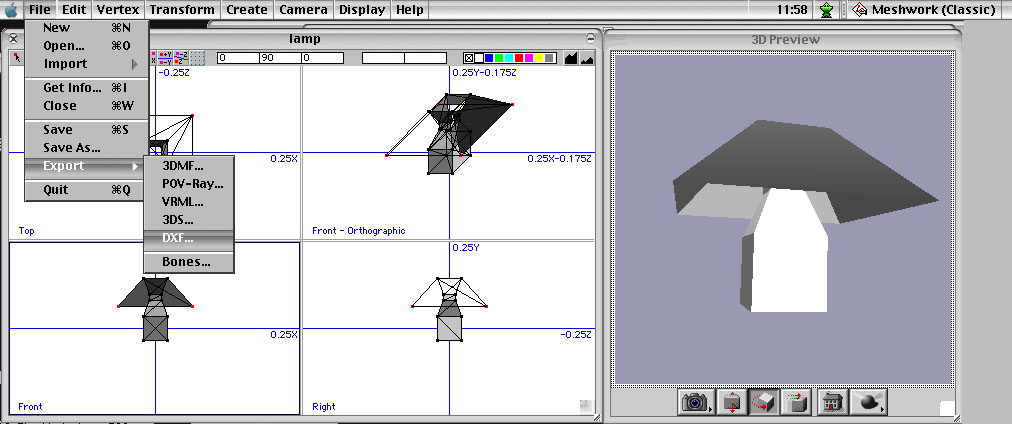 Save Export as dxf tip: Meshworks doesn't group parts, but adding bones to a bunch of vertexes, allows to COMMAND CLICK ON BONE to select the group assigned to it. (you wouldn't believe how long I looked for that tip...) Jeff Quan's tutorial on 'pinned textures' |
|
Delete the default sphere. Import your dxf (Command-i) Export your dxf (Command-e) as a wavefront-file 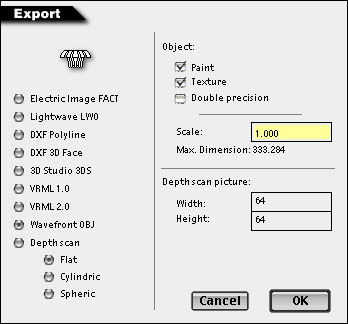 Quit Amorphium (Command-q) Sad huh? Can't find any use for Amorphium at all besides it's ability to import dxf and export it as a wavefront obj file. For oversight I rename the exported file with the fake extension objA. |
|
Usually I have in my UVMapper-preferences the worksheet set on 512x512 pixels, any size goes as long as the sizes are a force of 2. (1024-512-256-64-32-16, sounds familiar? :) The output will be a 512x512 sized bitmap, at 72 dpi, perfect for some Photoshop-maddness. If you think about masks, glowmaps, glowmask etc, it makes some sense to think for a moment how big your textures are going to be. Happily building with all these yummies means making lots of stuff to load in OpenGl... Open the objA-file Choose for this example the box-mapping frome the menubar:"Map". 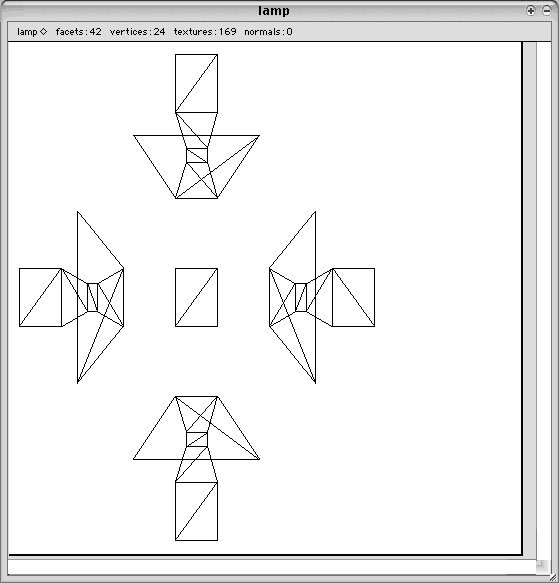 Drag and change the lay-out of the model. (yeah yeah, read the read-me, will you?) If possible you want to re-adjust the overlapping vertexes into clean divided one's 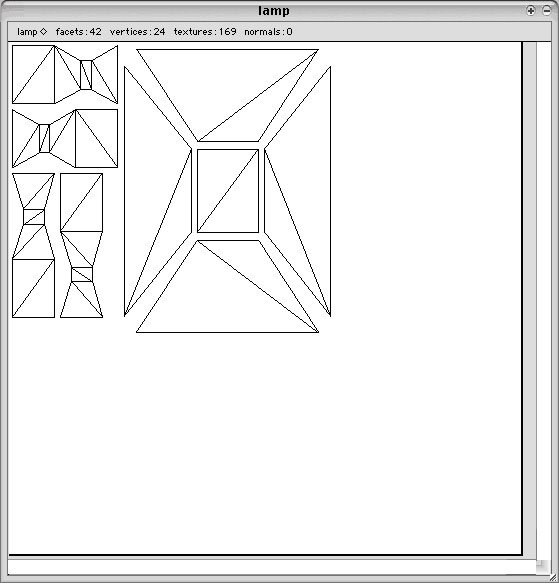 Export the Texture map AND the model. 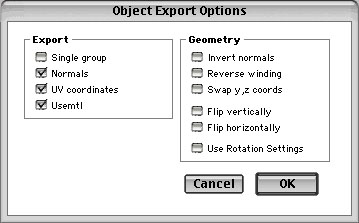 You may notice that there is a lot of empty space left, with some thought you can make another model which can be mapped in this current empty space, the benefit is that you can have one texture-image for different models. Or don't and use the space maximal :) |
|
Also, this a fine moment and a good way to check and be sure if a model is okay before messing around with MML-Scripting. (He sez wisely after spending three hours looking for a model at scale-size 0.001) |
 Open
the model, (Load model, Alias-Wavefront)
Open
the model, (Load model, Alias-Wavefront)|
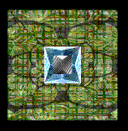
Open the texture-map 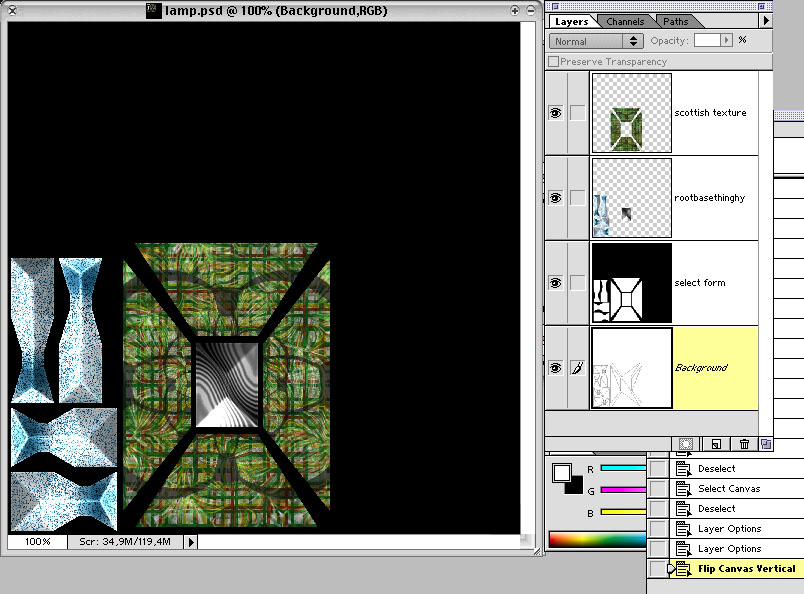 Convert into grayscale, convert into rgb FLIP THE TEXTURE VERTICAL. Color to yer heart's delight. Export as pct/jpg/whatnot, anything AO can handle. I usually have a layered psd around, with the original texturemap as background, a black-white layer for easy selecting, and endless artyparty layers with textures of the rest. With the texturemap one can work quite exact. Keep in mind what's up and down, add some custom shadows etc etc. Also, this is a good place to start thinking about transparancy (black is 100% transparent, white is 100% opaque) and glowmapping. (Which means for a decent transp/glow etc, you should have thought of it while modelling :), have fun! Flipped the texture vertical? Do it first at opening or last before saving, otherwise... no nice mapping. Seems the texture is added to the model from the inside-out, hence the mirrorring, or so... Small tip, usually the texturemap gets complicated fast and makes no sense what vertex is what plane. Use a layer in photoshop to colorcode some planes, load model and texture into Pfhormz, and suddely it's much more clear whats up and down. This example combines 2 textures (box open and closed), with room for another modeltexture. 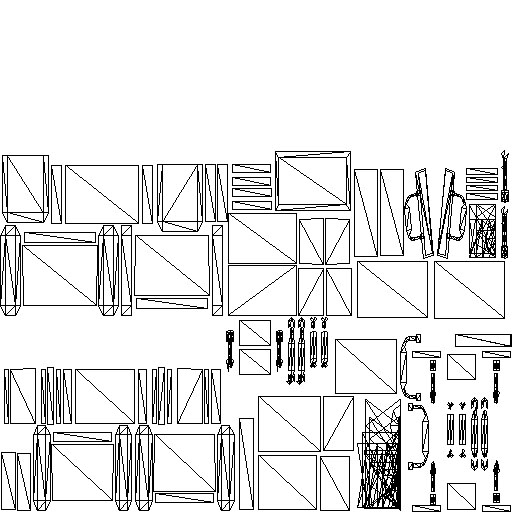
|
|
Example ready for copy and paste:
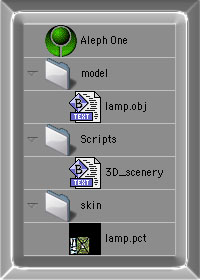
Copy the above script, save as something (3D_waterscenery_wfd) into the folder:
Scripts. clut="-1" This is good for scenery, because it just adds a texturemap to any replacement whatever clut is has. For different flavours (green pfhor, red, blue, pink), each CLUT has to have a replacement line.
<skin
		 clut="0" <!-- first CLUT -->
         opac_type="0"
         opac_scale="1"
         opac_shift="0"
         normal_image="art/ani3D/wfd/L33T.jpg"
         normal_mask=""
         glow_image=""
         glow_mask="" />
<skin
		 clut="1" <!-- second CLUT -->
         opac_type="0"
         opac_scale="1"
         opac_shift="0"
         normal_image="art/ani3D/wfd/L33T_scarred.jpg"
         normal_mask="art/ani3D/wfd/L33Tmask.jpg"
         glow_image="art/ani3D/wfd/L33Tglow.jpg"
         glow_mask="art/ani3D/wfd/L33Tglowmask.jpg" />
With some thought, awesome scenario-results can be made, replacing a different clut with a whole different texturemap...Enemy-flavour one, the enemy is fresh out of school (physics, make wussies) Enemy-flavour two, the enemy is battlehardened and has the scars, dents, prostatics and false teeth to prove it (physics, max out enemy) Enemy-flavour three, the powersuits of the enemy have been out of juice, and don't glow anymore in the dark.. or uberL33T-mysterious ninja-raised wraiths of another dimension, undsoweiter, undsoweiter. Note the unused but ready for use lines of normal_mask/glow_image and glow_mask, go bonkers, and use those too! MML can be adjusted later with the correct new textures, and this way its more handy to have the lines ready to be filled in, for now it doesn't make a difference. Note2: if you make a replacement for whole and destroyed scenery with the same model, (shoot evil green light, bulb splatters) make sure to have the same number of replacementtextures, meaning: if whole-scenery has all 4 maps, then broken-scenery too (could be different maps, but same number nonetheless)! Or crash. Launch ye Marathon If an errormessage pops up/A-1 crashes or such, slowly retrace what went wrong, enough RAM?, weird scripting? Bizarre bugs? Just one tiny chocolate?
|
|
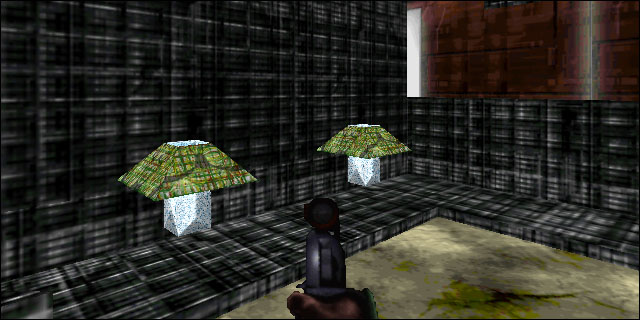
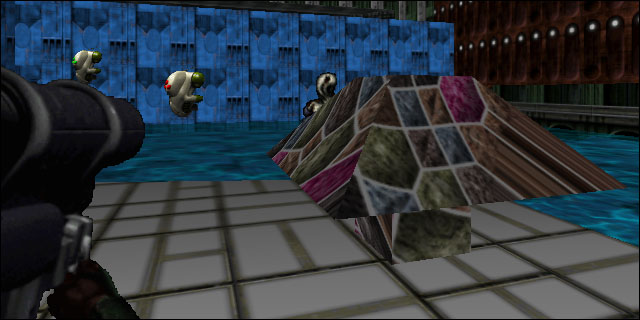
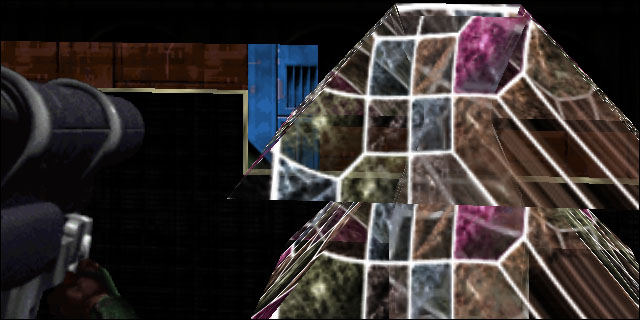
example map + script + model + skin + small shapesjuggler-file, inside
the map is a MML-resource which changes level two |
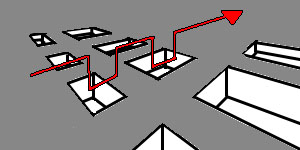
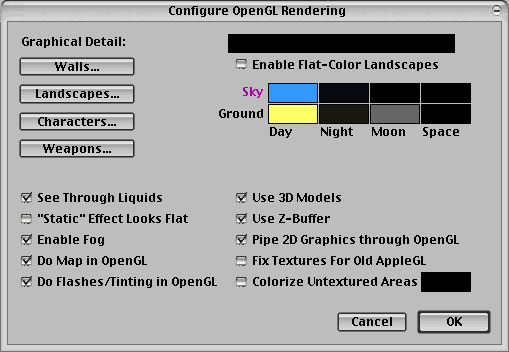
Aleph-One has a hard time to render all these clippings. |
