Revell 1/72 Storm Shadow
| Apart from manned aircraft, I also have an interest in UAVs and cruise missiles. In the cruise missile department I've so far collected the 12 Squared BGM-109 Tomahawk, Projekts AGM-86, Amodel Kh-55 kits and Model Art ASMP, but all four are in the research phase and not built yet. When Revell issued the single-seat Eurofighter with Storm Shadows (aka SCALP EG in French service) in 2007, I had to buy the model. My plan was to build a Storm Shadow as a stand-alone model, in flight, preferably in operational colors and markings. Since I only found hi-res photos of RAF examples, I built it that way.
|
References
Spoiled with walkarounds of every imaginable aircraft, it was a bit of a shock how few photos are available of the operational Storm Shadow. Most photos show mock-ups at air shows. The RAF Museum at Hendon appears to have a fairly authentic Storm Shadow on display.
Accuracy
The accuracy of Revell's model is difficult to judge with so few references. Model length and body width & height are within 1% of the usually quoted figures of 5.1 m and 630 & 480 mm. The wing span (3 m) cannot be checked since it has the wings folded, but when I unfolded them, they fitted nicely in a (scale) 3 meter span jig. The air inlet was a bit of a mystery: is the wedge part of the inlet, or just a stealthy cover that is ejected before launch? An air show mock up suggests the former, but in-flight photos of prototypes show a gaping inlet without wedge. 'Jane's Air-launched weapons' reports a redesign of the air intake to make it more stealthy, so I concluded that the model showed this latest configuration. Wrong, so I found out near the end of the project! The part to which the folded wings are attached is slightly raised on the model, whereas on the RAF version it is raised much more, and also chamfered on the edges. Its forward edge should be moved back. Revell's instructions for the top fins are not correct, they are set almost vertical. Possibly the exhaust openening is a bit too small.
Other models
In May or June 2015, a year after I finished my model, Eduard issued a very nice resin Storm Shadow / SCALP kit in their Brassin range. It contains parts for the wings 'stored' and 'flying' configurations. In February 2015, Hasegawa issued its 'European Aircraft weapons Set' (X7215) that includes two injection-molded Storm Shadow / SCALP models in the 'stored' configuration. I think this is the definitive model.
There are quite a few more 1/72 kits of the Storm Shadow:
Airfix's Tornado GR.4 (04041) issued in 2004 contained a new sprue of weapons: Storm Shadow, some LGBs and a Raptor pod. A built up (and modifed) example can be seen on Al Magnus' site
In 2010, Hobby Boss issued 1/72 Rafale B and Cs (catalog numbers 87245 and 87246) that contain two SCALP EGs. IPMS Germany has reviews with sprue photos of both the Rafale B and Rafale C
Aviation Workshop / AIRFrame used to offer resin Storm Shadows in 1/72 scale (catalog number CS100) until they ceased trading
Air-Graphics set number AC.071 'Storm Shadow & Scalp EG' contains two resin kits with the wings retracted. They appear to be a reissue of the Aviation Workshop / AIRFrame set
Because it's so detailed, the Flightpath 1/32 scale Storm Shadow is mentioned too. It was issued around 2008, and I have written a short in-box review.
Wire model analysis
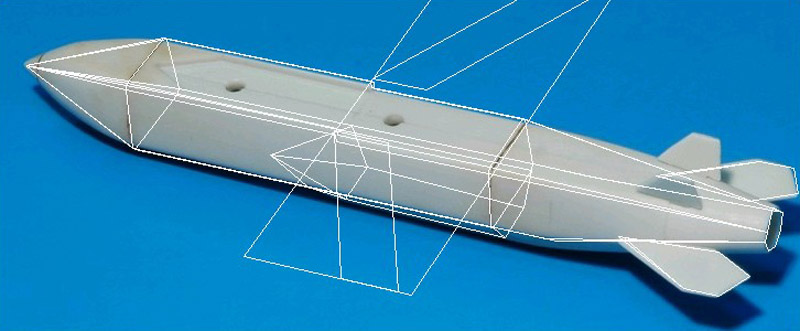
| For complicated projects I use a program that overlays a photo with a self-defined wire model. It sounds simple, but you have to get seven variables right before it fits, with perspective being the toughest parameter. The first step in this project was to make a very simple (rough) wire model, based on the model's dimensions. To check the wire model, I overlayed a photo of the model with it.
| 
|
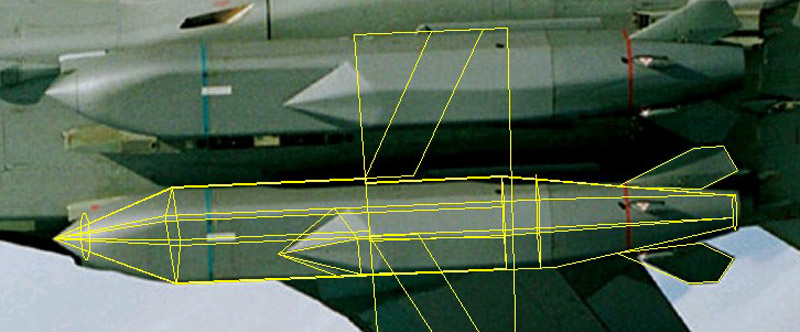
| Then I could compare the Revell model with photos of the real thing. Here a Tornado loaded with two Storm Shadows is analysed. It fits nicely, only the 'stealth' inlet cover is a little longer on the real thing.
|
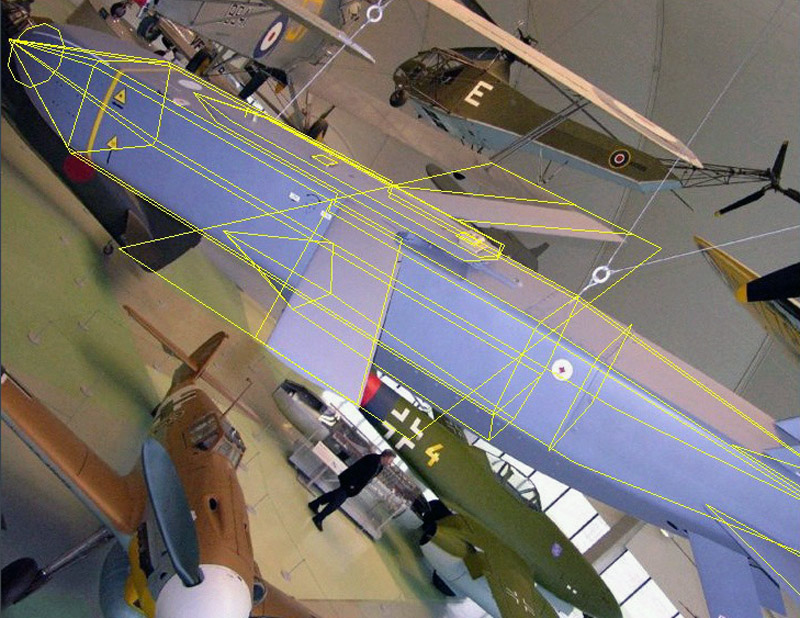
| The best Storm Shadow photos I could find are from the RAF Museum in Hendon. Museum exhibits are often not the most reliable references, and maybe his is a wooden mockup, but it looks very realistic to my eye. And it was the only one showing the wings extended. I used this photo to analyse the wing sweep angle (20 degrees) and the shape and dimensions of the hardback.
| 
|
Construction
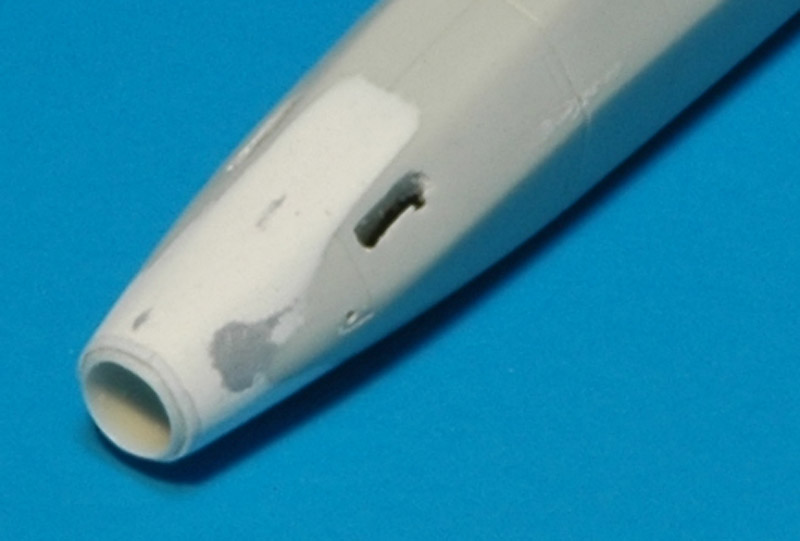
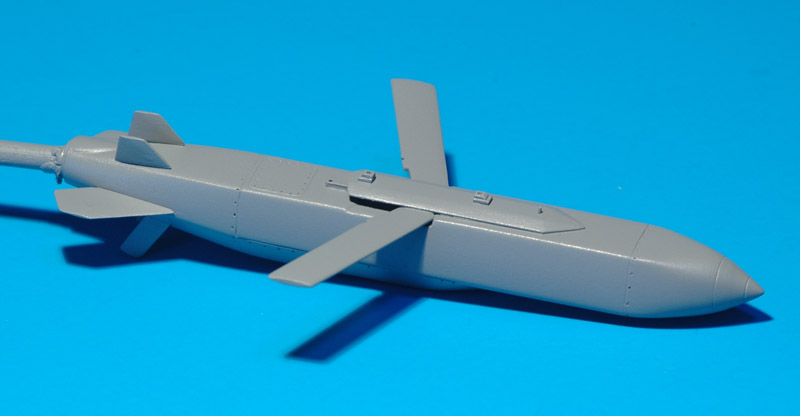
| I started with improving the air intake. I assumed that the wedge was a part of the inlet, and therefore the opening had to be increased to the next 'fold' in the exterior shape. This left a bit of a hole inside the inlet, which I closed with some plastic card. After that modification the fuselage halves could be glued together. The tailcone required some filler and sanding to blend in with the main fuselage. The tail surfaces are just test fitted.
| 
|
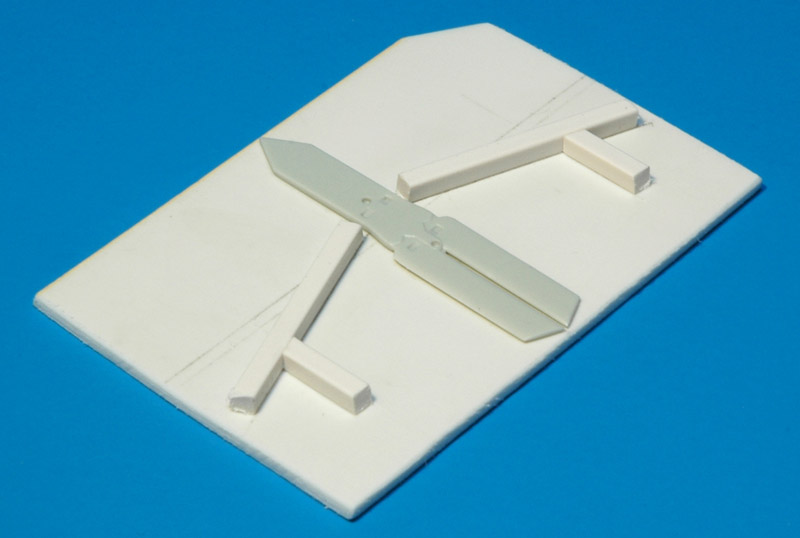
| The biggest modification of the model was to have the wings in the in-flight position. I built a simple jig from thick plastic card and square rod. The part is positioned by its connection pins. I removed the wings very carefully to preserve the 'hardback' part, but later I concluded that it had to be rebuilt anyway.
|
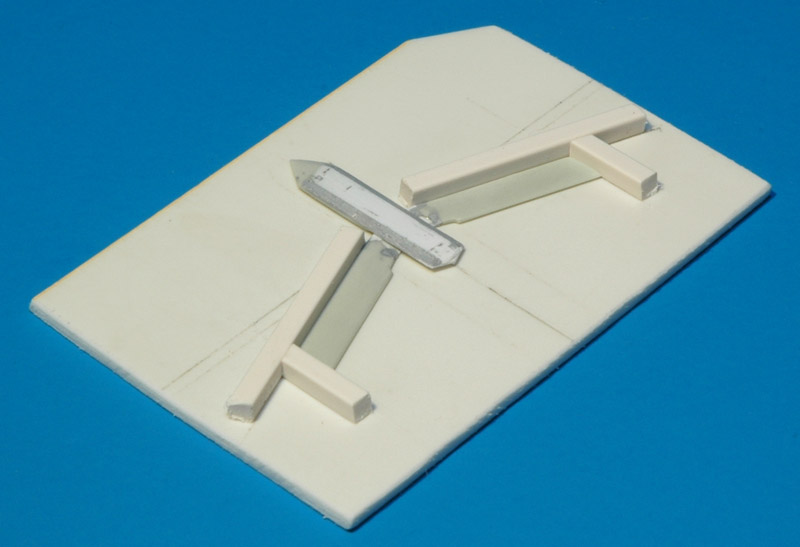
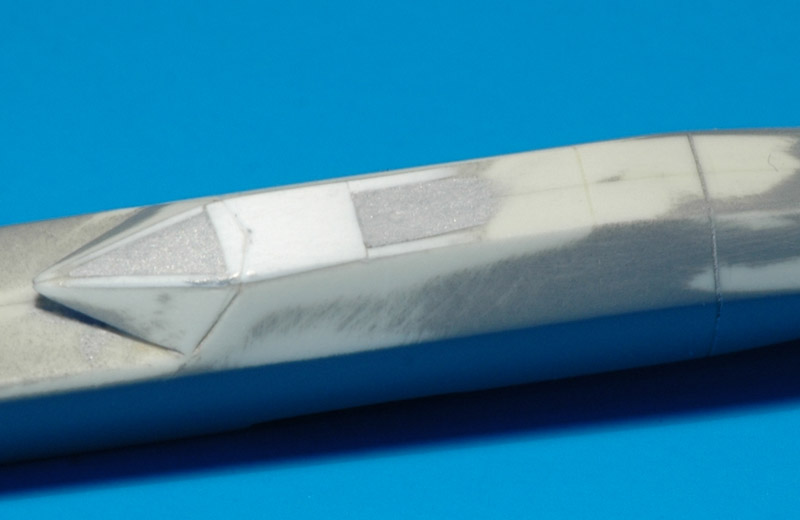
| The wings had to be lengthened a little at the root. The hardback required complete reshaping. A couple of millimeters had to go at the front end, some millimeters had to be added at the rear, and the part was made a little narrower. The cross section was faceted by addition of a strip on top (white) and Tamiya putty for the sides.
| 
|
| Because of the reshaped hardback, the cut-out in the fuselage required a little filling on the sides and a lot on the front. A shallow dent was added behind the wings.
|
| The faceting on the forward end of the hardback was impossible to get right by sanding and puttying. Therefore I decided to scratch build the part, using a technique that gave me excellent faceting on my scratch Lambach model. The edges of the facets were made from 0.3 mm steel wire, glued to suitable sized pieces of plastic card. The tiny size of the steel wires on the front side nearly drove me crazy, but the goal was achieved in the end. I used my scanner to make the picture shown here. Afterwards the areas between the wires were filled with Tamiya putty and sanded, finally giving that faceted look.
| 
|

| Three generations of hardback plus wings: top left the kit part, center my first attempt at a faceted hardback, and finally the scratch-built hardback with kit wings attached.
|
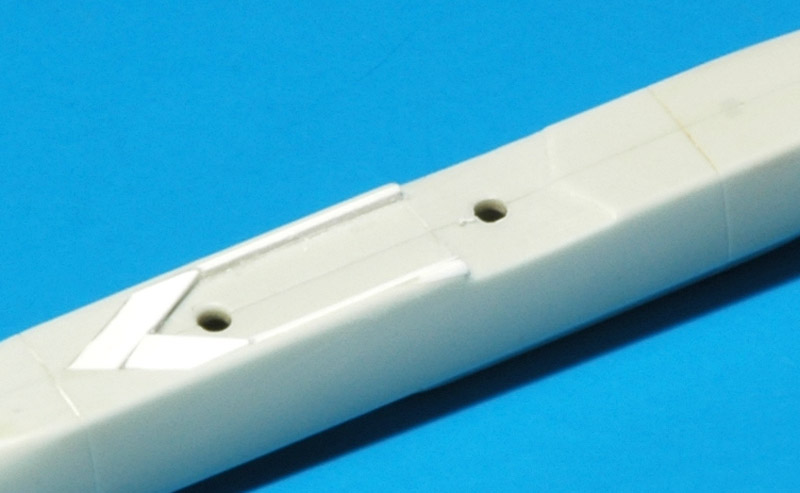
| I made two MACE lugs, here fitted provisionally. MACE stands for Minimum Area Crutchless Ejector, and it is standard on all RAF Tornado stores. The 'heavy duty' MACE version is used on the Storm Shadow. The lugs were built up from tiny pieces of plastic card, and are attached to stretched sprue. Without the stretched sprue pieces I would not be able to handle and position the lugs. The lugs are seen here threaded through 0.5 mm holes in the hardback. The forward hole in the hardback will get a pin, possible some kind of electrical connector in reality.
| 
|
| A modification that was probably a bit over the top is the replacement of the mounting tabs of the tail surfaces by 0.3 mm steel pins. I did't want the tabs to be visible, but drilling 0.3 mm holes in 0.4 mm thick tail surfaces is not the best of ideas. The root of the tailplane was recontoured to make it fit better.
|
| Because of the revised hardback, I had to fill the opening for it with card. The Milliput at the rear is part of the thickening of the exhaust area.
| 
|
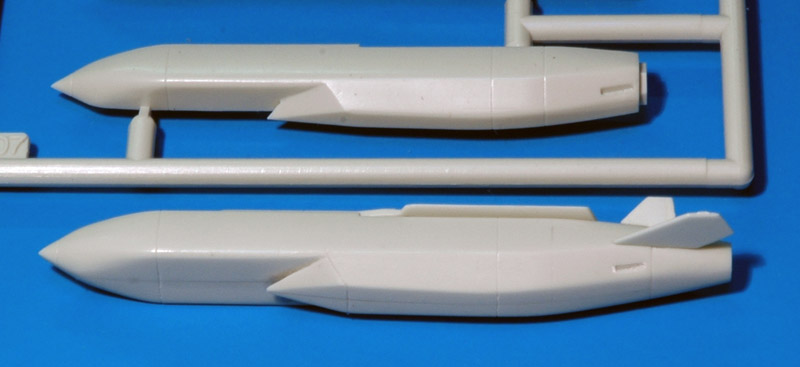
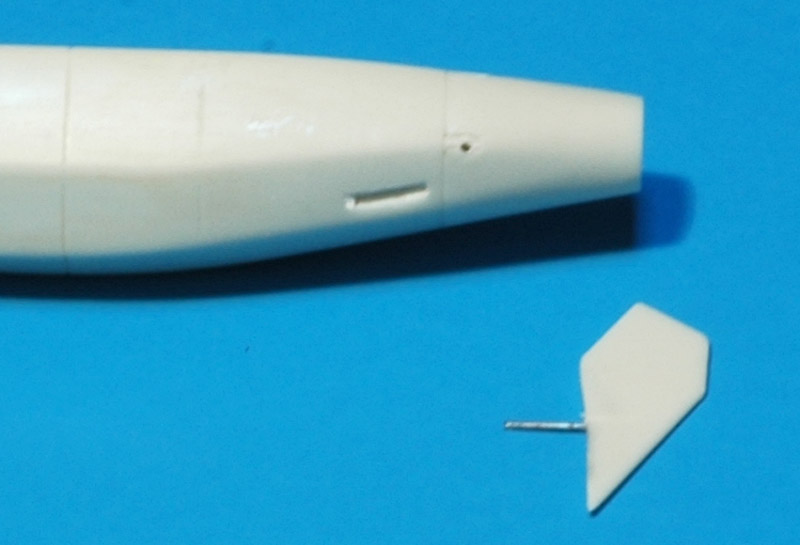
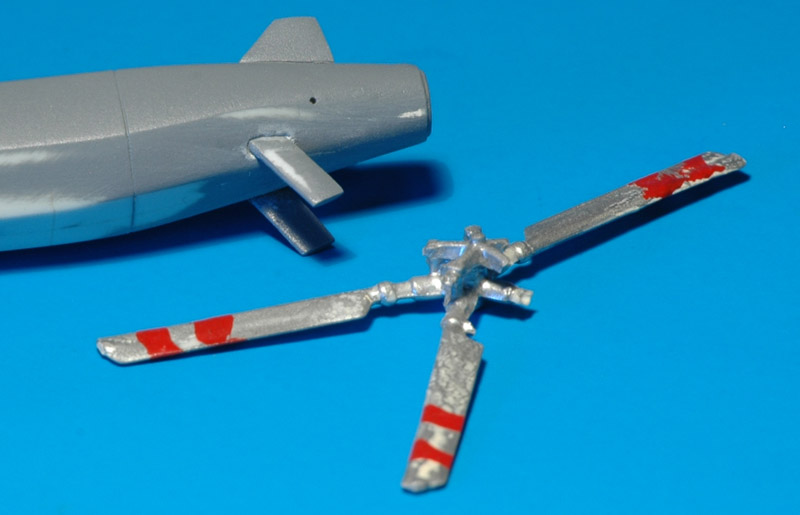
| I thought the rear fuselage looked rather skinny, but the few photos available made it near impossible to establish the correct diameter. I decided to glue 0.25 mm strip around the rear fuselage, leaving a lip to represent the engine exhaust (as seen in some photos), and build up the rear fuselage with Milliput.
You can also see the rough cutting work on the openings for the lower fins. These fins slide out after launch, and Revell represents them in the stored condition. I found an old helicopter tail rotor that had blades of the right dimensions to create the in-flight fins.
|
| The rear fuselage of the real thing is flat on the top side with a bulged fairing for the exhaust. I made the latter from a piece of plastic card. Not visible is that I drilled out the exhaust to make it deeper. The make a neat exhaust interior, I pushed Milliput inside and used the rear end of a 3.2 mm drill bit to smoothen the Milliput inside, using lots of water.
| 
|
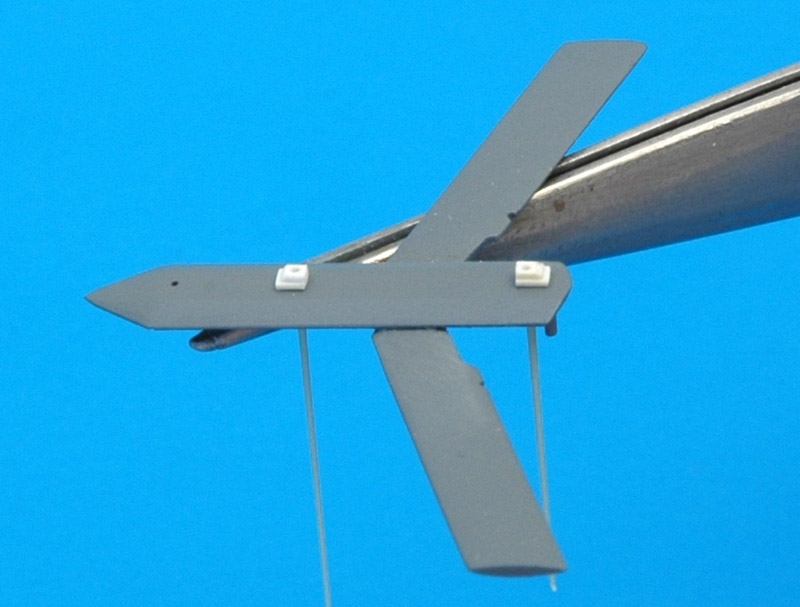
| Work continued with the lower fins. After launch, these fins are extended. As far as I can see, the fins move perfectly vertical, i.e. they are not angled outboard, probably because they have to clear the jet engine when stored. Since Revell's model represents the Storm Shadow before launch, the extended fins have to be built from scratch. I used an old helicopter tail rotor as a parts donor. I used the wire frame software again to establish the chord (3.0 mm), the sweep angle (40 degrees) and length of the fins when extended (about 4.5 mm).
|
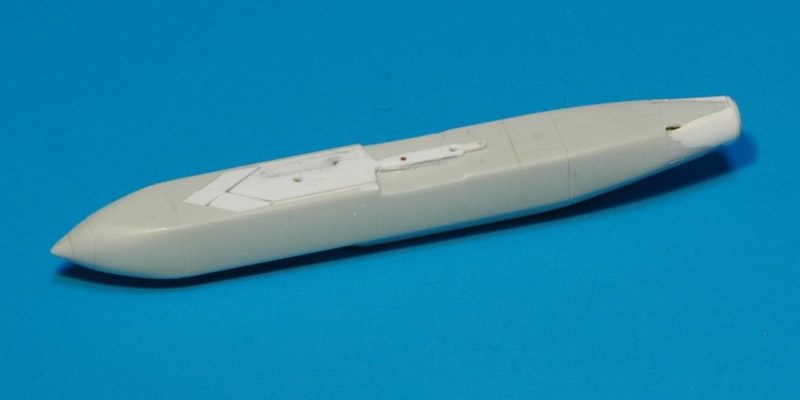
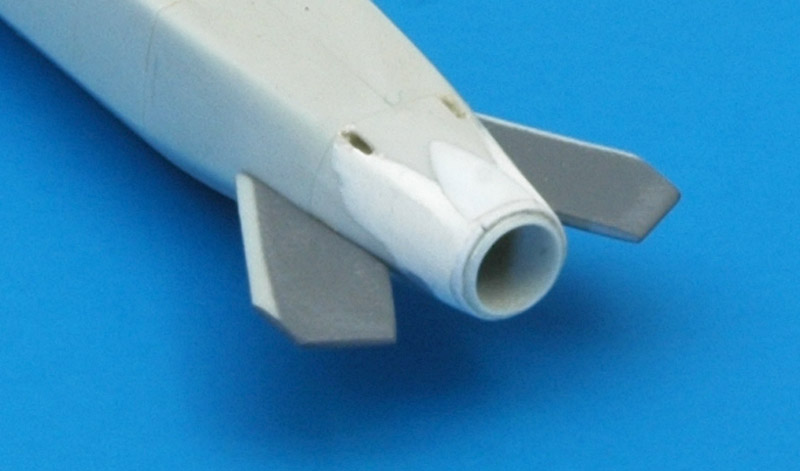
| The last job was the engine nacelle. Compared to photos it looked a tad too shallow, so I added a small piece of the thinnest plastic card to the front end, and faired it in with Tamiya putty. This also allowed the correction of a small error in the panel lines of the inlet part. Lastly I scribed a panel line where the nacelle attaches to the main body. After taking this photo I scribed a hatch on the nose and one on the top of the rear fuselage, and added a lot of fasteners represented by 0.3 mm holes.
| 
|
Painting and decaling
Operational Storm Shadows are painted in BS381C 629 Dark Camouflage Grey. Humbrol 156 is a good match, and that's what I used to paint my model. Test examples (including some 'mass simulators') were painted in orange and yellow, but I couldn't find enough photos to portray one accurately. Early Storm Shadow training rounds were delivered in BS 381C 224 Deep Bronze Green, the standard colour for British air-launched weapons (information courtesy 'Enzo Matrix').
The fuselage, hardback with wings and the tailplanes are finally assembled. The final layer of Humbrol 156 has been applied to the model. A second tin of Humbrol 156 was slightly darker and more blue. I had to modify the color by adding 0.3 ml of Humbrol 24 yellow to approximately 10 ml left in the tin of Humbrol 156. I had tested various mixes before adding the yellow, of course.
| 
|
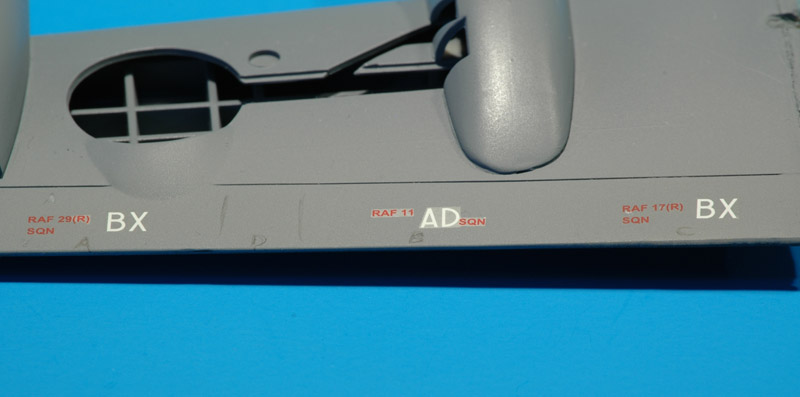
| As usual I painted an old model in the same paint, to test application techniques for the decals. Here you see the piece after I coated the decals with Humbrol 135 satin varnish. In the middle are the Revell decals applied straight to the test piece, with considerable silvering as a result. On the left are decals of which the adhesive was removed after soaking, and they were applied with Future as decal adhesive. Except for one small part these decals were perfect. On the right I used the same technique, but I polished the surface beforehand. These decals are perfect, and the polishing is not visible after clear coating.
|
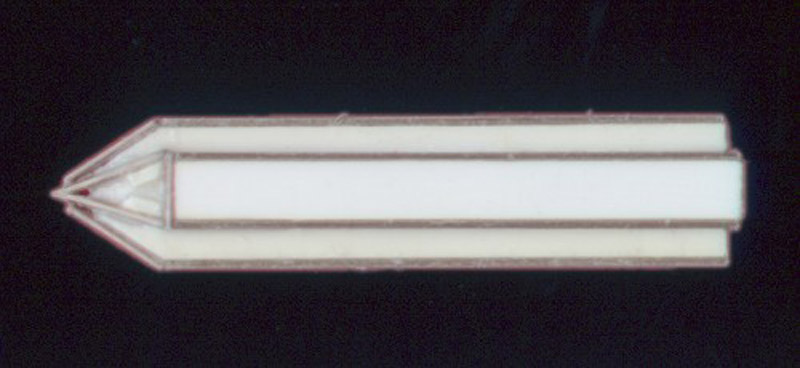
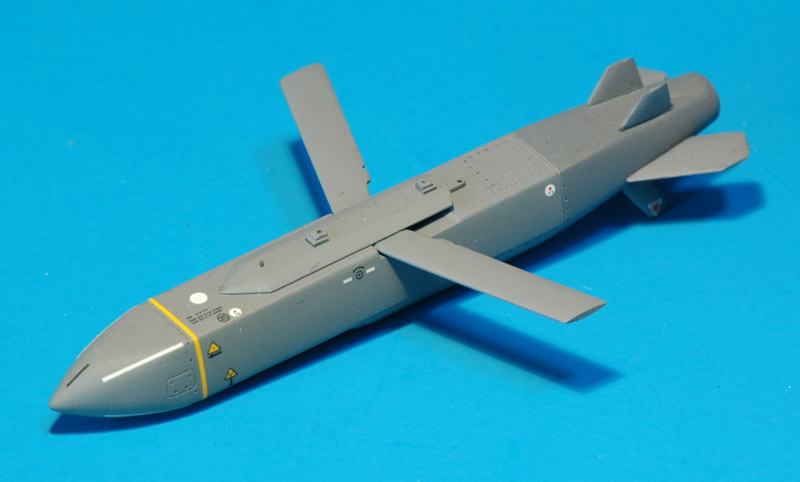
| The operational Storm Shadow has quite a lot of stencils and warnings, and Revell provides all of them in 20 decals. The white stripes on the nose cone required trimming of the excess clear film, because it would lift when applied to the small radius where the cone meets the fuselage. After the decals and the Future dried thoroughly, Humbrol 135 satin clear was airbrushed over the decals, to achieve a uniform gloss and to check for silvering. This revealed one badly silvered decal and one moderately silvered decal, most likely caused by the fast drying of the Future. They were ripped off with a piece of tape, and replaced. The end result was a very tight-looking model. I thought the model looked a bit too tight, so I added a bit of colour variation. The aft fuselage section is darker in many photos, and the inlet lip a bit lighter than the rest. I copied these variations on the model.
| 
|
Inlet modification
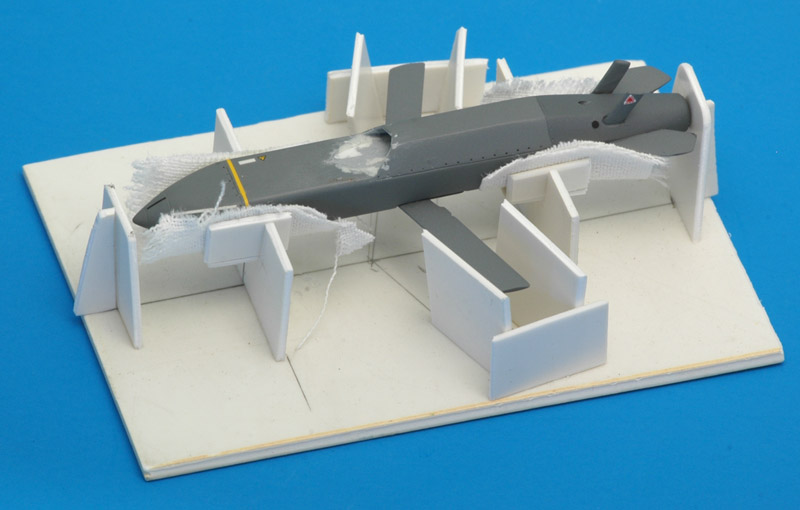
| At a very late stage, wiith only a bit of detail painting remaining, I found out that my model had an error: the 'stealth' inlet was an ejectable cover after all, which had no place on my 'flying' model. By now the model, especially the wings, was very vulnerable. I already knocked off a wing before, and fitting it again without the jig was not easy. Therefore I built an elaborate jig to hold the model safely during the inlet operation. This approach worked well, and the inlet was modified without damage to the model.
|
Presentation
I weathered the model a little, since it would only have lasted one flight in reality. Using black and grey water colors, I did a slight accenting of the panel lines and fasteners. The exhaust and the MACE lugs also got a bit of a brown wash, to accent their metal look.
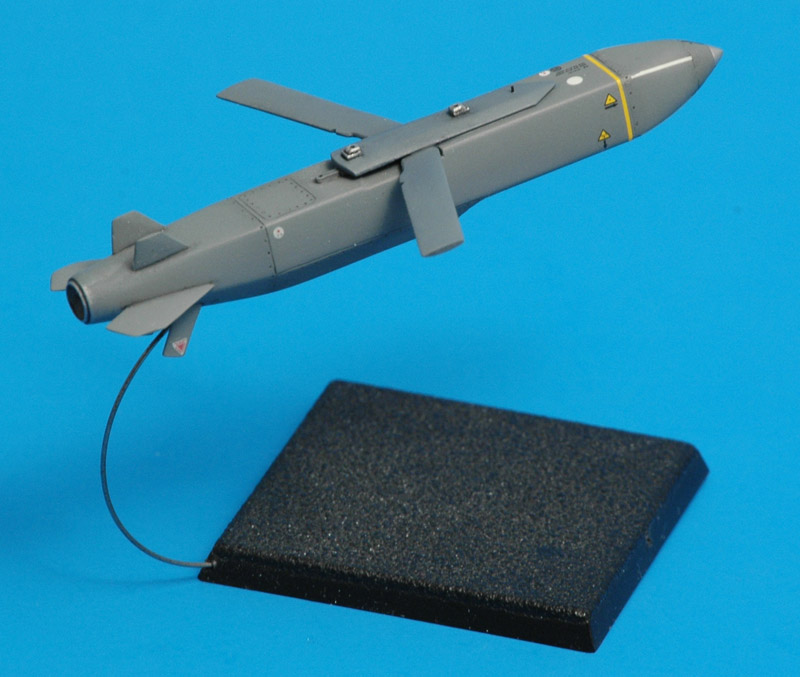
Inspired by Al Magnus' 1/72 scale rockets and missiles, I used a Games Workshop 40 mm square base as a base to display the model. A curved 0.5 mm steel wire puts the model in a slight nose-up attitude, and I like to display it with a little bank angle. And then it was done!
A special thanks to Britmodeller forum member 'Enzo Matrix' for his help with the MACE lugs and the colours.
| 
|
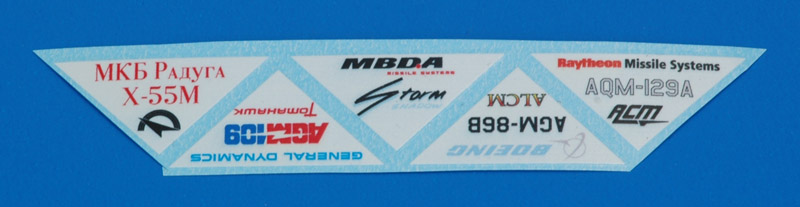
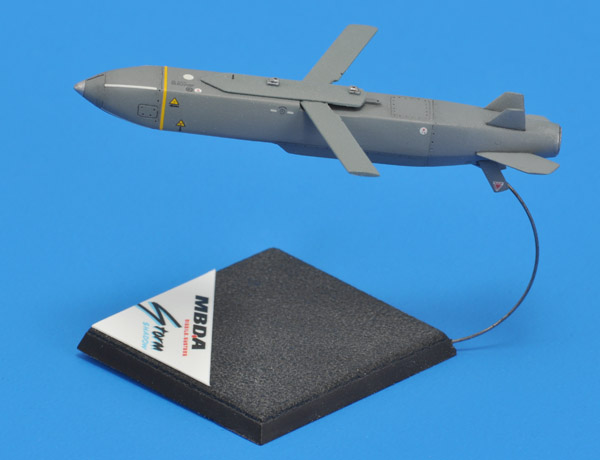
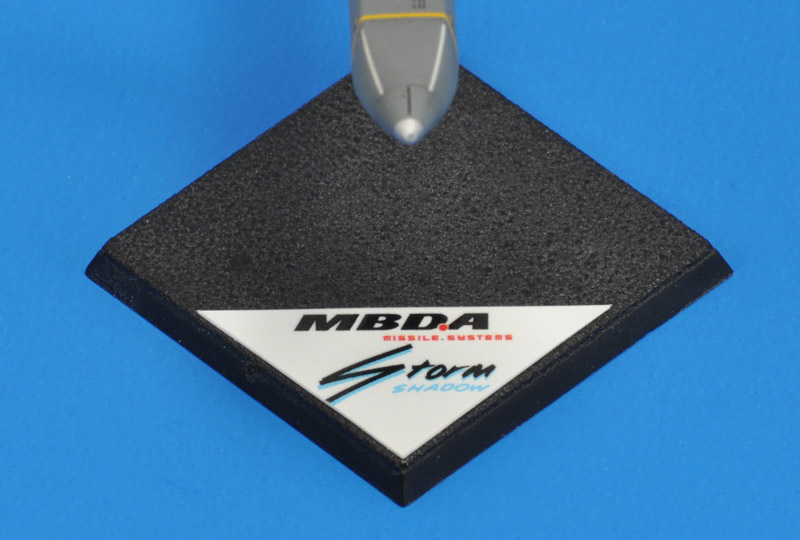
| Six years after finishing the model, I had finally gathered the 'official' company graphics to print a small logo to attach to the base. Unfortunately the light blue parts were printed very light, and are thus difficult to read. I had it reprinted with a darker blue.
I made similar logos for all cruise missiles that I am working on, with the company name and the cruise missile designation. 'AQM-129' should read 'AGM-129' by the way, and needs reprinting.
|
| The label is nice, but it does affect how one views the model, in my experience. It's now a bit less 'scale model', and a bit more 'desk model', although tiny.
| 
|
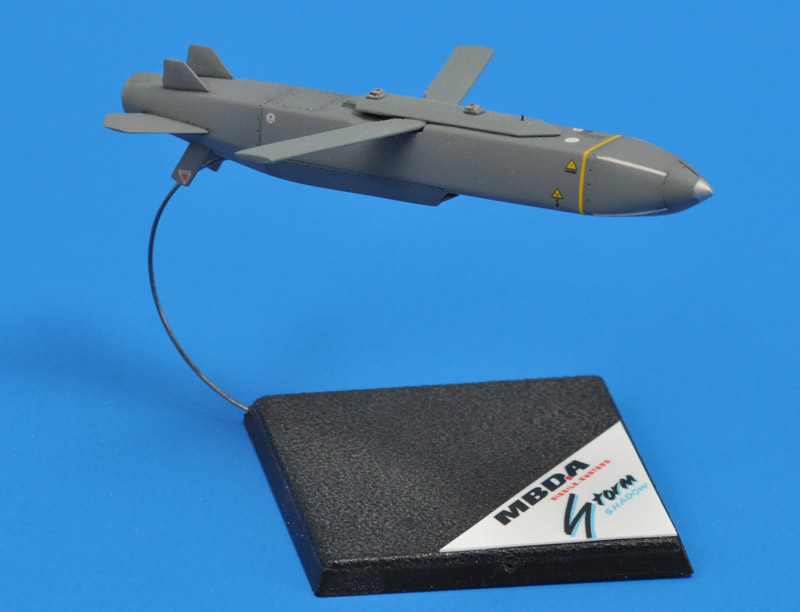
| On the other hand, you woon't find a desk model with this detail level at this small scale :-)
|
| Another view of the label. I don't think there's anything else to add, so it's declared finished now. What cruise missile is next to build?
| 
|
Links
Return to models page