Hasegawa 1/72 SR-71A play toy


Fellow club member Chris van Ravesteijn of IPMS-NL Regio Zuid-Holland donated a set of no less than four almost finished 1/72 SR-71A models. It turned out they were of three manufacturers: Hasegawa (two copies), Monogram and Italeri. They will be very helpful when the day arrives that I want to build one myself. Since I had two of the Hasegawa kits, I decided to finish one as a give-away toy for some kids I know. Here's what happened.


The donation

The models were already built, but not quite finished, mostly with the landing gear doors and clear parts missing. The vertical tails were removed to make storage of these large models easier.

One nice day, I hope to use these models again, when I decide to build an SR-71. They will come handy to study the differences in the models. One difference I noted straight away was the different widths of the front fuselages. The Hasegawa is 47.5 mm wide, Italeri 52 mm and Monogram 52 mm.
I sorted the remaining parts and put them in ziplock bags. The decal sheets were mostly complete too.


Construction

Over to the Hasegawa model that I wanted to finish. The original builder (who I do not know) had done a fairly decent job, but the model was a bit dirty from the filler work. To my surprise, 1000 grit 3M sanding foam cleaned up the model very well, and a rather nice bare plastic model emerged. I removed the remains of the landing gears, and installed the landing gear doors in the closed position.

The model is quite simple, with only 43 parts in total. But it's from 1981, when life was simpler. For me, it had the advantage that there were few glue joints / putty areas, compared to the other two models.
The clear parts were painted beige on the inside, and I stripped that paint using NaOH. The clear parts were then glued on using CA glue, without fogging them. I used Cheap Chocolate Foil to cover the windows. Only then I noticed that I had not only left out the pilots, but the seats too. Oh well. Also, I removed the pitot tube, since it would never survive play.


Painting

By then I thought that it was good enough to be covered straight away with paint. I love Revell's enamel #9 charcoal, and again it did not disappoint: a silk-smooth almost-black SR-71 resulted. The model showed a few rough areas, but a kid couldn't care less I think - he wants to fly it through the room.

After painting I noted the canopies were slightly oversized. For a normal, high-quality model, this would mean corrective work.


Decaling

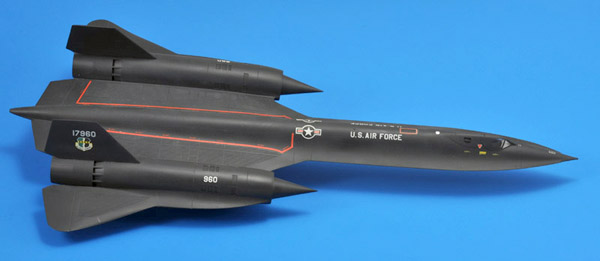
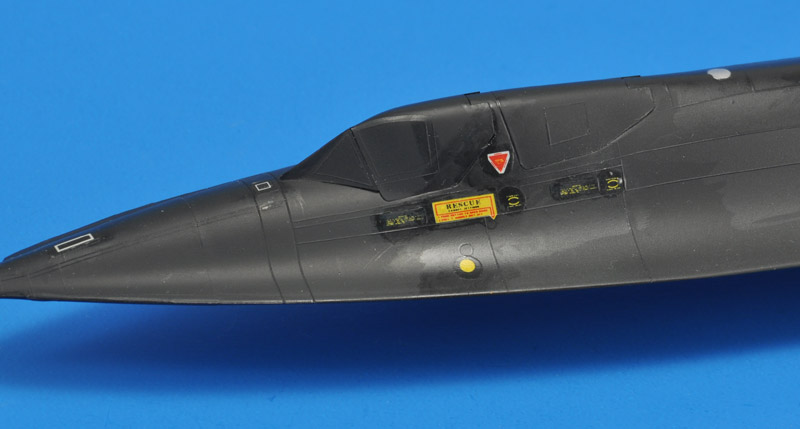
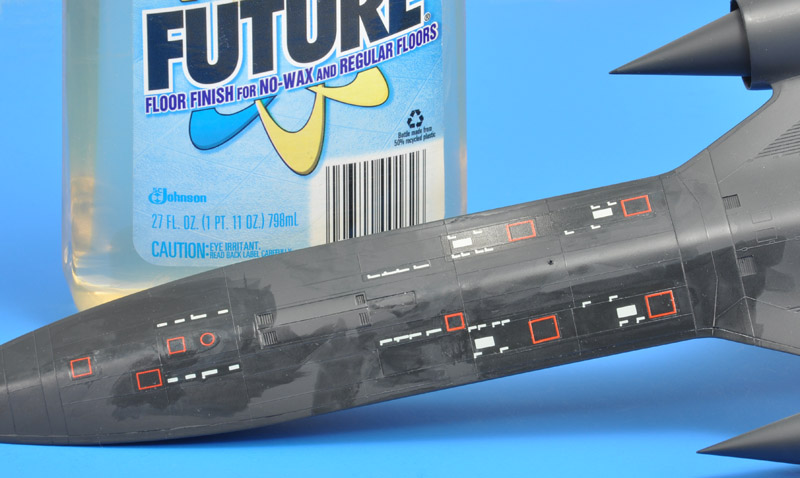
I had my doubts about the old decals, but they worked very well. I used my standard recipe: a drop of Future on the model, apply the decal (no 'juices' are used), remove the excess Future, and apply a clear coat (Alclad AL-313). This time I did not remove the decal glue, since no silvering occurred with the test decals. One strange thing was that the inks, and not the decal paper, sometimes wrinkled.

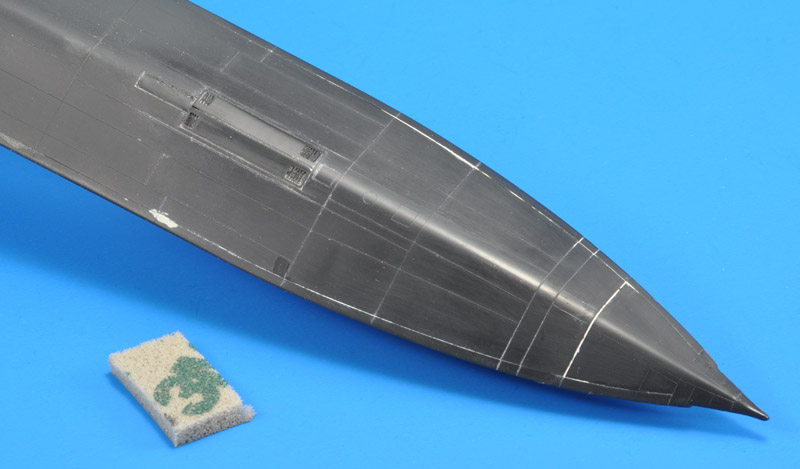
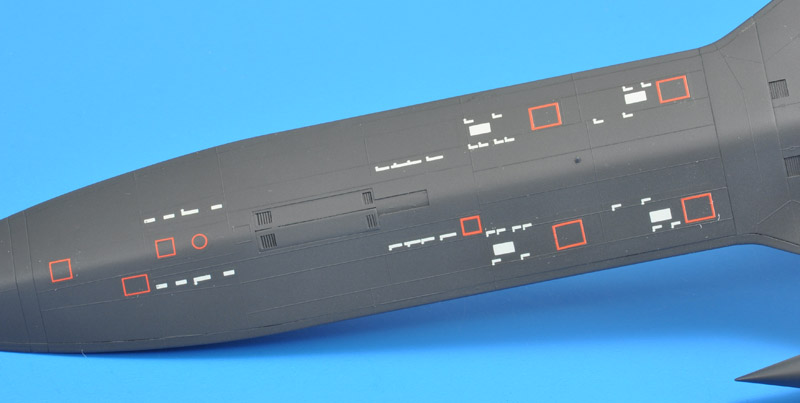
Here's what it looks like before the clear coat. The Future, roughly brushed away from the decals, leaves all kinds of glossiness 'stains'. It looks quite horrible.
The clear coat (I used Alclad AL-313 here) removes the 'stains'. The decal film is as good as invisible. Under certain angles you can see their thickness (thinness?) though. The colors of the decals are a bit too vibrant to my taste.
In a second decal session, I added all other decals, using the same methods, followed by Alclad ALC-313 'matte'. The model was declared ready and suitable for transfer to a kid.


Finished model

I removed the canopy masking, and discovered that the canopies were smudged on the inside. Too late to solve that now. The overall impression is good, I think I would have loved to have one of those at age 8 :-) Or, maybe it would have frightened me, this sinister black shape?
If it was a serious build, I would have corrected the shape mistakes, and weathered the model a bit. Or actually, I would have selected another SR-71 model. The Hasegawa model is the worst of the four available in terms of shape errors.

I found it interesting that the model wasn't sticky, like another model that I painted with Alclad ALC-312 'semi-matte'. The Alclad ALC-313 'matte' that I used on the SR-71 is different, clearly.


Lessons learned

Keep the model in gloss as long as possible. A matt finish attracts dust and dirt like crazy, that you seal in with each subsequent clear coat.

It's fun to build a kit, forgetting the high standards one usually sets. Building a model for a kid is a nice excuse :-)

Alclad ALC-313 is not sticky, unlike ALC-312 - interesting. I had almost written off these clears.


Return to models page