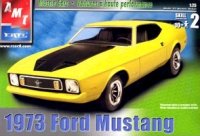
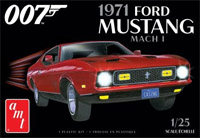
MPC-Ertl 1/25 1971 Mustang
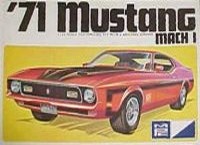
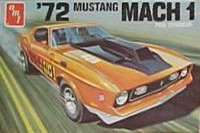
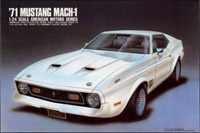
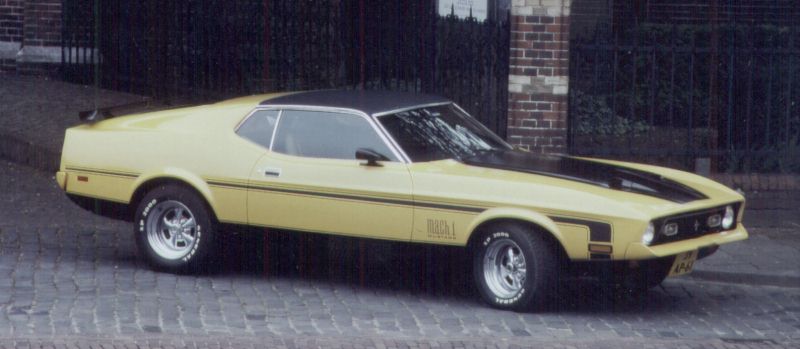
I bought this MPC-Ertl 1/25 Mustang kit (catalog number 6249, 1988 issue) with the plan to build it as the 1971 or 1972 Mach 1 shown below. This is not a completely original car, for example the vinyl roof is not factory standard, the rear bumper should be chrome, the mirrors should be in the body color, and the wheels should be Magnum 500s. I like the looks of the car in this trim, the vinyl roof makes it look a little less massive I think, and I will build my model like it.
When Revell issued their new 1971 Mustang in 2023, I stopped work on this model. The new model looks fantastic, and it would be a waste of time finishing this old model.
|


Reference photos
| This photo is roughly dated 1984. There were several 1971-73 Mustangs to be seen in my hometown, but this one I liked best. The black lower sides probably help the looks, appearing lower and lower.
| 
|
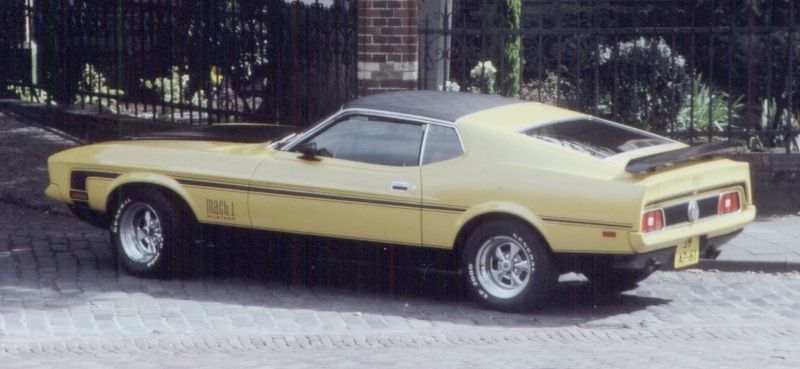
| This car had a dramatic ending. It was chased by police, made a 180 degree turn, and then deliberately rammed the police car. I remember seeing it all smashed up in the police yard. That was a sad day..
|
Model history
First I wanted to understand the history of the issue that I bought. Here's a reconstruction of its history.
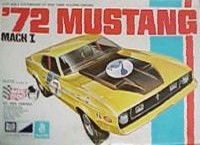
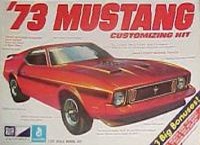
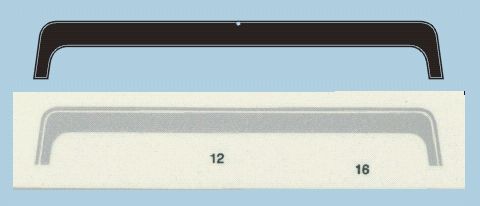
The kit was originally tooled as a '71 Mach 1 (catalog number 1-7113-200, issued 1971), inheriting the basic chassis and engine options that came with the earlier MPC '69 and '70 kits, which explains some errors in the engine department. It was reissued in 1972 as a '72 Mach 1 (1-7213-225), most likely unchanged. A '71 Boss 351 is also reported to be issued in 1972, but possibly it is confused with the 1988 reissue? The '72 model was updated to a '73 with a new and longer bumper and a new grille, and interior revisions (catalog number 1-7313).
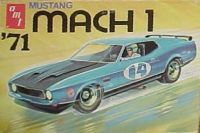
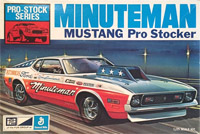
The kit was also issued in pro-stock version, a fictitious 'Minuteman' livery, inspired by the Sam Auxier Jr car. It explains the presence of many 'racing' parts like the roll cage and wheelie bars. I think it contained a new and unique hood. You can check the instruction sheet here: MPC Minuteman Mustang Pro Stocker #1-1751-225.
|
| 1-1751
|
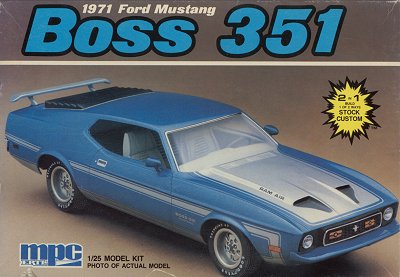
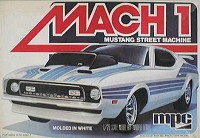
The kit was reissued in 1980 or 1981 as a 'Mustang street machine', white with blue striping, and a large air scoop on the hood (catalog number 1-0805). The 1988 issue of the '71 Boss 351 kit (catalog number 6429) is actually the '73 kit with Boss 351 decals. You can now buy the same model as the AMT-Ertl 1971 Mustang (see 3/4 down the page).
| 
|
| 1-0805
| 6429
|
Model quality
I gathered the following insights and comments about this kit. The main sources of information are Eric Verschuur, Dean Hemphill, 'WnB' from rec.models.scale and Rex Turner.
Reportedly the overall shape and proportioning of the body are pretty good
It scales out at 1/25.4
The '73 front bumper in the kit is not correct for a '71 or '72. The '73 bumper is longer to comply with 5mph collision requirements. A front spoiler (standard on the Boss) is missing. The optional rear wing is included, but I think the supports are too high
The kit's hood has vent slots near the windscreen (see box art), that neither the Ram Air or the standard hood had
A panel line circumventing the nose is missing from the model (it allowed the use of either a chrome nose strip or a strip in the body color). The NACA inlets in the hood also require a panel line around them. Two panel lines are missing near the lower edge of the door.
The rear body panel (part number 4) has a honeycomb pattern molded on, that is only applicable to Mach 1 versions. It has to be sanded off for other versions.
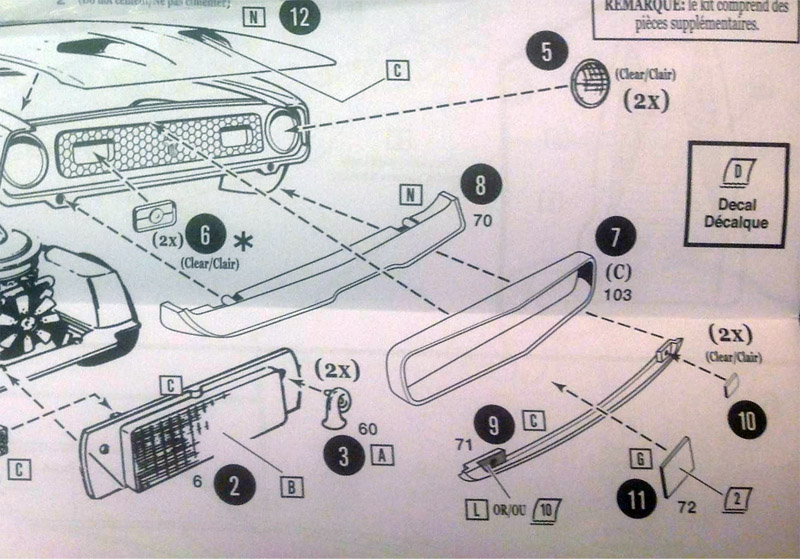
The kit has two grille inserts:
a chromed 1971/1972 version (part 103), of which Scale Auto April 2004 reports that it is unconvincing. The horizontal turn indicators are probably too large
an unchromed 'custom' grille (part 3) that gives you something resembling the '73 grille, with vertical turn indicators
The secondary (?) turn indicators under the bumper are missing
The kit's headlights are surrounded by a square/squarish trim, which was only used on the 1973 model. The trim is not symmetrical left and right though. The headlights are reportedly too small. Possibly the position of the headlights also needs adjustment, slightly deeper in the nose.
The fuel filler cap in the kit is the optional 'Quick Filler Cap'. The standard cap has a black center with a pony, and 'Ford Mustang' lettering on the chrome ring around it
Hood hold-down pins were standard on the Boss, but are not present on the model
The comments on the engines supplied in this kit vary considerably:
The small engine that the instructions describe as a Cleveland 351. One source described it as reasonable. Scale Auto (April 2004) reports that the engine is a 1966 289, fitted with inaccurate 351C valve covers to make it look like the 351C. Another source reported too that is a 289, that is included in all MPC 1967 to 1973 Mustangs. MPC claims in its instructions that the Windsor 351 could also be ordered for the '71-'73, but according to my sources it was last fitted to the '69 model
The big engines, 428 Cobra Jet and 'Boss 429'. I read no comments heard about the 428, possibly it's reasonably correct? A 428 with 429 valve covers doesn't make a true 429 though. The 429 Cobra Jet was only available in 1971
The engine bay is not very pretty, and needs a lot of help to make it anywhere realistic
The interior is fairly typical for this vintage kit, but could do with some more detailing. For example, the details on the doors are very flat, to allow molding of the 'tub'. It fits nicely against the tops of the doors. The basic parts (tub, dashboard, console) are reasonably good, but seats and door panels are not so well done (seat backs are hollow for example). Rear seat is rather flat and lacks a fold line in the seatback. Deluxe model console is molded in the tub. The steering wheel is correct for a Mach 1 and a Boss, but the holes in the spokes should be filled. The interior is that of the 1973 version, not the 1971
Chassis detail is again fairly typical for this vintage, but reportedly not accurate. It is the same as MPC '69 Mustang, if I compare the the instruction sheet drawing.
The exhaust system is not accurate for a 1971-73 Mustang
The driveshaft, rear axle and leaf springs are a single part like most kits of that time. A metal axle is used.
The kit wheels are actually wheel covers, one of three versions that could be ordered: 'Sports wheel covers - for zoomy sports flair'. The different 'Wheel Trim Rings / Hub caps' were standard on the Mach 1 and Boss. The high-end 'Magnum 500 Chrome Wheels' are not included. A '67 Cougar was mentioned as a suitable donor kit. A set of 8-spoked non-Ford wheels (Minilite racing wheels) is also included
The kit includes extra parts to build a race version with roll cage
My conclusion: if you fill the vents near the windscreen, and do some work on the bumper, grille and headlights, you can build a pretty decent curbside model of the 1971-73 Mustang, and that's what I plan to do.
Construction
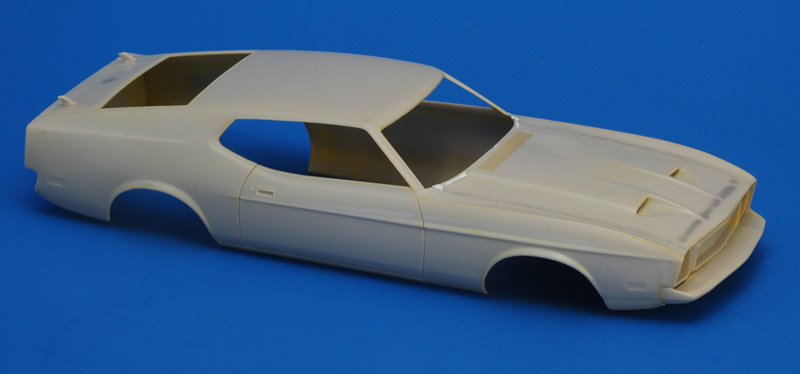
| I started this model a loooong time ago, when my experience and skills were far more limited. And information was not available as it is now. I wasn't too interested in showing the engine bay, and decided to glue the hood shut. Its fit was not very good, and rather wide and wavy gaps remained. I puttied them several times, and I hope they are OK by now. I still need to shorten the front bumper to 1971/1972 specs. I wish I had found out about that before I glued it on. You can also see some traces of yellow paint: I painted it at a certain point, but the results were disappointing, and caustic soda (NaOH) was used to strip it back to bare plastic.
| 
|
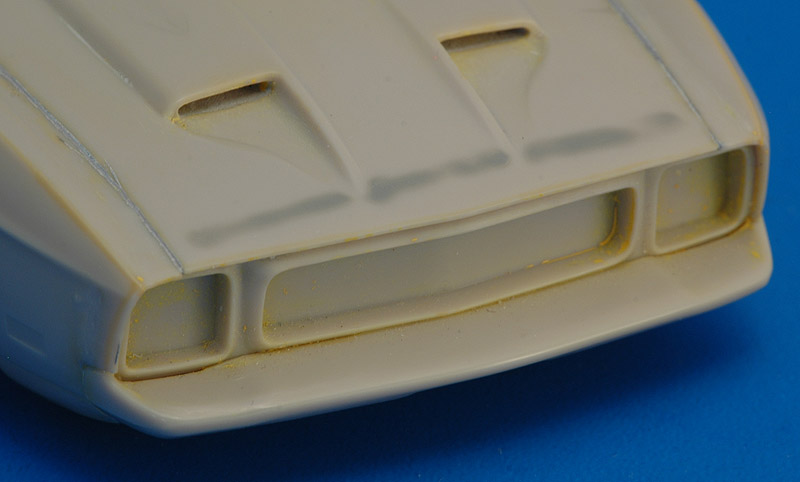
| More blue Tamiya putty was used to fill the hood gaps. Vaguely visible inside the NACA inlets is some plastic card that I added to extend the inlets. It prevents the engine bay being directly visible through
the openings. A shallow but long sink mark on the front edge of the hood was filled with Humbrol 1 base coat and sanded. Some scribing is to be performed here: a panel line circumventing the nose will be added, and I need to scribe lines around the NACA inlets. The buckets around the headlight lenses are definitely a 1973 detail, to be removed for a 1971 / 1972 version.
After comparing the MPC and AMT bodies (see below), I started thinking that the grille could be the weakest point of the MPC kit. It's possibly too high, and if that's true, it spoils the 'face' of the model. To keep the analogy, it creates an 'eyes wide open' face, instead of the 'slightly squinting eyes' of the real car. I did a provisional measurement of the distance between bumper and hood on a real car using my hand, and measured 0.205 m, or 8.2 mm in 1/25. The MPC model is 9.4 mm, so indeed the 'face' of the model is off. Now, how can it be improved, maybe by moving to bumper up one millimeter? The AMT measures ~7.7 mm, half a millimeter too small.
|
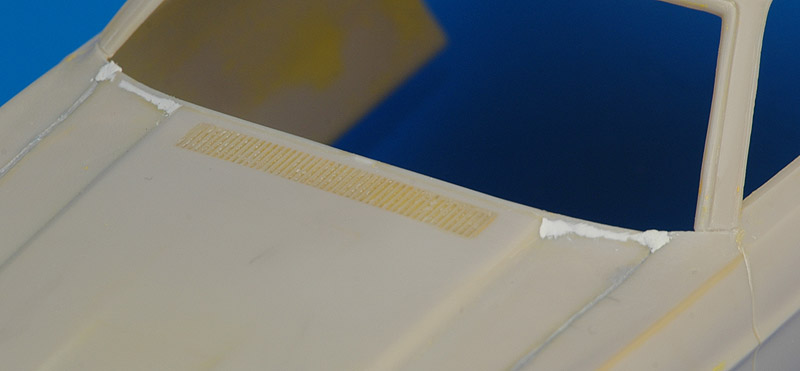
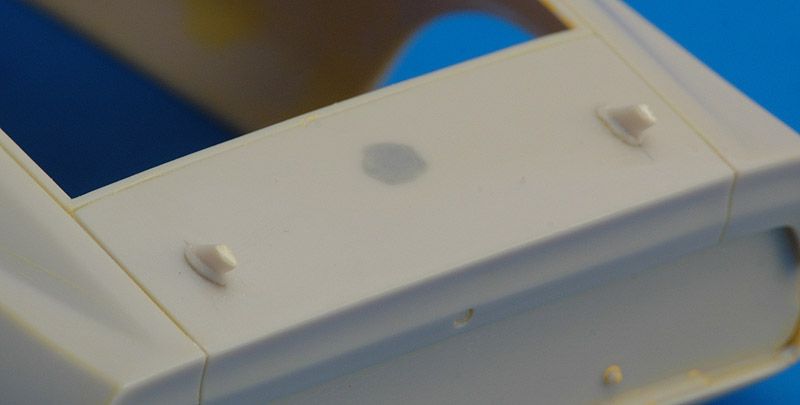
| A close-up of the work on the hood near the windscreen. The vent slots were filled with super glue, which explains why you can still see them clearly. I applied some white Milliput against the rear edge of the hood, since MPC molded a ridge there, whereas it should be a continuous slope. Still have to sand the Milliput a bit more. You can see some blue Tamiya putty that I used to fill the gaps between the fenders and the hood. Lastly, I scribed a panel line at the bottom of the A-pillars, to visually disconnect them from the fenders.
| 
|
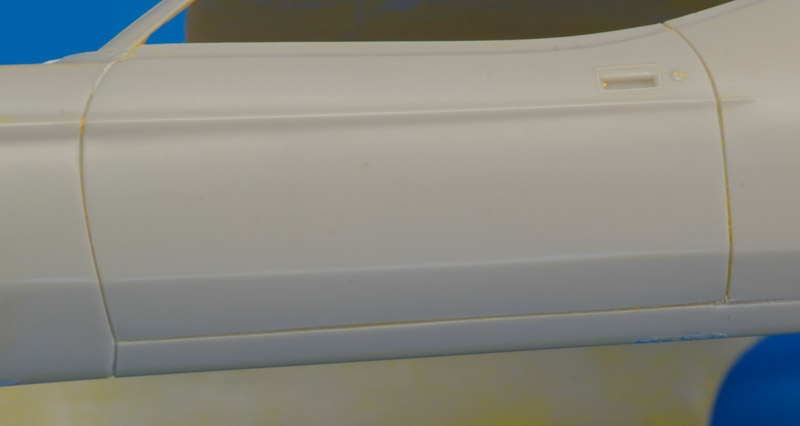
| I added two panel lines around the door: a vertical line at the lower front, and a horizontal line at the lower rear. I think these panel lines add a lot of realism.
|
| Work on the rear side is limited to filling a sink mark and adding the shortened rear wing supports. I believe I halved them to arrive at the height seen on the 1:1 car shown above.
| 
|
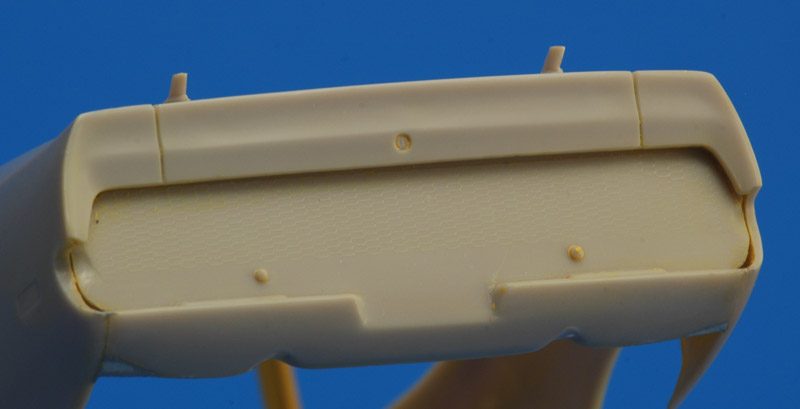
| A bit of work was done on the rear panel. It shows the honeycomb pattern unique to the Mach 1 version. Some remains of the first paint attempt are still visible.
|
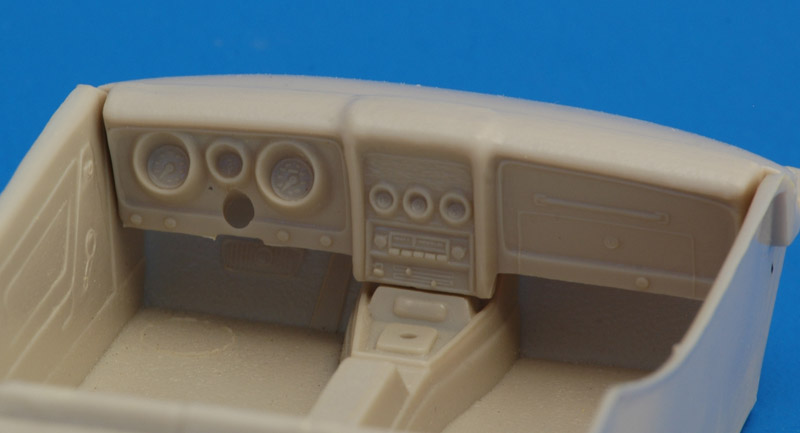
| The instrument panel looks pretty sweet to me. However, I haven't compared it to photos of the real thing.
| 
|
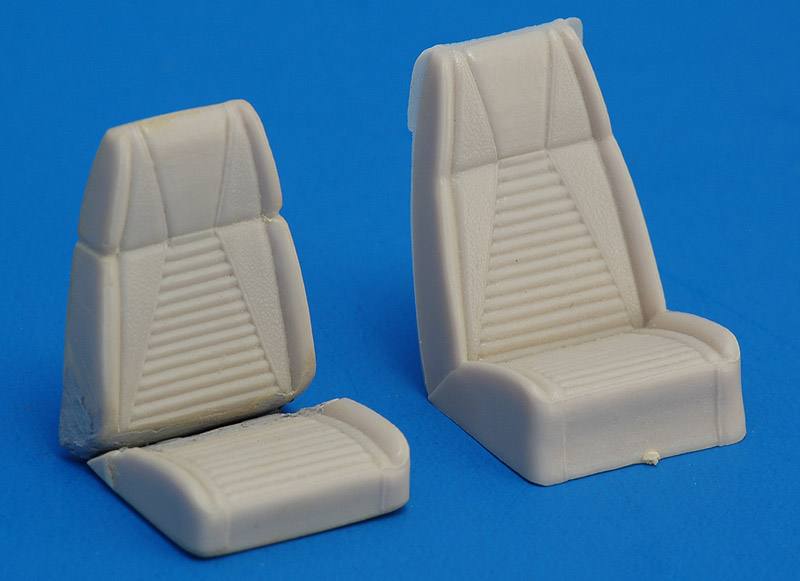
| The front seats look a bit like thrones, so I decided to modify them back then. They extend all the way to the floor for mounting, and I cut away the bottom half. Next I split the seat, since the original doesn't look like it can fold forward to allow access to the rear seats. However, I had no idea what the originals looked like, so some work was in vain. For example, I created a 'separate headrest' look by engraving lines on the sides, but they are definitely absent on the real seats.
Recently I decided to restore the seat back, and correct the substandard old work on the seat bottom. For the pleads on the seat bottom I used 0.85 and 1.0 mm plastic rod, with Apoxie to smoothen things out. The seat backs were made thinner. The seat backs look compressed vertically to me, so I added a bit of material at the bottom.
|
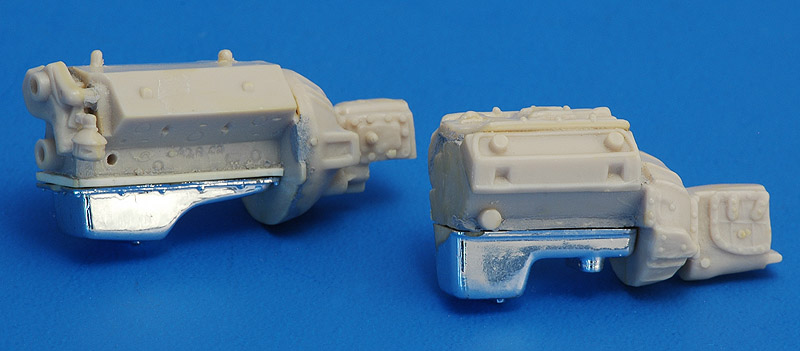
| The engines are a puzzle to me, since I know very little about Ford engines and gearboxes. See also the comments in the 'Model quality' section. I just fiddled a bit with them, adding some plastic strip to make the sump fit, and some puttying.
| 
|
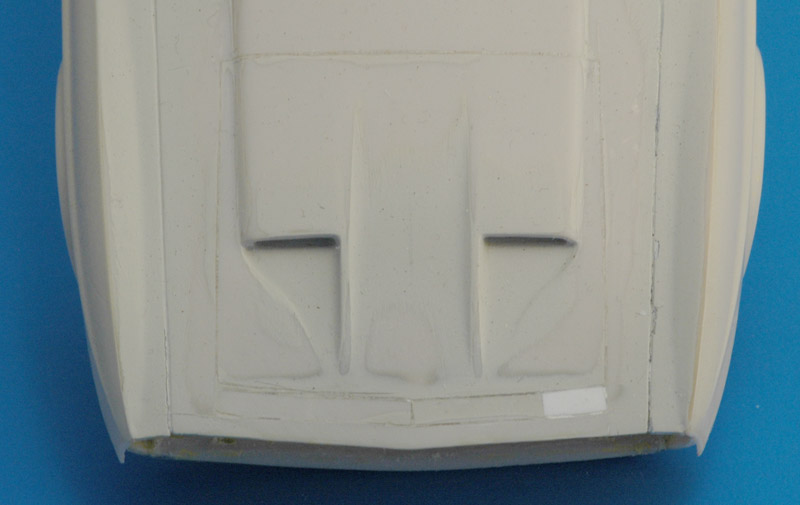
| After I painted the hood with Humbrol 28 (that comes close to the original plastic color), I finally checked whether the NACA inlets are placed too far forward, as I had noted in the model comparison shown at the end of the page. I did some measurements on a photo of a real car, and concluded that the inlets were indeed placed too far forward, by about 2.5 mm. The modification did not look too difficult, so I cut out a large panel with a JLC saw, removed a 2.5 mm strip, moved the panel back, and used the strip to fill in the gap at the front. It worked out pretty well, although I damaged the joints between the hood and fenders, so some repairs are required. I measured the panel gaps, and found out that a 0.2 mm wire fits nicely. That will be the target for the repairs.
|
|
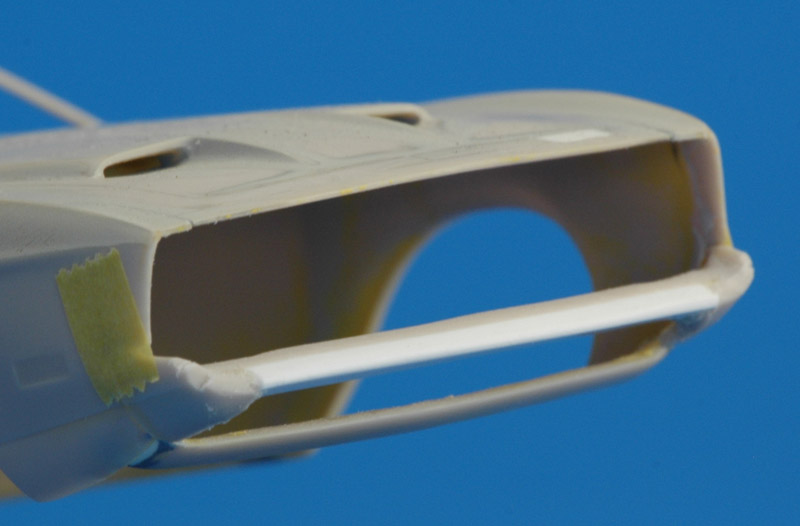
A study of various 71-73 Mustangs at a car show made something else clear: the distance between the hood and the bumper is too large on the model. I measured (not very accurately) 200-205 mm, which equals 8.2 mm in 1/25, whereas the MPC model is around 9.4 mm. That explains the 'eyes wide open' impression that the model gave me. Another discovery was that the 73 car has hardly any 'lower grille' opening. The model represents this reasonably accurately.
Since I wanted a 71-72 nose, I removed the (upper) grille and bumper, and started reshaping the latter. It's still very rough. I will mount it 1 mm higher, which will also create a decent lower grille opening. Shown here is the interim result.
| 
|
| As a not to myself, here's the section of the 2020 version of the model, that has revised nose parts for a '71 model.
|
| Another note to myself: a photo by Rob Hall comparing the old and new front ends (source with more photos).
| 
|
Wheels
I was puzzled by the 1:1 car's wheels for a long time. They are not the original high-end 'Magnum 500 Chrome Wheels', but close. My modeling friend Eric finally solved the problem when he found MRC's 'Muscle Car Hop-Up Sets'. Set BB106 has the Cragar SS 15 wheels that look almost exactly like the wheel shown in the photo. The wheel set costs nearly as much as the car kit itself, but hey, it's a hobby.

Engine options
Some options for a correct Cleveland 351 are:
Tim Boyd recommends the Revell '70 Mustang Mach 1 kit, "It is really the only mostly authentic Cleveland in this scale. It is entirely stock except for the valve covers, which are Ford Racing aftermarket parts that need to be replaced with parts that replicate the factory stock version." Only possible drawback is that it's a 1/24 kit.
Rob Mattis recommends the AMT '73 'Black Cat' Cougar for the Cleveland. Other comments are that the heads and intake are poorly done.
351 Cleveland stock engine by Motor City Resin Casters (or Scale Models by Chris), with decals and pre-wired distributor
Aftermarket parts
The following list is likely not complete:
Paint and decals
The kit has decals for the Boss 351 version, blue body with silver trim, whereas I want to build a yellow Mach 1 version with black striping. The earlier issues of this model probably had the correct decals, but chances are very small that I can lay my hands on these. Also, I would expect their quality to be comparable to the Boss decals, and this quality is rather average. My main complaint is that the pin striping is three times too wide. Therefore I will draw new black decals using the kit's silver 'hockey stick' decals as a reference. The hood decal must be made completely new, since that of Boss is much larger than that of the Mach 1 version. As a test I redrew the trunk decal, based on the kit decal's outline, but with the correct pinstripe width. It was easy enough, but the end result did not match photos of the real thing at all. Apparently the outline of the MPC decal is not accurate.
I also need 'Mach 1 Mustang' logos for the sides and the trunk. Using a large photo of the logo, I drew it in CorelDraw using Compacta LtBT and Microgramma DBolExt as the basis for the letters. After about 2 hours of fiddling, it was ready. I had a few logos test-printed on decal film using an Alps printer, and they turned out very nice.

Fred Cady issued set FC031 (or 031D) described as "1972-1973 Mustang Mach I with black hood, side stripes/Mach 1 side panels". Cady retired around 2010, but his decals can still be found on Ebay.
Late 2004 I found out that custom Mustang decals are available from Keith Marks. He has an extensive catalog of muscle car decals, including decals for quite a few 1971-1973 Mustang versions. They appear to be of a good quality, but I think the pinstriping is equally overscale as the MPC decal's pinstriping. Keith can be contacted through mofobow at hotmail.com. He also sells his decals on Ebay as 'kmarks999'.
For the Dutch license plates, DACO issued a decal set with Dutch license plates with numbers and letter in various scales. Slater's has plastic letters in the right style and height (3mm) for older (pre-GAIK) license plates. Catalog number is 1103. Flevodecals also produces a Dutch license plate decal set.
For the non-standard partial vinyl roof, I might follow this methode: Great product for replicating vinyl tops.
Other 1971-1973 Mustang models
Alternatives to the MPC kit are:
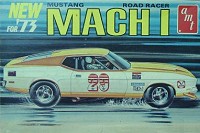
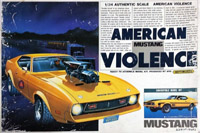
AMT initially issued three versions of its 1/25 1971-1973 Mustang model: '71 Fastback with 302 and 429 V8 (T114-225), '72 Fastback Mach 1 (stock or road racer) with 302 and 429 V8 (T335-225, issued 1972), '73 Fastback Mach 1, similar to 1972 kit with some optional parts differences and annual revisions, and full sets of stock Mach I graphics in both black and white (T425). The models are usually reported to be more accurate than the MPC model, but considering the above differences, I'm not so sure yet.
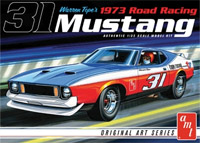
The 1973 model was later issued as '73 Fastback Trans-Am race car #31 driven by Warren Tope in a red-white-blue scheme (T206). Changes include the deletion of the normal front seats, replaced by one racing bucket seat, a new dashboard without details but with a separate instrument cluster, an extended roll cage, Mini-lite wheels, tires with Firestone overlays, deletion of the normal exhaust system, and some changes to engine.
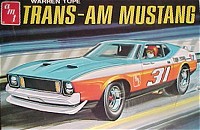
|
| T206
|
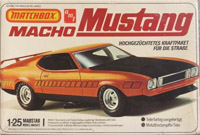
AMT reissued the model in 1978 as a 'Macho Mustang' (2901). This issue is probably identical to the Warren Tope issue, and lack a number of parts to build a standard straat version.
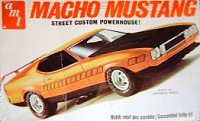
|
| 2901
|
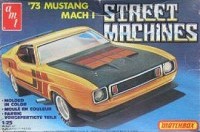
AMT was bought by Matchbox, and two 71-73 Mustang models were issued as AMT/Matchbox models, codes PK-4141 and PK-4167. PK-4167 is the Street Machines box shown, molded in yellow. It appears that these reissues are identical to the Warren Tope issue, and lack a number of parts to build a standard straat version.
| 
|
| PK-4141
| PK-4167
|
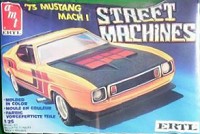
After AMT was bought by Ertl, the '73 Fastback Mach 1 was reissued with catalog numbers 2901 (Macho Mustang), 4167 (Street Machines) and 6531.
|
| 4167
|
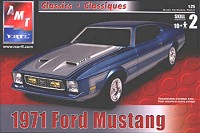
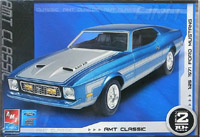
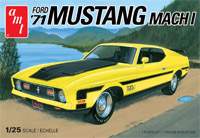
Two AMT/Ertl reissues hit the market in July 2004. They are a 1971 version (catalog number 38160) and a 1973 version (catalog number 38156). Surprisingly, the 1971 kit is identical to the MPC kit discussed on this page, and thus not a true AMT reissue. It is likely that the original AMT 1971 mold had been changed irreversibly during the many updates, particularly the Warren Tope Trans-Am version (T206). The box shows a blue Boss 351 with silver stripes, but inside is a 1973 model. The 1973 reissue reportedly is the AMT Warren Tope model, and therefore lacks a number of parts to build a stock Mustang of any version (wheels, tires, rear spoiler, normal interior, dashboard without details, possibly grille).
| 
|
| 38160
| 38156
|
In 2007, RC2 reissued the 1971 version, using the AMT/Ertl brand, but changing the old catalog number 38160 to 38160-1HD. I guess the contents are unchanged, it is still the MPC 1973 kit.
|
| 38160-1HD
|
Round 2 reissued the AMT Warren Tope driven '73 Fastback Trans-Am #31 in 2015. Like before, this kit most likely lacks a number of parts to build a stock Mustang.
|
| AMT896/12
|
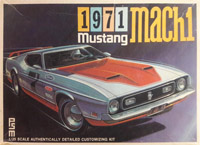
Round 2 reissued the MPC '73 in 2016 with the original MPC box-art. The contents are reportedly identical to my MPC Boss 351. The decals are incorrect Mach 1 stripes.
|
| MPC846
|
In 2020, AMT (actually Round 2) issued a James Bond 007 movie themed model, from 'Diamonds Are Forever', with catalog number 1187 (or A1187 or AMT1187). It is again the same old MPC '73 kit, but it has a few new parts: a smaller front bumper (for the 71/72 model), different grille, clear headlight lenses and flat disk wheel covers like the movie car. The tires appear to be the re-tooled Goodyear Polyglas tires.
|
| AMT1187
|
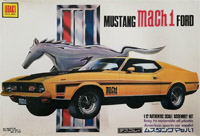
In 2022, AMT (actually Round 2) issued another version, with catalog number 1262 or AMT1262, as a 1971 Mach 1. The decal sheets contains the Mach 1 markings in both black and silver. For the hood stripe, it looks like only the pinstripe is supplied.
|
| AMT1262
|
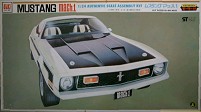
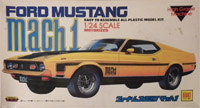
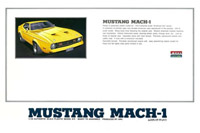
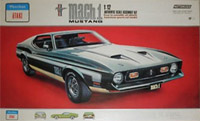
Otaki offered a '71 Mach I in 1/24 scale, with catalog number OT3-46, in at least three boxes.
Arii reissued the Otaki model in at least three boxes (catalog numbers A572, 31032 plus unknown). I took a peek at this model. It is motorized, so the chassis is pretty bad, and there is no engine (despite claims on the box!). The doors can be opened. The body looked a little squarer and flatter compared to my MPC model, but I did not compare them side by side, and I can't say which is the more accurate of the two. The windows are inserted from the outside, which I usually like a lot better than 'internal' windows that recess too deep. The hood has an error: it connects to the windscreen, whereas the real car has a space between the windscreen and the hood, where the wipers hide. The 'Mach 1' logos on the sides and trunk are molded as raised items, but they are stickers on real car. I did not see any decals by the way. Here's a build report by Hans Reggelsen on the Britmodeller forum.
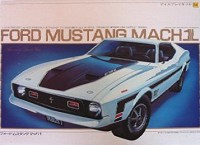
Otaki made a 1/12 '71 Mach I model. It was motorized and had working lights. It was also issued with a 'Peerless-Otaki' logo on the box. Peerless was a Philadelphia-based US importer of Japanese kits. The catalog number of this version was 1201.
|
| 1201
|
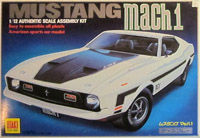
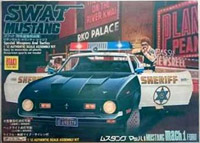
Otaki also made a simplified version without motorization or lights, issued as OT3-58. Catalog number OT3-133 was a 'SWAT Mustang Mach 1' with Sheriff decals and a lights bar on the roof. Catalog numbers OT3-36 and -92 are also reported, but no proof of their existence was found so far. Three versions of OT3-58, plus OT3-133 are shown here. Otaki stopped production in 1985, with most of the tooling going to Doyusha and Arii.
| 
| 
| 
|
| OT3-58
| OT3-58
| OT3-58
| OT3-133
|
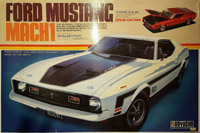
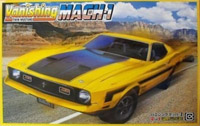
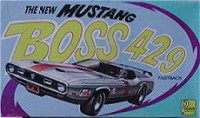
Doyusha reissued the Otaki model as DBS-8. Jordan White reports in his article 'The 1/12 Doyusha Kits - A Look Back' that the Mustang had opening doors, trunk and hood, working suspension, posable front wheels and plenty of detail. Because of the motorized, the engine is slightly overscale and square to make room for an electric motor. The differential has the same problem, to house the gears. Six AA batteries were placed in the gas tank. The instructions describe the engine as a 7030 cc 429. The kit lacks the front or rear spoilers of the Mach 1 version. A version with pale green plastic and a version with yellow plastic were issued. At least one version of the model also had working lights. Benjamin Filer reports that the body proportions are odd, mostly because of the roof line that is too low. Also shown below is one of the other issues, 'Vanishing Twin Mustang Mach 1' (1042).
| 
|
| DBS-8
| 1042
|
a Palmer 1/25 model, which has been described as a joke, a caricature and a waste of money. It has a multi-part body, like the earliest car kits, before slide molds were developed. In this case, a roof piece is glued to an upper body part, to which the sides are glued. It seems Palmer also had a 1/32 scale version.
| 
|
| ?
| ?
|
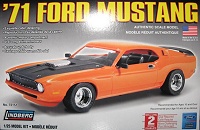
Lindberg reissued the Palmer model as a '71 Mustang street machine (72151). This model has a one-piece body however, so either it's not a reissue of the Palmer model, or the Palmer model has a one-piece body too. Here's a finished model by 'Mustang Madness' on the MCM forum, with some comments by readers on the model's problems.
|
| 72151
|
Also reported is a Lindberg 1/32 '71 Convertible (catalog number 142).
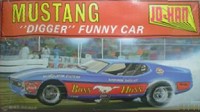
Jo-Han offered (and still does) a '71 Mach I 'Digger' funny car (GC-2100).
|
| GC-2100
|
Revell offered a '72 'Blue Max' funny car, catalog number 85-7661 and possibly others.
Motor City Resin Casters offers resin transkits for the following Mustangs:
'71 Mustang Grande includes body, flat hood, valance panel, grille and bumper.
'71 Mustang Mach 1 Coupe includes body, grille and bumper.
'72 Mustang Grande includes body, flat hood, valance panel, grille and bumper.
'72 Mustang Spirit includes body, grille and bumper.
'73 Mustang Coupe includes body, flat hood, valance panel, grille and bumper.
This Ford Mustang model cars site has an even more extensive listing of Mustang kits. This page by Jan Kozala has another listing of '71-'73 kits (his site has other Mustang kit lists too). The Japanese 'Route 66' site has not just one but two pages with Mustang box art.
In the mean time I obtained an original AMT 1972 issue. Its quality is comparable with the MPC kit in my opinion. Both kits have their strong and weak points, but they don't differ much in quality and shape. The Arii model could be pretty good too, but it is motorized and I'm not sure yet of the body shape, it looks flatter and squarer. I will happily finish my MPC Mustang, it's close to be the best available in my opinion.
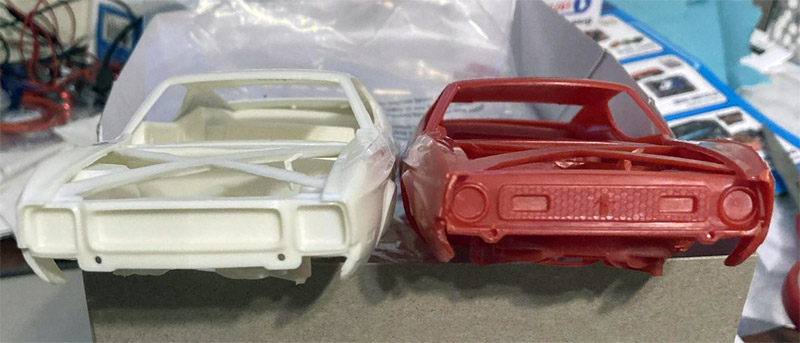
Photo comparison of the MPC and AMT models
As an experiment, I photographed the MPC '73 (sand color) and AMT '72 (white color) models in exactly the same position, to compare the body shapes.
Next I made animated GIFs of each set of photos (using EZGIF.com), that alternate quickly between them. Any shape difference will then become clear.
In this view, I noted the following differences:
the AMT windscreen is angled slightly steeper, and slightly longer at the top
the AMT A-pillar is thinner and more accurate, and has a slight curve
the upper edge of the AMT door opening is positioned 2 mm higher than the upper edge of the windscreen, on the MPC model this is around 1 mm. MPC is more correct in that respect
AMT's side window is about a millimeter taller at the rear
AMT molded the NACA ducts in the hood 2.5 mm further back, and they are shallower and closed. I measured some distances in a photo, and found that the front edge of the NACA openings are at 33.0% of the local hood length. The length of the inlet piece is 2.75% of the local hood length. That shows that the MPC inlets are 2.5 mm to far forward, and the AMT nearly spot-on (0.5 mm to far forward).
AMT's fold in the sides is more restrained than on the MPC model, and faired in the sheet metal with a radius. The MPC has sharp folds, and that's what the real car shows
the AMT fender flares are also faired in with a radius, but it should be more of a fold like the MPC model
AMT has raised trim strips on the lower body, MPC forgot them. The Mach 1 version had them to cover the factory paint break (earlier I reported the opposite)
the 'Mach 1 Mustang' logos the front fenders are molded raised on the AMT, whereas it is a sticker in reality on the 1971 and 1972 Mach 1 cars. Most other Mustang models have a raised 'Mustang' script, as does the 1973 Mach 1
the AMT grille and headlight area is modeled differently, likely more correct than on the MPC model
the AMT hood has no vent slots near the windscreen, which is correct
| 
|
| A rear three-quarter view shows the following:
the AMT windscreen is longer, and the roof subsequently shorter
the AMT rear window has too large corner radii at the top side
reportedly the AMT rear panel has been contoured wrong, but I did not add it to the model for these photos
the horizontal surface of the rear fenders is narrower on the AMT model
the interiors visible through the rear windows are quite different
|
Another but lower rear three-quarter view shows:
the 'character line' fold extends lsight further into the rear fender on the AMT model
the edge of the nose dips a little lower on the MPC model
the nose is raked forward a bit more on the AMT model
the difference in the side window height is well visible in this view
| 
|
| A front three-quarter view:
the headlight and grille area of the MPC is 1 millimeter taller than the AMT version. The headlight buckets are quite large on the MPC
the grille and headlight area are modeled differently, AMT is likely more correct than the MPC model
the sides of the AMT model are less rounded, so the MPC is narrower measured on the bottom edge
the upper edges of the windscreen and side window show a substantial jump on the AMT kit, and that definitely not correct
|
1971-1973 Mustang references
I found a fantastic 1971 429 Cobra Jet Mustang site, that has all the information I ever wanted to know, and more. The Paint info page is extremely useful for modelers.
The Mustangs and more site has a forum section with a 'Scale Model Collectors' department.
Scale Auto Enthousiast magazine had a 9-page article on building the MPC 1971 Mustang in the July 1997 issue.
Modeling links
Return to models page