Verlinden 1/72 MD-3 'Mule' deck tractors
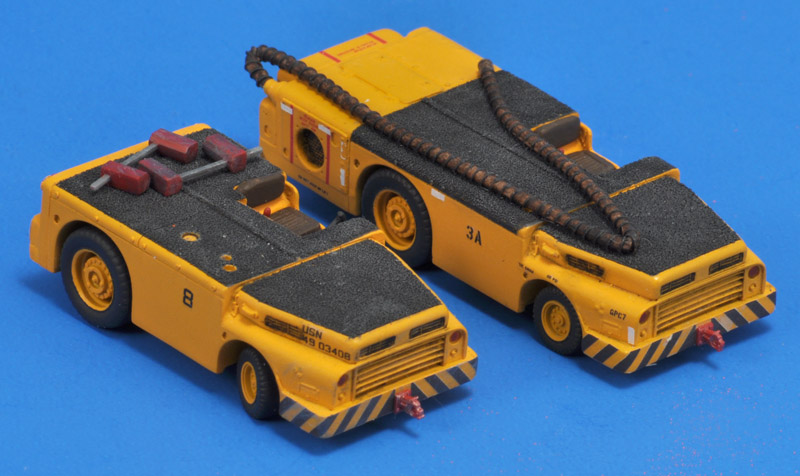
| I own just a few Verlinden items, but I always loved this little tractor kit. The box shows three versions, but contains only one kit. I decided to build a short and a long one, a bit in a hurry, for a club project, revolving around fictitious shop displays for the 2023 Euro Scale Modeling event.
|
History
The Mules used to be known as MD-3's, but are now officially known as the A/S32A-31. Quoting from NAVAIR (Naval Air Systems Command) 19-40-44:
"The MD-3 Tow Tractor is a pneumatic tired, diesel powered tractor intended for towing all carrier based aircraft aboard aircraft carriers. The MD-3 tractor is powered by a 100 horsepower diesel engine and has a draw bar capacity of 8500 pounds at an approximate speed of 1 mph on a dry level concrete surface. The MD-3 includes a quick detachable unit with the capability of starting conventional and impingement type air-starting aircraft and providing AC and DC electrical power to aircraft while to towing. Hydraulic power steering is provided to permit maneuvering in confined areas. The tractors have a low silhouette to permit operation under wings of parked aircraft."
"The tractors originally came into service in the early 1950's and were manufactured by Frank Hough Corp. Around 1952, the Frank G. Hough Company was bought out by International Harvester which was later bought out by Tenneco Incorporated and merged with its then subsidiary, Case Corporation. The tractors originally procured in the 50's were SLEPed (Service Life Extension Program) in 1981 and reidentified as the A/S32A-31. This SLEP was essentially a re-engining of the unit (new engine and transmission), along with some brake components and a general overhaul (stripped all the way down and repainted)."
I researched the MD-3 Mules and their models, and made an extensive webpage with around 100 photos showing the various versions: 'Mule' deck tractors in 1/72 scale
Construction
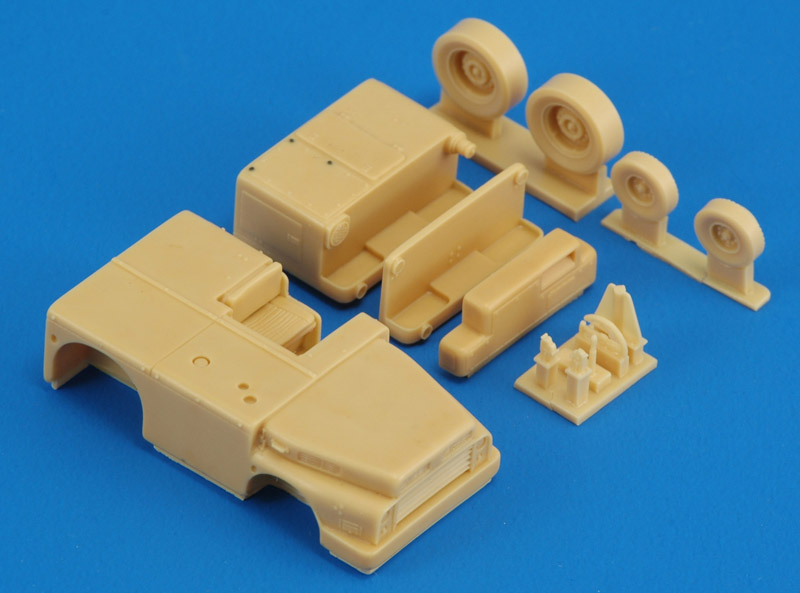
Here's what you get: 14 resin parts, a dry transfer decal sheet and instructions. There are no photo-etched parts. I repaired a few air bubbles that occured at rivet / bolt positions on the 'huffer' extension. They are visible as brown dots. The tires lack thread, and smooth tires on a wet and slippery flight deck makes no sense. Also, the rear tires should be double ones.
Since my plans would require at least three kits, and I only ever saw the one that I bought, I decided to work with resin copies. They are for my own use only, but still it's on the edge of what's legal. The materials were more than the cost of a new kit, so a financial gain was absent. Another factor was that the original kit was dear to me, and I wanted to preserve it in its as-bought condition.
| 
|
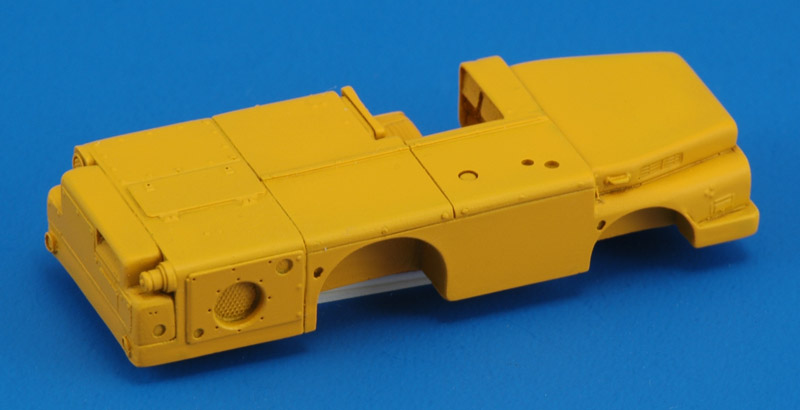
| I started with the version with the 'huffer' extension, and the 'hot air supply' extension on top of the bumper of that again. The height of the 'huffer' extension was about 0.5 mm less than the tractor, so I added Apoxie to the lower side to even it out. Plastic sheet / strip may have been a better choice though. The 'hot air supply' extension was about 0.6 mm wider than the 'huffer' extension, so I cut it with a JLC saw in two places to remove some material to reduce the width. A coat of Revell chrome yellow (310) showed that assembly had been mostly successful.
|
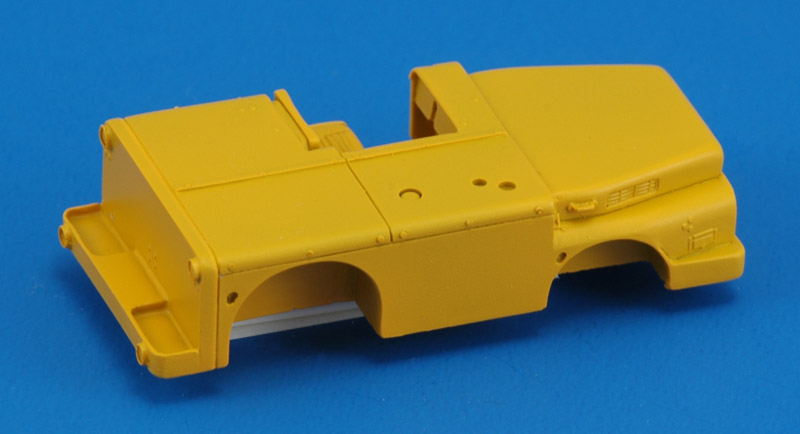
| I also built a short version. I increased the thickness of the plate that attaches to the rear side with 0.5 mm plastic card. If you look closely you can still see it through the paint. I did this since this is a ballast plate, and on modern white Mules it is much thicker. Since I had no good photo of a short yellow Mule, I guessed the thickness.
| 
|
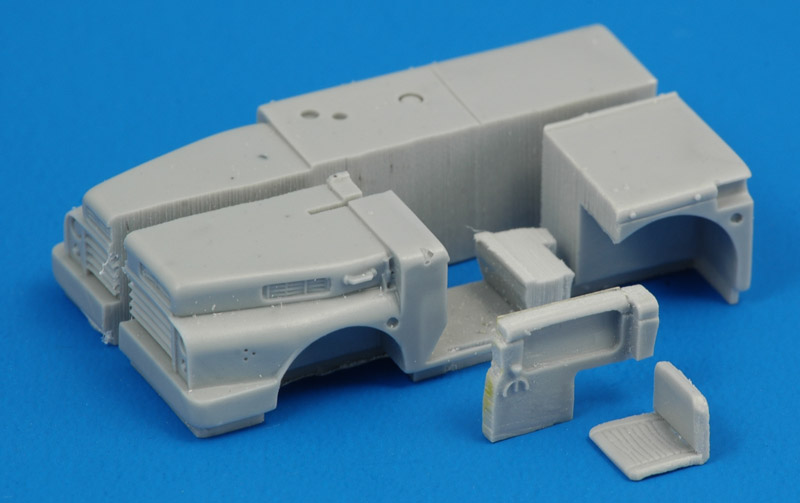
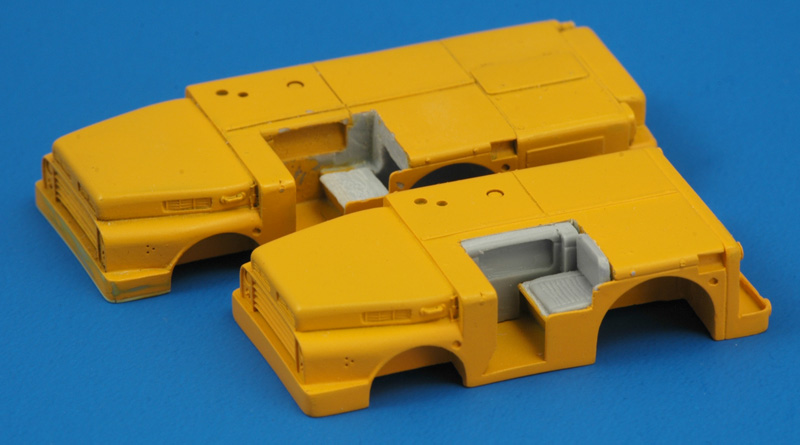
| Another known problem of all Mule kits is that the driver's cabin is too wide. Alex Scale Aircraft Modeling says it's 36% instead of 52% of the width. I measured the Verlinden kit at 24.2 mm width, with a cabin width of 11.1 mm which is 46%. I decided to cut up another casting to obtain a right-hand cabin wall, that I could use as an insert. I aimed at a width of approximately 2 mm. I also managed to cut the seat from this casting.
|
Before test-fitting the displaced cabin wall, the seat of both kits had to be removed. I did that by using a drill press as a machine tool, with my hand providing XY-movements, and stacked pieces of plastic card providing Z-axis control. It worked well, except that I machined into the wheel well.
In the short Mule I positioned the parts described above. The new cabin width was 9.2 mm, or 38% of the vehicle width, close to the figure of Alex.
| 
|
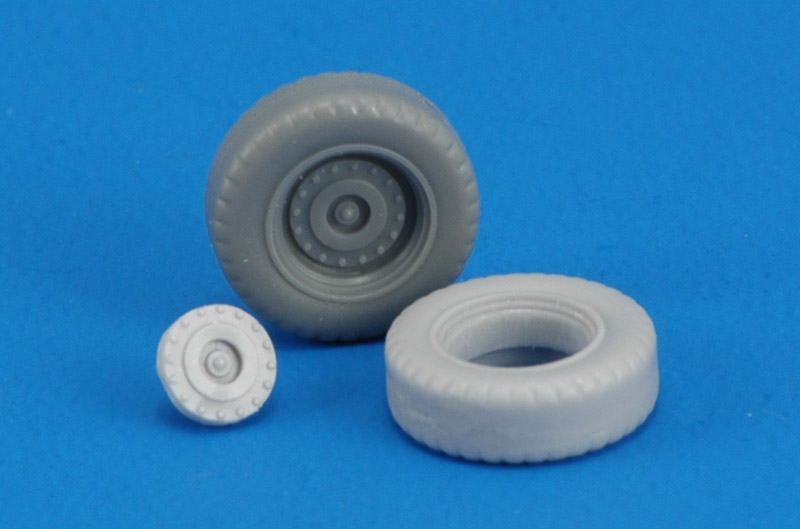
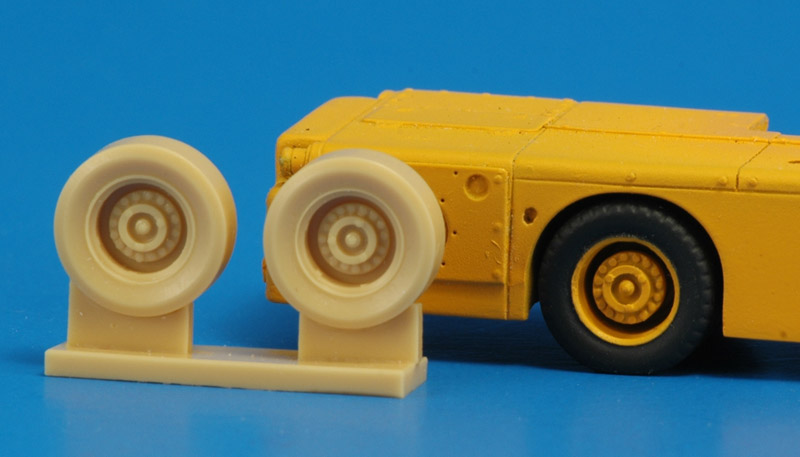
| I made resin copies of the Fujimi wheels, that at least show some thread. In one wheel, I drilled out a hub, to create the much deeper wheel that photos show. From another I cut away everything to end up with the hub only. Next is casting another wheel, to make a double wheel set.
The end result is a lot better, but it still only partly resembles the real wheel and tires. Also I see now that the Fujimi tire was a bit too wide, leaving too little space for the differential. But you don't see that in a normal viewing of the model, plus none of the other models has a detailed lower side.
|
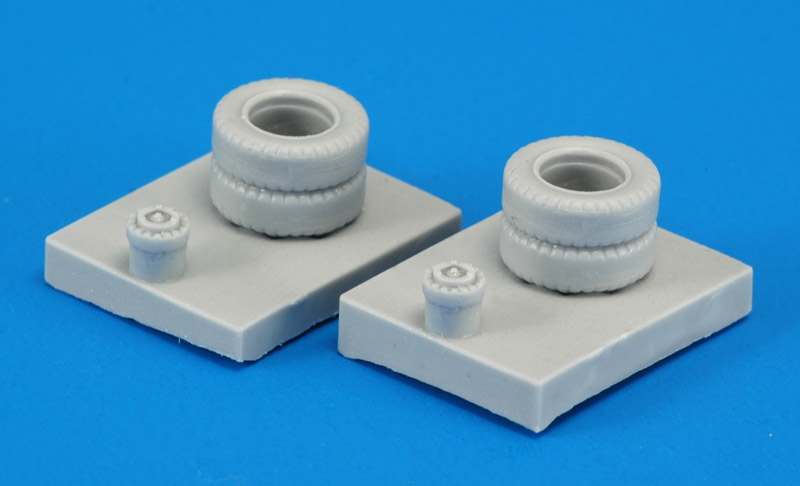
| Using resin copies I made a double wheel set, with a deep rim. The next step was to cast copies of that again. I also cast copies of the hub of the Verlinden wheels. If you're building a Mule too: I'm offering these wheels for sale.
| 
|
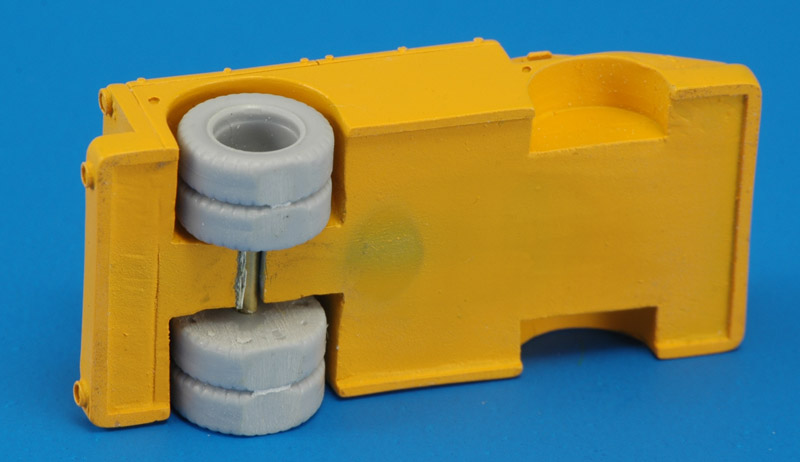
| I glued two copies on a 1.5 mm axle, and fitted that in a slot in the body casting. I made the slot oversize and then fine-tunes the axle position with bits of 0.1 mm plastic card. The end result was 2.5 mm ground clearance, that agrees pretty well with the published figure.
|
The hubs were glued with epoxy, allowing plenty of time to center the hubs nicely inside the wheel. I used a 7.75 mm circular mask from Artid Decals to mask the wheel and paints the tires. All photos showed black-ish tires, so I used Revell 9 coal black. This photo shows the original Verlinden and modified wheels.
The Fujimi front wheels received the same treatment.
| 
|
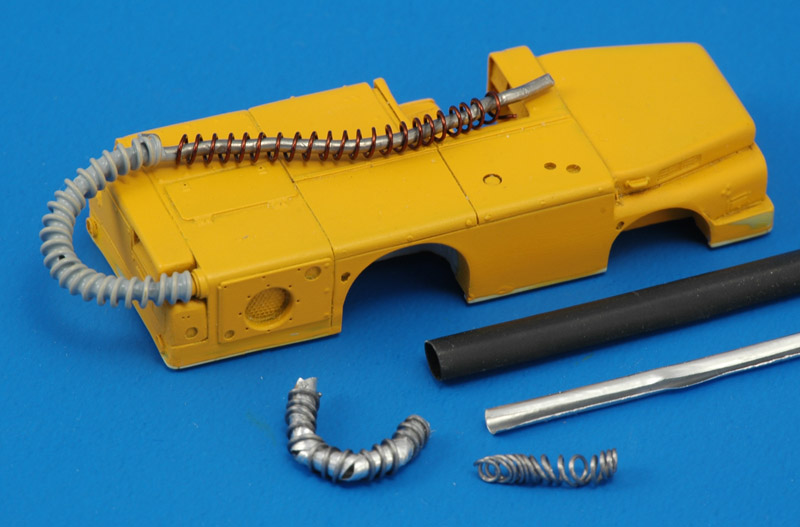
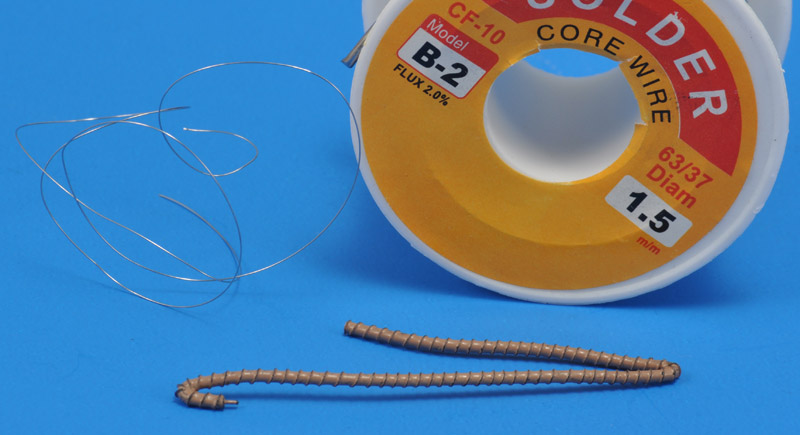
For the air supply hose I tried various things. The Verlinden manual does not give a diameter, but it does give the length as 130 mm. I tried 1.5 and 2 mm core diameters.
First I tried to make a thin-walled tube (that could be flattened) from thick alumnium foil, by winding a narrow strip of it around a 2 mm wire. I wound 0.4 mm lead wire around it, and applied two liberal coatings of thin CA glue. The main problem was that it would burst open when bent. Another major problem was keeping the spacing even between the lead wire windings. This material is so soft that you often deform it unintentionally.
Next I tried 0.5 mm brass wire, wound around a 2 mm wire. The resulting 'spring' could be extended with a nice even spacing between the windings. When I replaced the winding core with 1.5 mm solder, I had something that started to look right, and that could be bent into a natural shape. I dipped it in thick enamel paint to fill all the gaps, and that made it even better. The only drawback is that it looks fully inflated, whereas the real thing looks a bit 'limp' when not inflated.
Later again I found some 0.4 mm copper wire, that slightly improved the appearance again. And I bought 1.5 mm diameter solder. Later I tried 0.2 nickel steel wire, which was another improvement. Slowly but surely the air hose became more subtle :-)
Here's a Navy MD-3 Mule navy tractor air hose discussion on Hyperscale.
| 
|
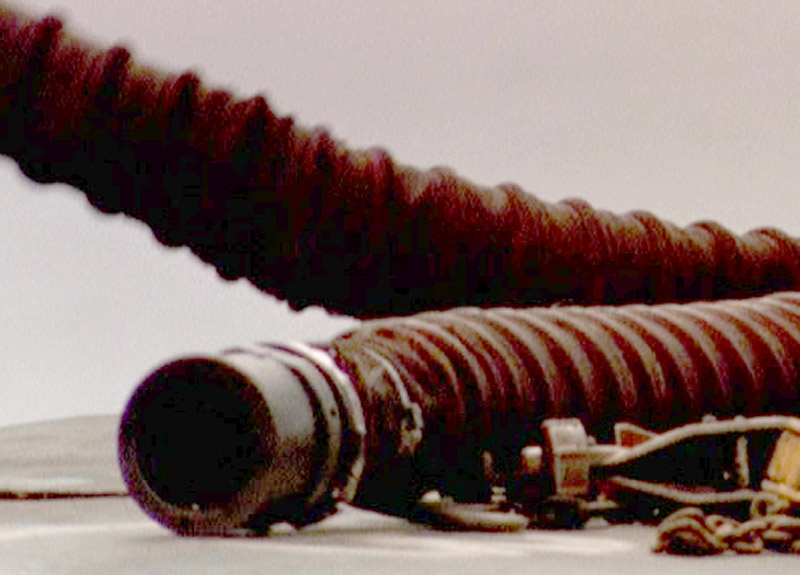
| I could not find a decent picture of the nozzle, until I played 'Top Gun' on DVD, and spotted the nozzle in the intro. I changed some settings to see the most of the nozzle.
|
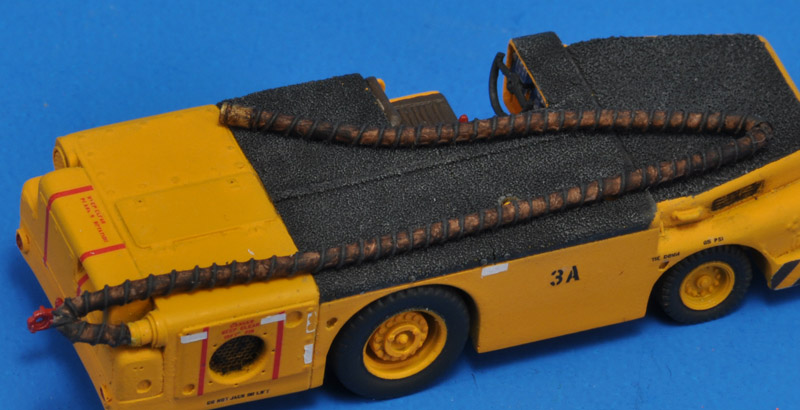
After the experiments, I decided on 1.5 mm solder plus 0.2 mm nickel steel wire. The pitch of the wire is 2 mm, but I think 1.5 mm would have been better. I painted it MRP-103 FS 30219 to simulate the hose's fabric, and drybrushed Revell 9 coal black to make the reinforcing wire black. It needs more drybrushing.
Solder gave me the interesting option to flatten it and fold it sharply, just like the real hose does, collapsing the hose. A drawback it that the fold is really weak, and could break easily. A repair would be very difficult.
| 
|
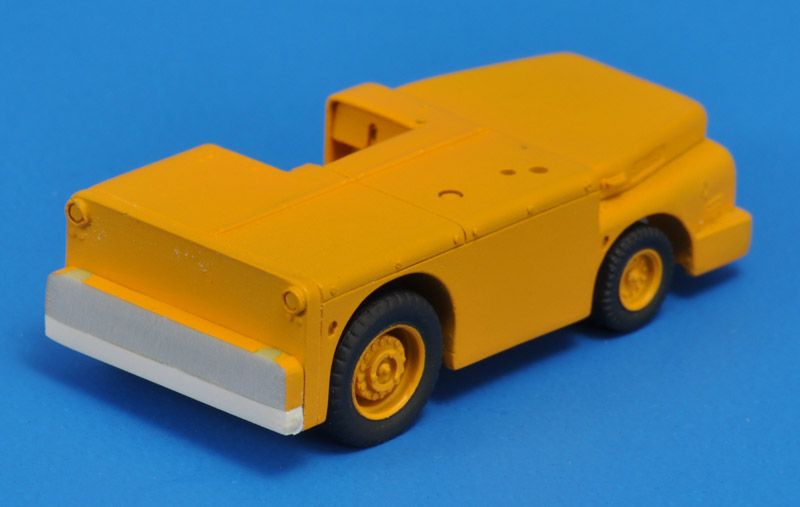
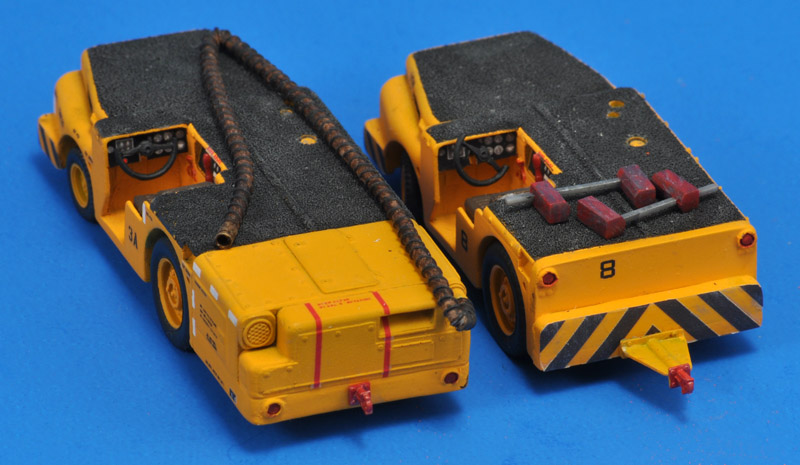
| After doing more research, I found out that the rear attachment of the 'short' tractor needs to rotated 90 degrees, occupying half of the height of the rear side. I added a 2x2 mm square rod at the lower side. But: what a strange mistake by Verlinden! Fujimi copied it, BTW..
| 
|
| I made a new master, and cast a few resin copies.
|
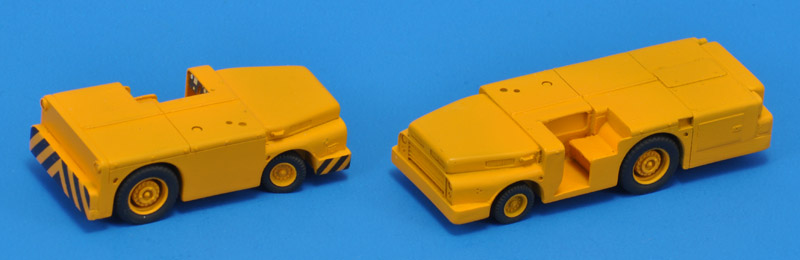
| At this point I mounted the wheels on both tractors. The short tractor got steered wheels, the long tractor has straight front wheels.
| 
|
Painting and decals
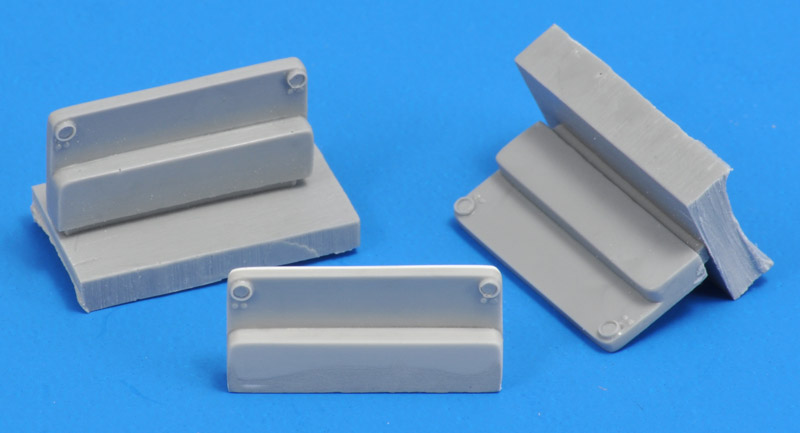
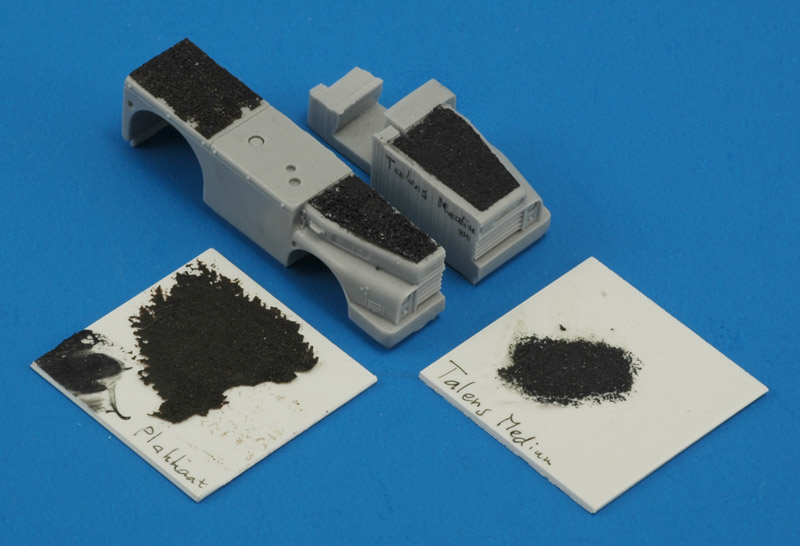
I tried two grit materials for the anti-slip coating. On the back side of the half casting sprinkeled solid glass spheres (max 0.15 mm) in brown gouache paint. After a bit of drying I painted mottles of black gouache over the glass spheres. The effect was out of scale but probably acceptable. On the front side I tried 'birdcage sand' in a similar manner, but it was even more out of scale. On the quarter casting I tried 'Talens medium' (I think it's alkyd paint without pigments) as the bonder, and that worked a lot better, since the goauche started peeling badly after a few days. The pieces of plastic card served as tests for the attempts on the castings.
After another photo study of real Mules, I had to conclude this is not the way to go.
| 
|
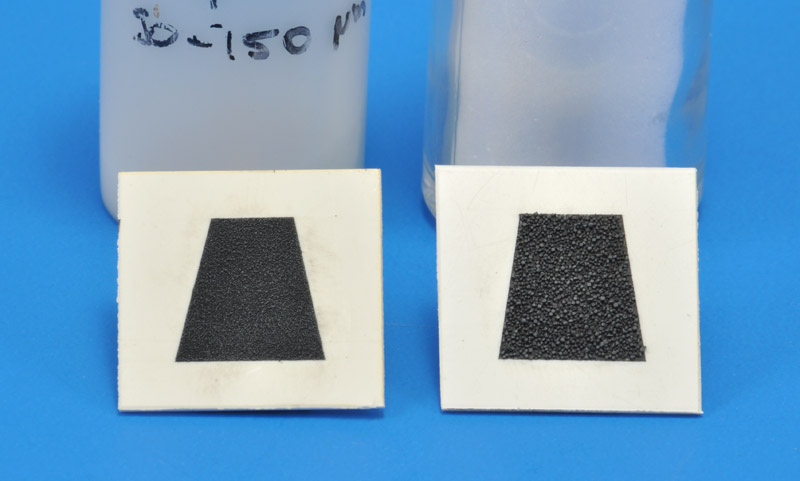
| I made more test pieces, switching to enamel paint, for better adhesion. I masked an area roughly comparable to the hood, for scale effect, then painted a wet coat of Revell 9 coal black. The areas were then sprinkled with glass spheres (80-150 micrometer) and ordinary salt, and again painted. After drying I did a bit of dry-brushing with Humbrol 140 medium grey. Glass spheres looked best, I concluded.
|
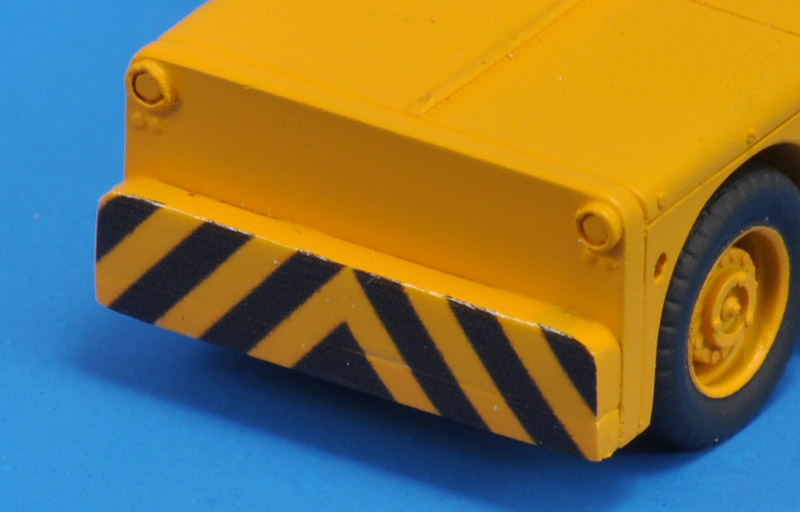
| Here's a test-fit of the custom decal that I designed for the front bumper. It fits nearly perfectly.
| 
|
| Another test-fit of the custom decal that I designed for the new rear bumper. It too fits nearly perfectly.
|
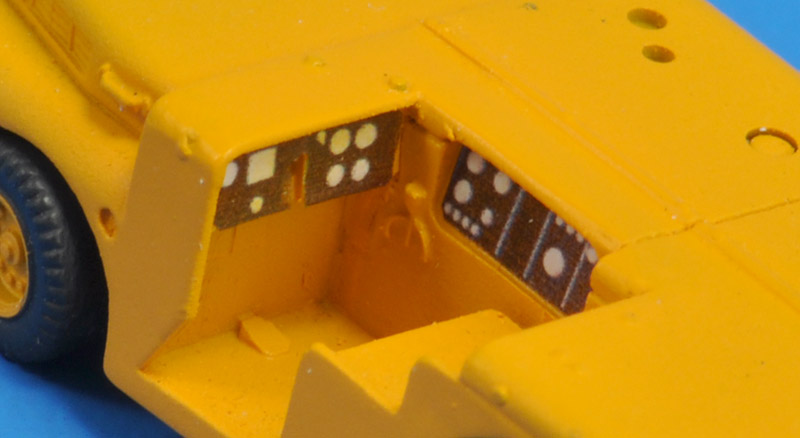
| The instrument panels of both the Verlinden and Fujimi differed in size, and did not correspond to the openings in the Verlinden kit. I designed simplified instrument panels for test fitting purposes. I will make minor size adjustments.
| 
|
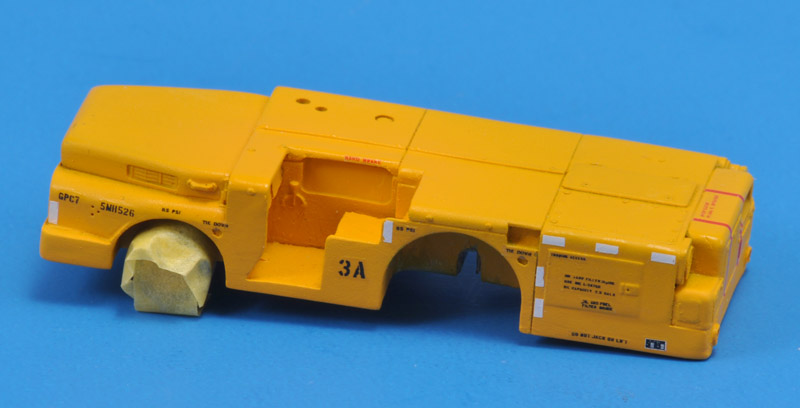
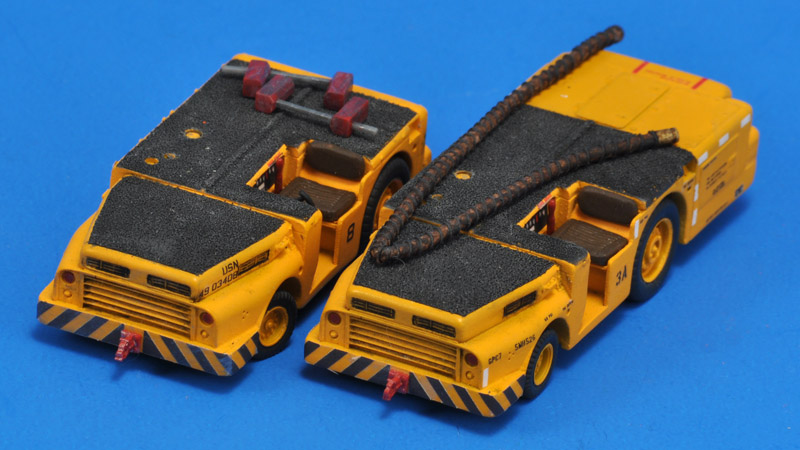
| I printed the small markings and stencils on my broken Alps MD-5500. I selected one Mule (serial number 5MH526) as my prototype, mostly because it had the most readable stencils. The smallest stencils are 0.35 mm tall, and are still mostly readable. The white conspicuity stripes are MicroScale White Trim Film. The decals still have to be overcoated with a clear.
|
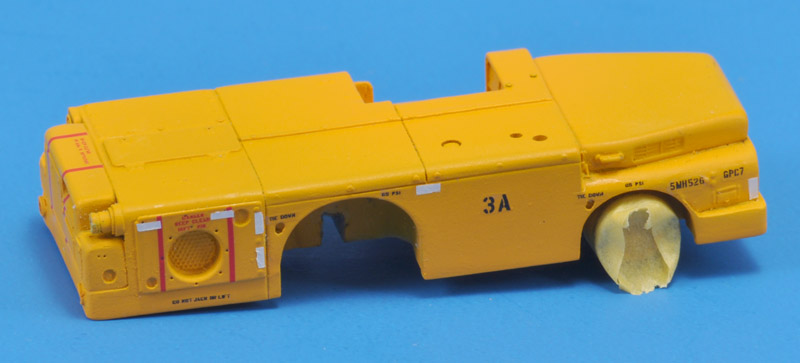
| I had no photo of the right side, so I based my markings on various other Mules. Initially I printed the red stripes in the 'classic' Alps way: 3x white, 1x yellow, 1x magenta. Then I realised that 1x magenta would have the same effect.
| 
|

| For the short Mule I selected one from the mid-sixties, at a time when they had very few markings, and a different serial number system.
|
I applied the anti-slip coatings in two stages, first the hood, then the main body, in order to have a slight demarcation between the two areas. The edges of the main body coatings were different between the two Mules.
I used black artist oil paint to fill in the cooling openings in the hoods. The roughness of the Revell enamel paint created some flowing out of the paint, but it could be touched up.
| 
|

| I used my own decals for the instrument panel, and the side instrument panel. Next, the steering wheel, handbrake handle and seat cushions were added. The seat cushions were painted with a mix of Humbrol 10 and 62.
|
| slang
| 
|
Finished models
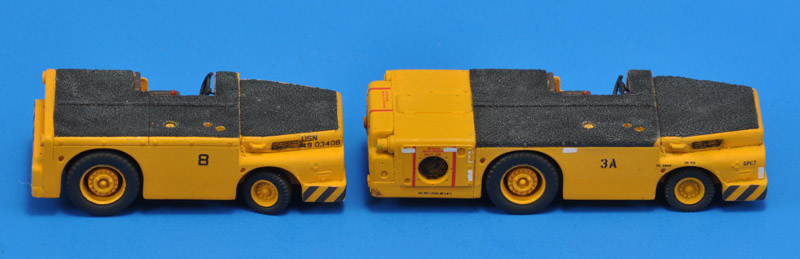
| My two Mules were finished rather quickly, for a club project, so they are not my definitive Mules. But still I like the result. Due to the grainy enamel paint I didn't dare to apply a wash, fearing it would stain the models all over.
|
|

| One of the main lessons is that is that no two (real) Mules are alike. It looks that every carrier wing had its own standards, and within that standard there was a lot of freedom. Finding more than one photo of a single Mule will be very difficult, so a model will usually be a combination of a left and right side photos of two different Mules.
|
| I slightly regret the two 1:1 Mules that I picked to portray. They both had small side numbers, and no repeat of that number on the anti-skid coating.
| 
|
| I think I'll build a few more in the future!
|
Shop display
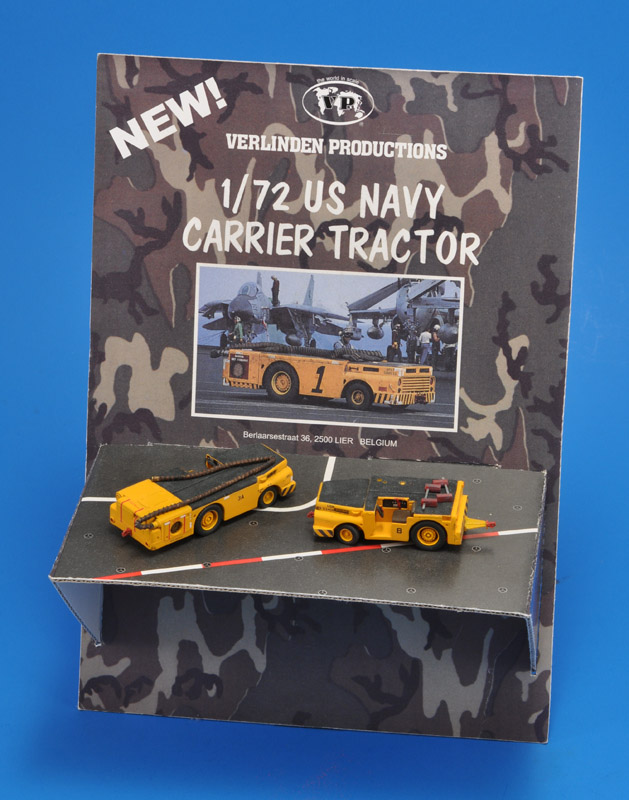
| I built these two Mules specifically for our club's fictitious shop displays display at the 2023 Euro Scale Modeling event. To me, it seemed logical that a company like Verlinden would also produce shop displays to promote their latest kits in shops. As a background I used the camouflage pattern as used on Verlinden packaging, scanned from the back side of a catalog. I also found the right fonts, and designed a tilted panel with some kind of platform attached, suggesting something aircraft carrier-like. After printing and building the first version, I noted some problems, and enlarged the design a bit.
| 
|
Links
Return to models page