![]() Tomix turnout
control system
Tomix turnout
control system
> main > model > control > tomix control system
> accesory control > train control
Tomix offers a wide selection of turnouts, with new turnouts announced for release later this year. To control the turnouts and to route the track power, Tomix offers a number of switches. Described below are the switches and their application.
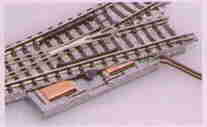
Tomix turnouts are normally power-routing, which can be turned off with a small switch built in the turnout. Just switch the power-routing on or off with a small screwdriver, the swith is in the diverging track.
The point motors need a directional DC pulse, which is
provided by the Tomix switches, but when you are a little more
skilled you can use Kato or LGB switches as well. For more
advanced control you can use DCC accessory control units, be sure
that these are compatible with LGB. When programming your DCC
units, you should program these as if your turnouts are LGB.
Tweaking is needed to find the best performance for a DCC
accessory control unit.
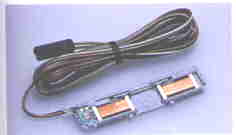
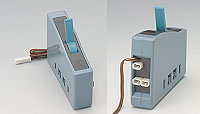
 Tomix
point motor (left) and application (right).
Tomix
point motor (left) and application (right).
The point motors themselves are very simple: just 2 flat coils wired in series with a space in between. When inserted in the turnout base, a small permanent magnet attached to the turnout mechanism fills the space between the coils. When current is applied (switch is thrown), a magnetic filed is excited in the coils, this magnetic field (force) pulls the magnet towards one of the coils. When the switch is thrown again, the current flows in the opposite direction, and the magnet will move again. Tomix (and Kato) turnouts are self-locking by means of a spring inside the turnout machanism.
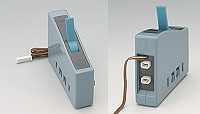
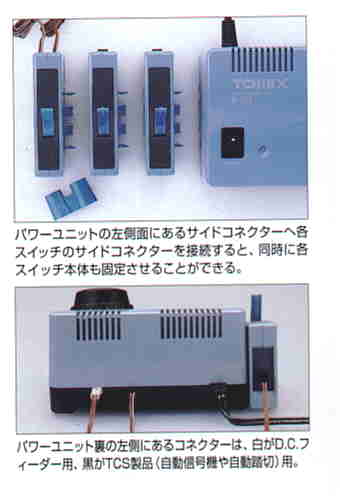 Tomix switches
simply plug into the train control unit. The blue bar connects
the handles of two switches when you need to operate these
simultaneously.
Tomix switches
simply plug into the train control unit. The blue bar connects
the handles of two switches when you need to operate these
simultaneously.
Introducing the Tomix switches
 Tomix
5531
Tomix
5531 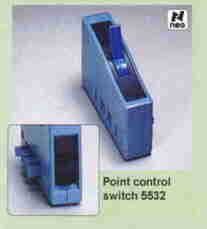 Tomix
5532
Tomix
5532 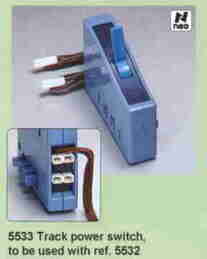 Tomix 5533
Ref. 5531
Tomix 5531 is the basic type. It can control one turnout, the cord just plugs into the back of the switch. The switches themselves plug into the left side of a Tomix train controller or the adapter box ref. 5500. You can use an extension cord ref. 5814 to make longer cords. Another option is to cut the cord attached to the point motor and splice in any desired length of 2-wire cable. This requires some electrical skill as soldering and using shrinking foil.
Ref. 5532
This switch looks similar to ref. 5531, but can operate two turnouts at once. On the back of the unit there are two sockets, instead of one. You need this switch when you have a passing loop at a station or use this switch with a normal crossover or the scissors crossover.
Ref. 5533
This switch does not control points, but switches track power. It can be used with reverse loops and it is needed with the scissors crossover. A joining bar is provided with this swith, to connect the operating levers of two switches.
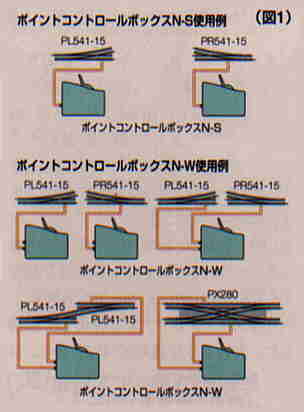
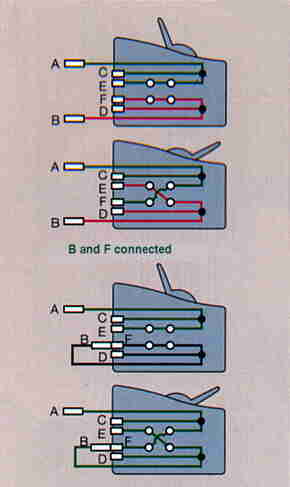
Application examples (left) of the different Tomix turnouts switches (ref. 5531 and 5532) and he internal wiring of ref. 5533 (right). The socket labelled 'F' accepts the plugs 'A' or 'B' in both normal and upside down positions. This ensures a polarity change, which is needed in reverse loop situations.
Ref. 5535
This switch is made especially for reversing sections, like return loops, reversing wyes etc. This switch can switch the polarity of the track power indepently from the polarity of the controller. Points need to be switched by point switches, ref. 5531 and 5532.
Tomix ref. 5535 switch and its function: polarity change. (photo and schematic by Tomix)
Ref. 5536
This switch is new and can be used to switch track power to sections that could be 'locked out' by the power routing Tomix turnouts. Like all Tomix switches it has busbars to power other switches connected to its left hand side.
Tomix ref. 5536 and its
internal wiring. This switch is useful in yards, signal
controlled sections etc. Use together with gapped track pieces,
power-routing turnouts and insulating rail joiners. (photo and
schematic by Tomix)
Alternative controls
There are alternatives if you don't want to use these Tomix switches. All alternatives include a little handywork and are best suited for permanent or semi-permanent layouts.
Alternative # 1 Peco passing contact switch (Peco PL-26)
This switch has a single-pole single-throw contact that is made in such a way that it gives a pulse action. You can use these switches, which are a somewhat cheaper than Tomix' to control Tomix turnouts. Use of Peco PL-26 takes a little knowledge of electricity, soldering and wiring.
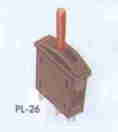 The Peco PL-26
passing contact switch.
The Peco PL-26
passing contact switch. 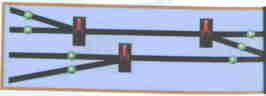 A control panel with Peco PL-26 switches
1st. You need to build a special power supply. In electrotechnical terms, the power supply you need will have to give two outputs: a positive and a negative 'half-wave', which can be achieved by the use of two diodes. Use one lead of the transformer output as 'ground' and attach the two diodes to the other transformer output. Wire up the diodes in 'anti-parallel' fashion. One diode should have its marker ring at the transformer side, the other diode should be placed the other way around. The free ends of the diodes are the outputs of the power supply. You wire a 1 Amp fuse in series with the transformer, but it's not really needed when you use a transforner with a built-in overload protection circuit.. Use diodes that can handle at least 1.5 Amps. Another option is the use of an old PC (AT version!) power supply or an old power supply of an HiFi amplifier.
2nd. Wire up your point control circuit. Cut-off the plug from the Tomix point motor, then connect one lead to the ground terminal of the power supply. Connect the other lead to the 'wiper' side of the Peco switch (centre terminal), then connect the two other termals of the switch to the output terminals of the power supply. Then test function of the circuit. If the action of the lever is the opposite of what you want you can either change the power supply outputs or simply turn around the switch. Peco switches can be build into control panels with a panel mountin plate (PL-28) or build into a console (PL-27) which accepts 6 switches. Other switches in the Peco range are a single-pole on/off switch and a single-pole changeover switch. Some accessories complete the range, like mounting plates, a console in which you can mount switches, a joining bar and crimp terminals which save you soldering wires.
 The console in
which you can mount Peco switches
The console in
which you can mount Peco switches
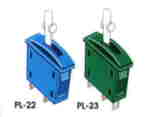
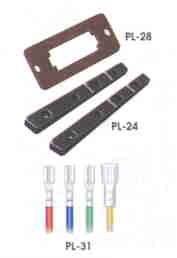 The
other Peco switches and some accessories. Peco switches can be
wired using crimp terminals, so no soldering is needed.
The
other Peco switches and some accessories. Peco switches can be
wired using crimp terminals, so no soldering is needed.
Alternative # 2: DCC
This is the 'high-tech' approach, which is best suited for DCC controlled layouts.
1st. Select and purchase a suitable DCC accesory decoder. Choose one that can drive LGB turnouts. Some decoders are available in kit form, which saves you money, but requires some skill to assemble. If you have a little experience in slodering cirrcuit boards, you can successfully assemble a decoder kit. Littfinski (LDT) from Germany offers the 1-DEC-DC decoder in kit and ready-built form, one decoder drives 4 point motors. A friend of mine had tested this decoder successfully and the Littfinski point-motor decoder is thouroughly recommended. If you use the Lenz LS-110 or LS-100 accesory decoder, you need special 'EPL' adapters. Lenz also has the LS-150 accessory decoder with 5 outputs which can drive twin-coil point motors, EPL point motors, stall motors (like the Tortoise), LEDs and lamps. Digitrax offers two suitable decoders, DS-51K and DS-52K. The DS-54 could also be used, when fitted with adapters. CVP offers a decoder with dedicated outputs (AD4MC), which is available in both kit and ready-built varieties. NCE offers the Switch-Kat that can handle 1 Kato or Tomix point motor. No doubt that this is the most costly option. IMHO, Littfinski and CVP offer the best value-for-money.
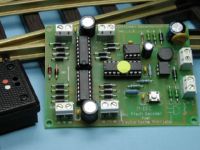 Littfinski 1-DEC-DC DCC point motor decoder (photo: LDT)
2nd. Wire up the decoder: Follow the instructions of the manufacturer. Read the manual first! Cut off the plug of the Tomix point motor, strip bare the ends of the cable and connect these to the output terminals of the accesory decoder.
3rd. Program accesory decoder following the manufacturer's instructions. You need to do some experimenting in finding the right 'pulse time' for the point motor. Try values between 0.2 and 1.0 seconds. Longer times mean that more power is applied to the point motor. This may result in damage by overheating. Avoid long pulse times and continuous power to your point motors.
WARNING:
These do-it-yourself projects also mean do-it-yourself warranty. The construction of power supplies using non-cased transformers is something for qualified electricians! If you're not a qualified electrician, use a cased transformer with an overload protective circuit. Always work following the local electrical code. The author of these pages is NOT responsible for any injury, accident, loss or any other damage that may be caused by following the descriptions above.
< Back to the Tomix control overview
< Back to the model
railway control page
 Modelling
  Layouts
  Modeller's
Corner
Modeller's
Corner  Train
Simulators
Train
Simulators  Various