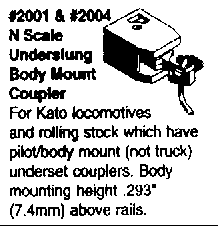
 .MT #2001 and #2004 are
virtually identical, they differ only in shank length
Kato MT conversions
> main > modeller's corner > couplers > Kato
Disclaimer: The Kato range referred to in these pages is the Japanese Kato range, not the US or international range. Other MT-couplers may be needed to convert these models properly.
Kato models are usually easy to convert, although I found out that there are 'more ways to skin a cat'. The most obvious solution is not always the best. As Kato is the Japanese agent for Micro-Trains, MT's couplers are listed in the Japanese Kato catalogue, but only a few of MT's extensive range. Many MT conversion kits are made for a specific manufacturer or even a specific model. Fortunately, it is possible to convert the complete Kato range with only 3 different MT-couplers. I went a bit off the trodden path by doing some conversions in a different way.
Kato locomotives are relatively easy, use MT #1128 (short), #1129 (medium) on older models. Kato recommends MT #1128 only for the vintage electrics, EF15 and EF57 classes and #1129 on all other stock except for the newer diesel and electric locomotives take MT#2001 or #2004 (as 2001, but 4 short couplers instead of 2 long and 2 short couplers). Conversion of Kato locomotives should be no problem if you read MT's instruction carefully, at least twice and if you make yourself known with the MT parts and construction of your loco. One thing to watch are the footsteps on Kato's electrics (EF81, EF64-1000, EF200, EF210 and EH500 classes, and class DF200 diesel). These break off easily, so be careful with filing when enlarging the coupler opening in the front skirt of the loco. The best MT-coupler for these locos is MT#2004, or the short couplers supplied in MT#2001.
.MT #2001 and #2004 are virtually identical, they differ only in shank length
Kato's passenger cars take the bogie-mounted MT #1129, or maybe MT #1128 when you have wide curves on your layout. Install as per the MT instructions and I expect no further problems.
The same applies to Kato's freight cars, usually they take MT #1129, but I used MT #1128 successfully on a Kato slidewall box-car. You need to file a small recess into the ends of the cars body. Disassemble the model first. The recess is very small, file in the center of the ends until the lower rib, that's all. This recess allows the coupler to swing out in curves. Please be careful with the plastic pins that hold the bogies.
Another option for box-cars is to use MT #1015, a body-mounted coupler. This conversion is a bit more drastic than the first one and needs a little more confidence. The advantage is that you can assemble the couplers in a seperate session and mount them on your box-cars later. Assemble the MT #1015 with the bottow lid upwards (not needed with the new #1015 design, which has a seperate shim) as per MT's instructions. Then file the recesses in the front ends of the box car's body, and then take off the bogies from the chassis. Remove the wheels from te bogies and cut of the drawbar and coupler completely, so that only the bogie bolster remains. Then mark the centerline on the chassis and mark the position of the MT #1015's coupler pocket. Use a centre-punch to make a clear mark. Then take the pin vise and the smallest drill from MT's tap and drill set. Drill holes in the chassis and the tap in the thread needed for the mounting screw. Again use the pin vise. I strongly recommend the use of a pin vise or hand-drill for drilling holes in the plastic chassis. Do NOT use a mini-power tool (Dremel and the like). These power tools are useful for many other applications, but are moving at a very high speed. This will cause lots of heat when drilling in plastic, the plastic will probably melt and the result is a disaster. So take a little time and use hand tools. Then screw on the MT #1015's, check operation and height with the MT coupler height gauge and the magnetic uncoupler ramp provided in the starter set, make adjustments where needed. Re-assemble your box car and you are ready.
MT #1015 is the most universal MT coupler. It will fit many of your models.
Pages compiled by Mark Veneman
Modelling
Layouts
Modeller's Corner
Train Simulators
Various