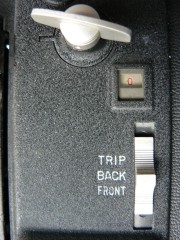
Unlike the regular "in-between-the-lens-shutters", the Kodak Aero 7 inch lens is a so called barrel lens, it does not has a build in shutter of its own. The shutter needed to make exposures is build in the back of the camera. It is a so called focal plane shutter and exist out of a rubber finished fabric with 4 rectangular openings or slits. The curtain is light tight and rolled on two rollers one on top and the other on the bottom. The last one is spring loaded. By winding the shutter the exposure time becomes visible in the little window next to the winding key. Blank means the shutter is not spring loaded in closed position. If it reads "O" it means that the curtain is Open.
Below the window there is a slide-selector to select either the front shutter or the back shutter. We just learned that the Aero is a barrel shutter and thus we have to select "BACK". Push the shutter-selector up by pressing in on the lower half of the selector and push it up.
Now the build in shutter release is connected to the focal plane shutter. You may try that by winding the shutter and releasing it by squeezing the build in shutter-release. The shutter speed control lever at the bottom of the camera can be engaged to get twice the exposure time. 1/1000 becomes 1/500 etc. Try to get familiar with the shutter by winding and releasing.
Now set the shutter-speed in the window on position O.
In the previous page we have pulled and locked the standard against the infinity stops and thus fixed focused the Aero lens on subjects far away, we would be able to take the first exposure. However we have to make sure that the subject is on focus. We can do that by turning the focusing knob on the front of the drop bed and watch the double image in the Rangefinder coincides to one single image. On that point you can fix the position of the lens by turning the track lock, to the right.
Now you may like to check if your readout from the rangefinder is correct. This can be arranged by checking the subject-image on the ground glass. The ground glass is on the back of the camera and becomes visible by pushing the small chrome hood release. The hood now opens automatically and you see the ground glass. The ground glass is a grinded window on which the upside down image appears. As the Aero lens diaphragm is always in open position you may already see an image on the ground glass. For the brightest possible image make sure the Aero diaphragm is set on 2,5.
Check the subject image on the ground glass with a good magnifier. The subject on the ground glass should be needle sharp. If so, your rangefinder is reliable. To convince yourself, find a subject further away or near by and check again the rangefinder image and the ground glass. The nearest reliable distance for the rangefinder coupled to the Aero lens is about 8 feet or 2,50 meter. Before attempting focusing on a new subject unlock the track lock to avoid the bed mechanism to be damaged.
Without damaging the track guide!
Remove the Aero lens by sliding the upper and lower lens board slide locks while holding the heavy Aero lens under control with your free hand. Pull the lens out of the standard and put the lens aside on a safe place. Replace the front and rear cover on the lens.
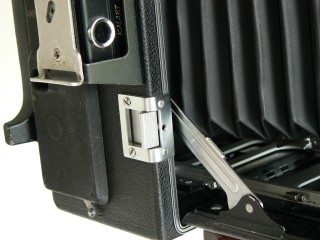
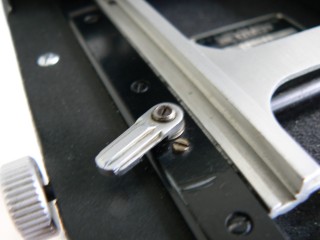
First unlock the sliding track before attempting to turn the focusing knob since otherwise the bed mechanism is likely to be damaged. Now move the track all the way back into the housing with the focusing knobs. Next unlock the standard by swinging the standard lock straight forward and push the standard back into the camera house. Swing the standard lock to the right or left.
Always check to be sure that the sliding back is all the way back into the camera body before closing the camera.
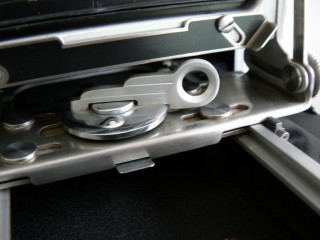
Both photos show the situation when the track is all the way back into the housing.
Note: The hinge of the track is situated right above the hinge of the bed and the distance scale indicates infinity.
Now that we have practiced the opening and closing of the camera and the focusing by the rangefinder or the ground glass, it is about time to get familiar with the preparation of the real work, namely photographing. However we first have to decide with what sort of film we want to work with.
There is 120 Roll Film and 4x5 Sheet Film. Beside that there is still Polaroid film available.
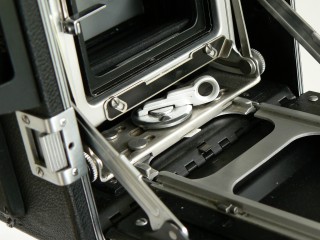
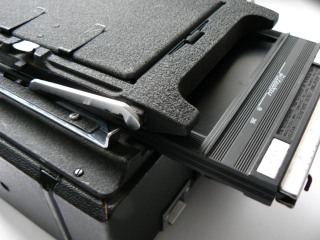
If your camera is equipped with a Graflok back than your camera accepts only Graphic attachments with the raised lock rib light trap. The spring loaded focusing panel frame pulls back to accept all 4x5 international sheet film holders and the desirable 6-sheet Grafmatic holder. Roll Holders require removal of the focusing panel and are held in place by means of the slide locks which should be moved to the left to release and to the right to lock.
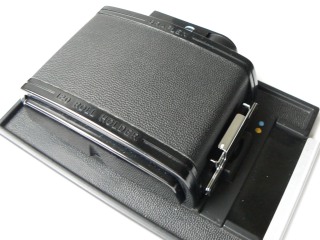
Graflex Rapid Vance Roll Film Holders are exclusively made for the 4x5 Graflok back and 12 exposures can be made in formats of 6 x 6 or 10 exposures 6 x 9 cm ( 2 1/4 x 2 1/4 or 2 1/4 x 3 1/4 inch.) on regular 120 Film. Graflex Roll Film holders are: RH /8 cat. No. 1256- RH /10 cat. no. 1256 and RH 12 cat No. 1257 The Graflex knob wind version Roll Film Holders are: Cat. No. 1248 (6x9) or Cat. No. 1251 (6x6)
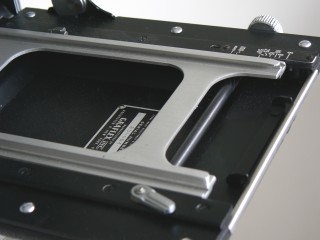
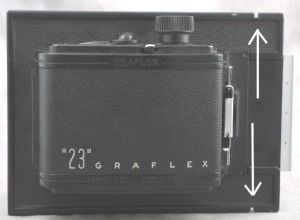
Attention: The nomenclature of Graflex is very often confusing. There are Roll film holders for use with the older Graflex cameras as well. Although they are named Graflex "23" or "22" they will not fit to the back of the newer Graphic cameras such as the Pacemaker Crown Graphic or the Pacemaker Speed Graphic. They can be distinguish by a groove. (arrows photo right)
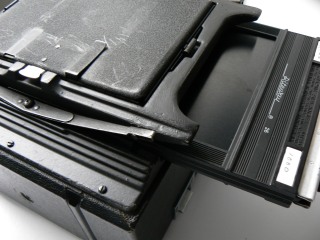
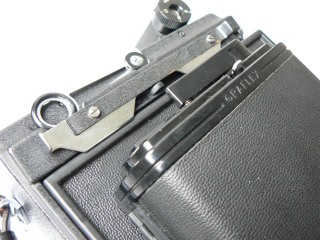
On the left photo a regular double sheet film holder half way into the Graflok- Back. On the right photo the same situation with a Spring- Back. Note: To distinguish both backs, the chrome slide spring clamps and the chrome slide locks on the Graflok back and the one fixed point spring system on the Spring Back.
If your Pacemaker Speed Graphic camera is equipped with a Graphic back - the so called Spring Back- your camera accepts 4 x 5 international Graphic film holders as well. They slide into the back beneath the focusing panel. Even a Grafmatic holder can be sandwiched between the focusing panel and the camera back.
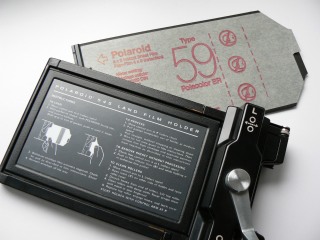
The Polaroid 545 land film holder and the Grafmatic 6 sheet automatic film holder fit to the Graflok back as well as to the Spring Back.
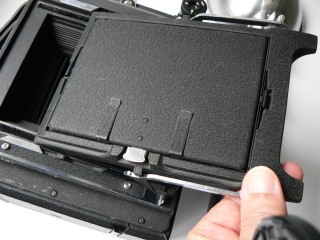
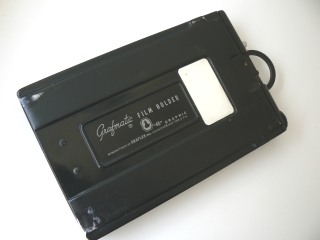
Last, but certainly not least there is the 4 x 5 regular Sheet Film Holder such as Linhof, Graflex, Fidelity, Riteway and all the other international 4x5 sheet film holders. The easiest and the best of all holders. These holders can be loaded with 2 sheet film. One on each site of the holder. Loading should to be done in absolute darkness. A dark slide, is simply a dark cover which slides into a recess in the holder, to protect each sheet of film (or plate) from fogging or unwanted exposure to light. When using a sheet film holder, the film holder is inserted into the camera, and the dark slide is withdrawn, making the film available for exposure. After the exposure has been made, the dark slide is reinserted into the film holder, and the film holder is removed from the camera for later processing of the exposed film.
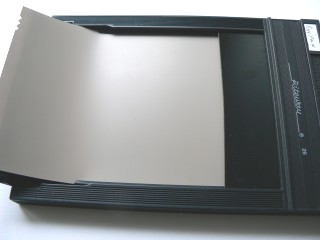
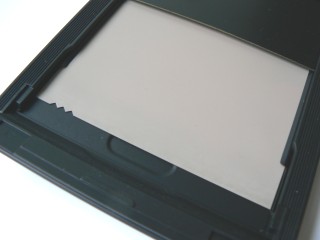
The regular Darks Slide Sheet Film Holder is easy to load with film. Always be sure to load the film in such a way that the indentations are situated either on the right upper corner or the left underside. These indentations make it easy to feel in the dark how to slide the sheet film between the film guides to make sure the emulsion side is opposite of the lens.