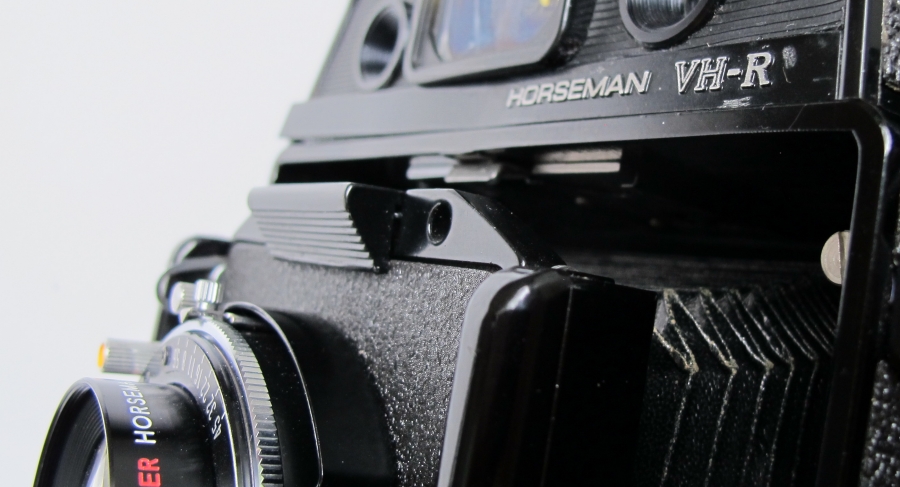
Horseman VH-R
6x9 Press Camera.
By Jo Lommen
Japanese Professional Press and Studio Camera
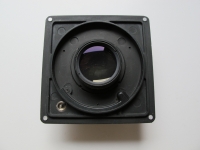
Characteristic looking medium format press camera showing its bright viewfinder between the two rangefinder windows on top of the 6x9 housing. This double extension bellows camera with interchangeable lenses was produced by the Komamura Corporation established in 1947. The company has been an important player in the international professional camera business for more than 60 years. Komamura Corporation developed and marketed the Horseman Professional Cameras product range for medium and large format film.
In General
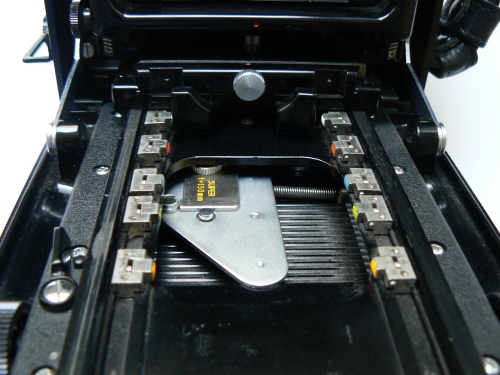
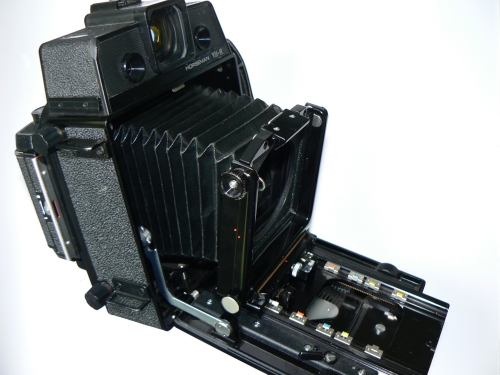
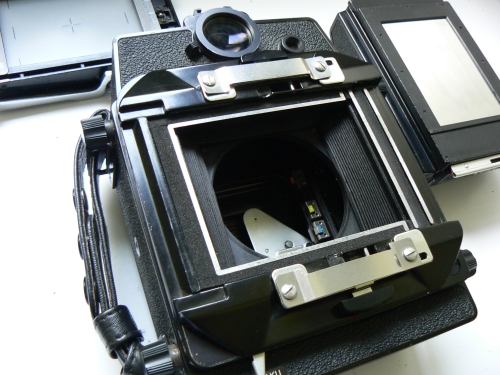
The Horseman VH-R is a Japanese look-a-like of the American Press camera of the fifties and sixties of the last century such as the Graflex, Busch, Beseler, Burke & James and the British MPP. Characteristic of these cameras was the drop bed, which in closed position also serves as a camera door. When the front door of the camera is in open position you see the focusing track and rail guide. The lens standard and bellows are still folded safely inside in the back of the camera house. The inside of the door now serves as a gangway for the rail guide, focusing track and lens standard. The standard can be drawn out of the housing by squeezing both front standard locks together while pulling out the standard over the focusing track firmly against both of the infinity stops.
These infinity stops have a pop up hinged stop. Depending on which stop has been set, the standard will stop and will be focused automatically on infinity for the particular lens. Unlike the other press cameras there are more than the usual two or four infinity stops. The Horseman camera VH-R is standard equipped with 5 pairs of them which can be used for 5 different lenses. From the back to the front we see a pair of white ones followed by red, green, yellow and finally orange. The white stop should couple the 75 mm lens, the red stop 105 mm and 90 mm and so on. Each lens has it own cam. The cams are marked with the corresponding lenses and the colour indicates the infinity stops to be used with them.
The Horseman Lenses
In order to couple the rangefinder, the cam, lens and infinity stops must be used in a set. That means: orange150 mm cam, ornage infinity-stop set upwards as a constant reference to the infinity distance and orange cocking-lever on 150 mm lens. The camera is now ready for focusing on infinity or nearby distances by the use of the focusing knobs at the front of the drop bed. All lenses are mounted in the Horseman 4 way lensboard measuring 80x80 mm which is exclusively prepared and equiped with a safety lock. There are several lenses available for use with this exclusive camera:
| Lens | Cam Colour- Infinity stops | |
| Wide Angle | Super Horseman ƒ = 7 65 mm | White |
| Professional Horseman ƒ=5,6 75 mm | White | |
| Standard | Super Horseman ƒ= 5,6 90 mm | Red |
| Prof Horseman ƒ = 3,5 105 mm | Red | |
| Professional Horsem ƒ = 4,5 105 mm | Blue | |
| Super Horseman ƒ 5,6 120 mm | Green | |
| Telephoto | Super Horseman ƒ= 5,6 180 mm | Green |
| Long focal | Super Horseman ƒ = 5,6 150 mm | Orange |
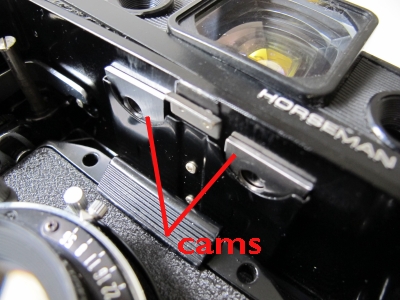

From left to right: Cam storage slot for 2 cams, cam in position and lensboard against infinity stops.
Orange cam mounted - orange dot on shutter cocking lever - and lens standard to be drawn against orange infinity stops.
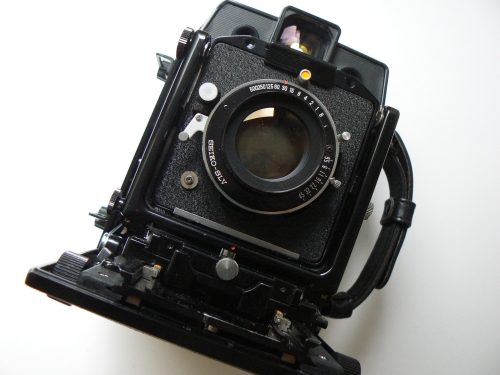
The Horseman Camera.
Many desirable features.
The body section
Revolving back for portrait or landscape mode. Revolving viewfinder frame for landscape and portrait and an automatic revolving all viewfinder frame parallax compensation mechanism which can also be used with wide angle lenses. The camera body is finished in a black hard coat layer applied over a basic construction of light alloy diecast. The camera body contains the finder and the lens standard mechanism. The finder section on top of the camera house contains the rangefinder and viewfinder. The viewfinder can be turned in landscape or portrait mode or any position in between matching the position of the revolving back. Parallax correction is automatically achieved when focusing. The lens board is sturdily built and it features a reinforced design to safeguard against distortion and reflection. The important camera bed extension mechanism which is made up of the focusing track and rail guide features an oil-less finish which is specially processed. In order for the camera bed to be opened 90° or 105° from the camera body and for it to be secured, the bed braces are L- shaped for easy movement when wide angle lenses are being used. There are two focusing knobs at each end of the camera bed and a focusing lock is provided at the left. The whole of the camera bed serves as a front cover for the camera and the focusing knobs double as a mechanism that locks the front cover. Tilt, swing, shift and slide lens movements have been provided to make the camera suitable for studio or architecture work.
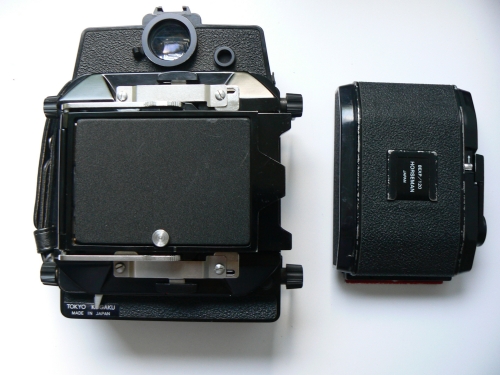
Revolving back with ground glass and viewing hood. On the right camera in drop bed mode for use with wide angle.
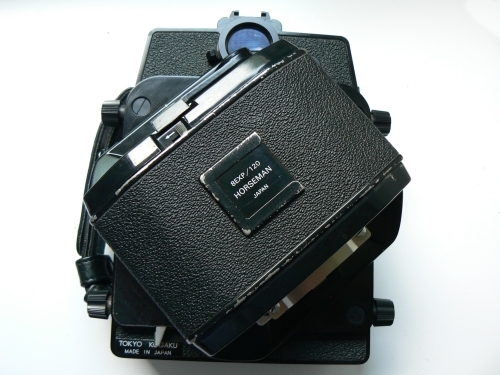
Revolving back with roll film holder mounted and on the right the open back ready to mount the 6x9 film holder or the ground glass assembly.
The finder section
The rangefinder magnification is 1:1. The big bright viewfinder framing 90-105-150 and 180 mm lenses can be turned freely either horizontally in landscape as well as vertically in portrait mode to match the revolving back while parallax is automatically corrected with all of the Horseman lenses. All together a great feature.
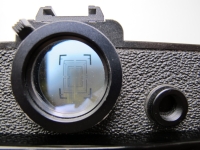
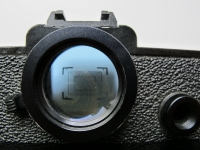
Bright view through the view finder. The big eyepiece allows you to focus with both eyes open. The smaller eyepiece of the rangefinder which is coupled to the focussing mechanics offers you a bright image to focus.
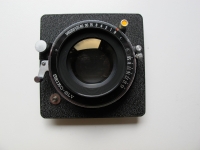
Lens Board section.
The 4x4 cm lens board is designed for easy but safe mounting into the U shaped lens standard. Lens changing is a matter of seconds and it will fit in all 4 ways. The U shaped lens standard itself looks very sturdy and feels very dependable when sliding it over the rails setting it in its demanded position.
Rangefinder adjustment.
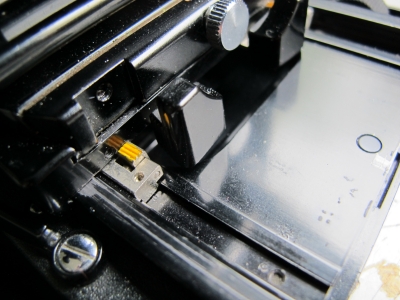
My camera came with four cams: 90, 105, 190 and 150 mm. Unfortunately with no lens, but I was lucky to find an original and mint Super Horseman 150 mm in Seiko SLV shutter. Having the camera complete then I wanted to go off and take photos with it. However I found out that the rangefinder was out of focus. The distance needle in the top of the rangefinder house was out of range and the rangefinder itself as well. The double image didn't move at all when turning the focusing knobs. Despite close inspection of the camera-house and drop-bed there was no sign of adjusting screws or any thing that could be used to adjust the rangefinder. The only thing that obviously was part of some adjustment could be found inside the camera house on the bottom of the left side seen from the front. I found no way to get a closer look of it to see the working without having to dismantle the camera completely. After hours and hours I gave up searching. The internet wasn't helpful either and I placed the camera on the shelf and decided to get back to it at due time. I use to do that very often to give myself the opportunity to relax and wait for inspiration. After all the factory workers who did assemble the camera, surely had to adjust the rangefinder as being the last handling. So there must be a hidden "something". A couple of days later I grabbed the camera from the shelf and felt with my fingers along the leatherette on top, front and back and along the rangefinder housing. On the back of the lower part on the right side seen from the back I felt an irregularity. I peeled off the leatherette and found the hole from which the adjusting screw could be set.
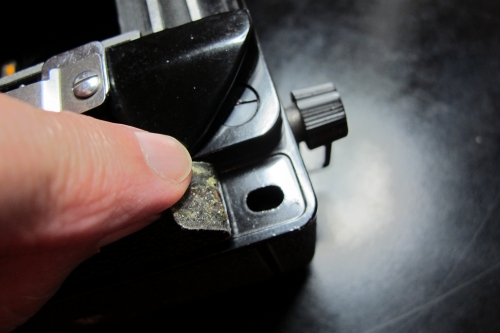
Left: Hidden hole gives access to the infinity adjustment.
On the right: removed leatherette and hidden screws to lift the rangefinder cover.
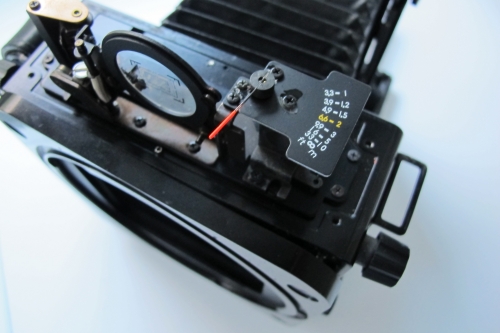
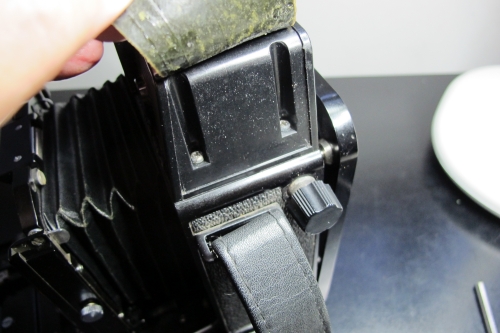
Hidden hole on top of the rangefinder housing for vertical rangefinder adjustment.
Right: Distance indicator out of range.
The hole gave access to the screw I mentioned before. This is the screw to adjust the infinity position of the distance scale on top of the camera. Unfortunately it brought me not any further as the needle was too far out of range. I had to try to remove the top of the rangefinder and see what caused the problem. I peeled off the leatherette on the top of the housing and found two interesting positions on the right and left side underneath the leatherette, two hidden screws on each side as well as a hole on top of the camera which gave access to a screw beneath it. After unscrewing I could lift the top of the rangefinder and had free access to all of the optical mechanics.
The reason why the distance scale needle was invisible in the window was obvious as the position of the gear was out of range. I loosened both screws next to the gear and reset the indicator in the right infinity position. It is obvious that the camera should be fixed in its infinity position before resetting the needle. Having done this part of the job, one has to check the double image in the rangefinder eye piece. If both images don not coincide you may try to solve this problem by placing the camera without the top cover on a tripod. Be aware that the top cover is off and the mechanics are very vulnerable. Aim the camera on a far away object by turning the focusing knob until the track is back into the housing. The distance is now set on infinity. The ground glass image of the far away subject should be needle sharp. If not take care of that first by checking if the infinity stops are corresponding with the lens and cam.
If necessary turn screw behind the hole in the back until the needle points to the infinity mark. The distance indicator has been adjusted now and corresponds with the sharp infinity image on the ground glass, the infinity position of the track rails, the color of the infinity stops and corresponding lens.
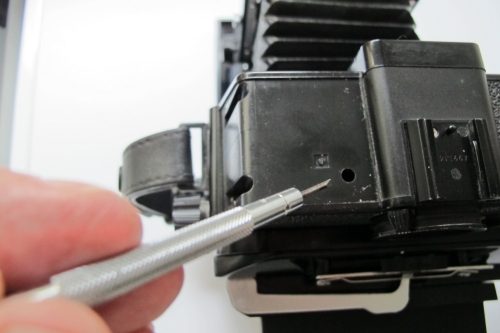
Now we have come to the rangefinder itself. If the two images of the far away subject in the rangefinder do not coinside than turn the screw next to the round window (right photo) very carefully until both horizontal images coinside. If the images do not coincide vertically, than leave it that way and continue by remounting the top cover (very carefully) but not yet the leatherette.
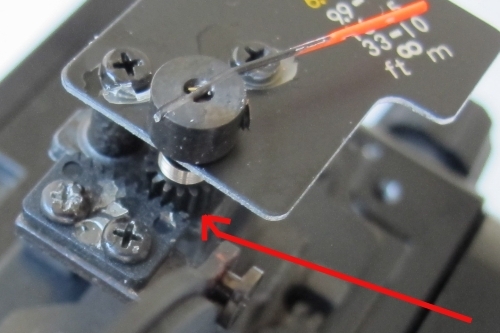
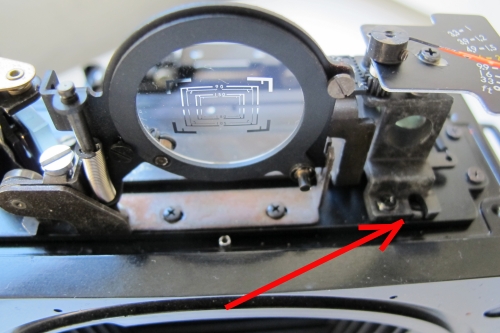
Photo left: the needle indicator mechanism. On the right the adjustment for horizontal correction.
Having done that successfully you may correct the vertical coincide by inserting a fitting screwdriver inside the hole on top of the rangefinder. Try to find the adjusting screw by the feeling and when found it turn it clockwise. If the difference between both images is getting wider than turn it anticlockwise until the images coinside. Fix the leatherette and enjoy working with this amazing camera.