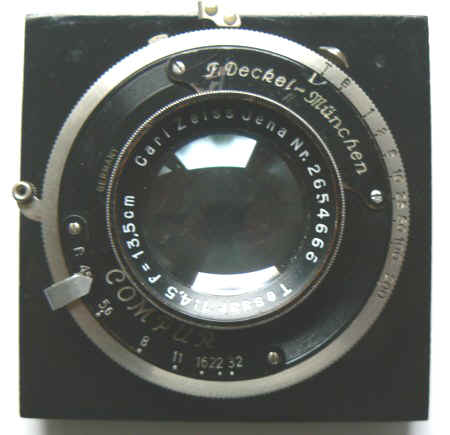
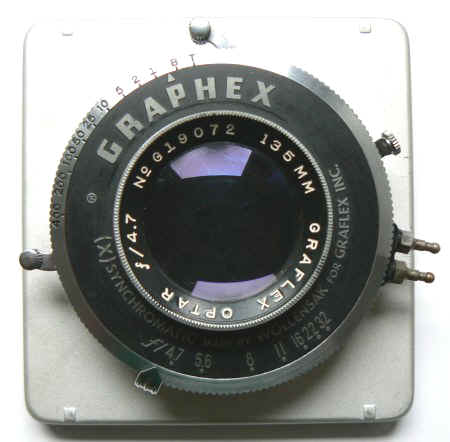
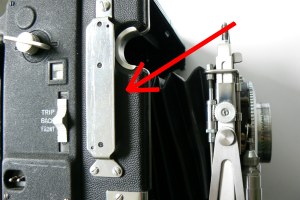
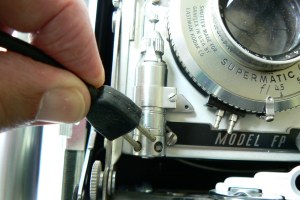
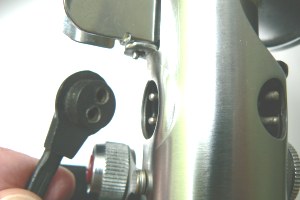
Graphic cameras with Between- the Lens Shutter that do not incorporate build in shutter synchronization require the Graflex Flash Synchronizer complete with Solenoid Release. The Solenoid Release is so adjusted that it will cause the shutter to be open when the flash of the bulb reaches its peak. The shutter on the right photo has a bi-post connector and thus has a build in Shutter Synchronization. The left shutter has no flash connector and would need the help of a synchronizer to fire the flash.
consist of a Battery Case, Reflector, A-20 Connecting Cord and Camera Bracket. It is intended for use with Graphic and Graflex cameras having build- in synchronization circuits. These include the circuits build into the Revolving Back Super D Graflex, the Pacemaker Speed Graphic and those between the lens shutters complete with build in flash synchronization.
1 the build in synchronization circuit on the shutter marked M-M-FX and Off with the flattened end of the A-20 cable
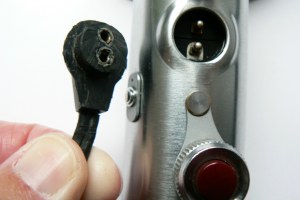
2 The circular molded end and the series outlet of the chrome battery holder
3 The mounting bracket for mounting the chrome Flashing Unit
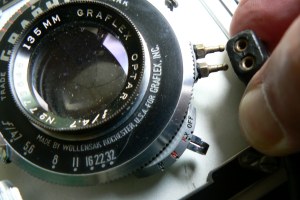
1) connect the flattened end of the A-20 cord to the prongs of the shutter and the circular molded end to the series outlet in the back of the battery case.
2) determine the correct exposure for the lamp selected. Use the film speed given by the film or the lamp manufacturer and the exposure tables supplied by the latter.
3) Set the synchronization adjusting lever in accordance with type of flashbulb used.
4) Adjust the diaphragm and shutter speed control accordingly and cock the shutter (and the synchronizing mechanism, if necessary).
5) Insert lamp in the socket by thrusting its base directly into the clamp.
6) Be sure the focal plane shutter is open.
7) Insert film attachment and pull out its slide.
8) Focus the camera lens.
9) Direct the camera with either of the two viewfinders.
10) make the exposure by pressing the finger release on the lens board or by pressure on a cable release screwed into the shutter. This will operate the shutter which in turn will effect synchronization of the flash lamp.
is a precision instrument and must be properly installed if it is to give the superior performance of which it is capable. It consist of a battery case, reflector, camera bracket, solenoid release, release mount and connecting cord. So the combination of all these elements makes it a Graflex Flash Synchronizer. You'll need a so called S-17 cord. This cord is 17 inch long and has a circular molded female connector and a plug.
1.
Connect the S-17 cord to the solenoid and to one of the two circular parallel
outlets in the front of the battery case.
2.
Determine the correct exposure for the lamp selected. Use the film speed given
by the film or lamp manufacturer and the exposure tables supplied by the latter.
3.
Adjust the diaphragm and the shutter speed control accordingly, and cock the
shutter.
4.
Insert the lamp in the socket by thrusting its base directly into the clamp.
5.
Be sure that the focal plane shutter is open. (ignore if you have a Crown
Graphic camera.)
6.
Insert film attachment and pull out its slide.
7.
Focus the camera lens.
8.
Direct the camera with either of the two viewfinders.
9.
Make the exposure by pressing on the main switch at the back of the battery
case. This will cause the shutter to operate in a manner to effect proper
synchronization.
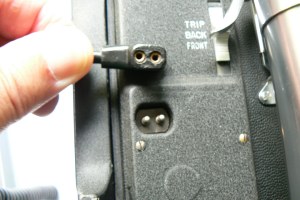
Graflex cameras equipped with a focal plane shutter have a socket for connecting an A-20 connecting cord.
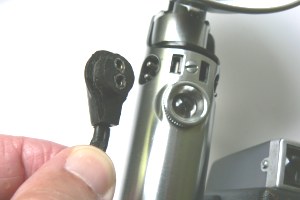
The A-20 cord connects the camera bi-post socket on the side of the camera with the series outlet of the chrome flash battery case. These cords have one circular molded and a flat oval shaped connector.
The series outlet of the flash can be found by unscrewing the red button on the back of the battery case. Be sure to plug in the cord firmly to the end into the Series Outlet to avoid disconnecting.
Note: Above instructions are applicable for the chrome Graflex Flash also known as the Light-Saber in Star Wars films and not for the brushed aluminum flash. The numbers 35 or 37 indicate a 3 cell battery-holder either equipped with a 5 inch reflector or a 7 inch reflector.
Use Long Peak Bulbs such as Sylvania 2A for use with 4x5 inch Focal Plane shutter camera.
Adjusting the Solenoid Graflite
Home Graflex Cameras Flashing Synchronizer Heiland Synchromar The Mendelsohn Speedgun
About Bulbs Testing your camera with the Flashunit Film Sheet or Roll Film Holder