[ page 1 ]
Dassault Mirage F.1 kits in 1/72 scale: kit modelling reports
page 2
page 3
page 4
page 5
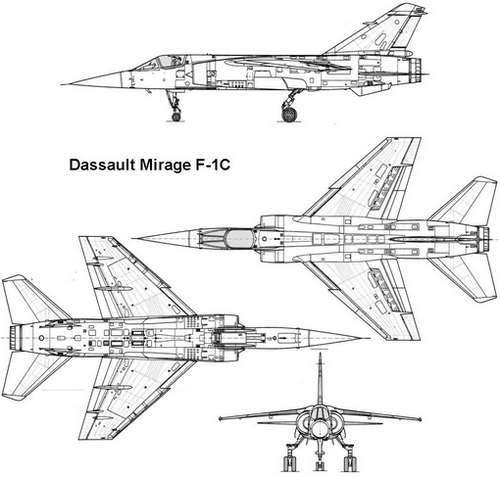
The French Dassault company designed the Mirage F.1 as a fighter and secondary attack aircraft with first flight end 1966. It is powered by a single SNECMA Atar 9K50 turbojet giving it a MACH 2.1 max speed (750 kts). The fighter has 2x 30mm DEFA canons and can carry a wide variety of weapons. It was ordered by the French Armee de l' Air and it entered service in 1974 where it replaced the Mirage III series. There is also a two seater trainer, the F.1 B/ D. The type was used in various conflicts and proven to be a good aircraft.
It was exported to many other countries with more than 700 Mirage F.1 aircraft being manufactured. Some are still operational today.
Length 15,25 m; span 8,44 m; wheel base 4,87 m; track 2,48 m.


Jordan F.1EJ

French F.1C
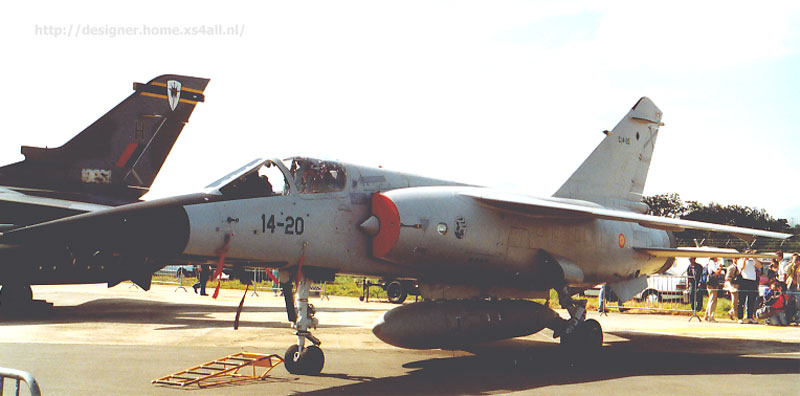
Spanish F.1CE
(photos made by me at UK Fairford RIAT and Open Days in The Netherlands)
There are several Mirage F.1 kits in 1/72 scale. Nowadays, the best Mirage F.1 kits are from Special Hobby. (The older kits like from Airfix, Heller and Hasegawa will be discussed in the near future).


Special Hobby came with a whole series of F.1 kits in 2016 with both a single seater and trainer. Some kits have a few resin extra parts for fairings, pylons etc.
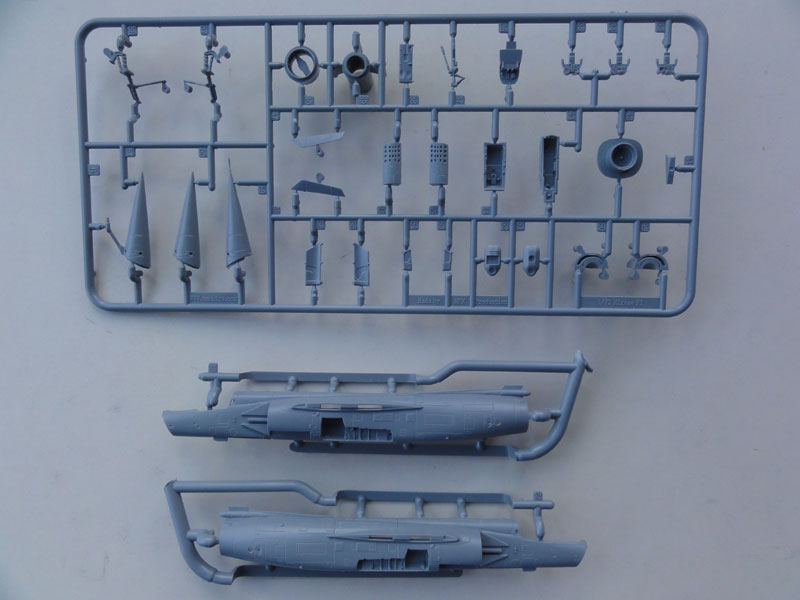

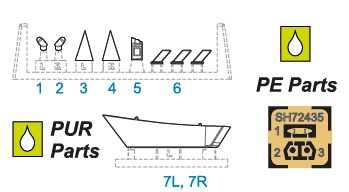
All these kits have about 140 - 160 parts with very nice engraved panel lines and several optional parts for the vertical tail, different versions of the MB ejection seats and other smaller bits. There are also nice stores like fuel tanks, Magic R530 and R550 IR missiles, MATRA Super 530 F missiles, pods like Raphael SLAR and Barax ECM pod and their pylons. Some kits have in the package extra resin parts for pylons and rails indicated as PUR xx and special missiles.
These kits were purchased:
Kit #SH72289 for F.1CE and F.1CH has decals for 3 Spanish Ejercito del Aire and 2 F.1CH and F.1EH of Morocco.
Kit #SH72294 for 3 F.1CG with decals for Greece Hellenic Air Force jets.
Kit #SH72386 for F.1ED and F.1EQ has decals for Arab schemes of the Free Libyan Air Force, Iraqi Air Force and Iran (ex-Iraq). This kit has an extra sprue for the vertical tail with fillet and PRESTO recce pod. It also has a few resin "PUR" parts for an AM39 Exocet missile with its pylon.
Kit #SH72388 for the F.1C / CT has decals for 2 French Airmme de l'Air jets.
Special Hobby also came with 1/72 two seater F.1B/BE kits, to be discussed in the near future.

I also bought at model shows several "over trees" #SS007 kits hat came without decals and no box in a plastic bag with a discount.
Special Hobby also offers after-market resin parts for these kits with more detail. But I did not consider these really necessary though as the kit details and stores look good enough for me.
Several Special Hobby kits will be made, starting with single seat F.1 kits.
Some general suggestions in a logical order are:
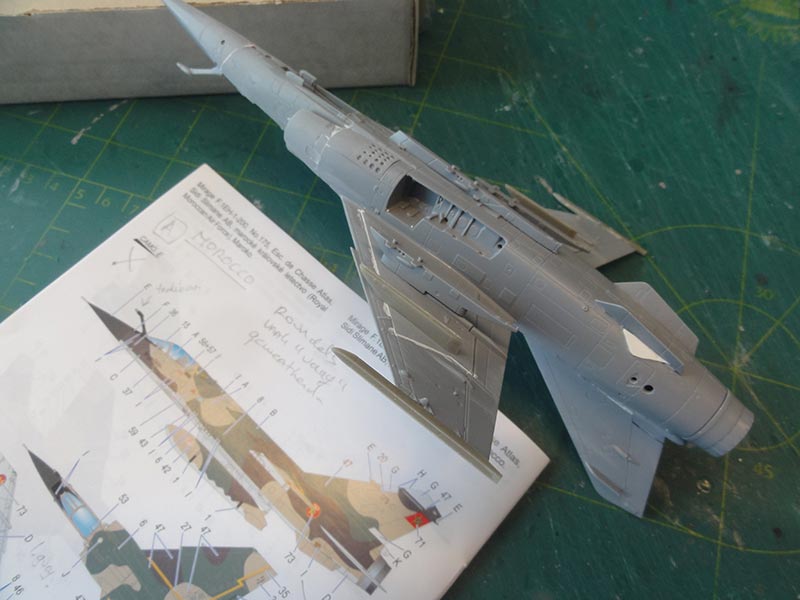
Each kit has a lot of optional parts so it is needed to study first which air force livery and F.1 version one wants to build. For example, the wing tip antennas and launch rails differ as well as the vertical tails.
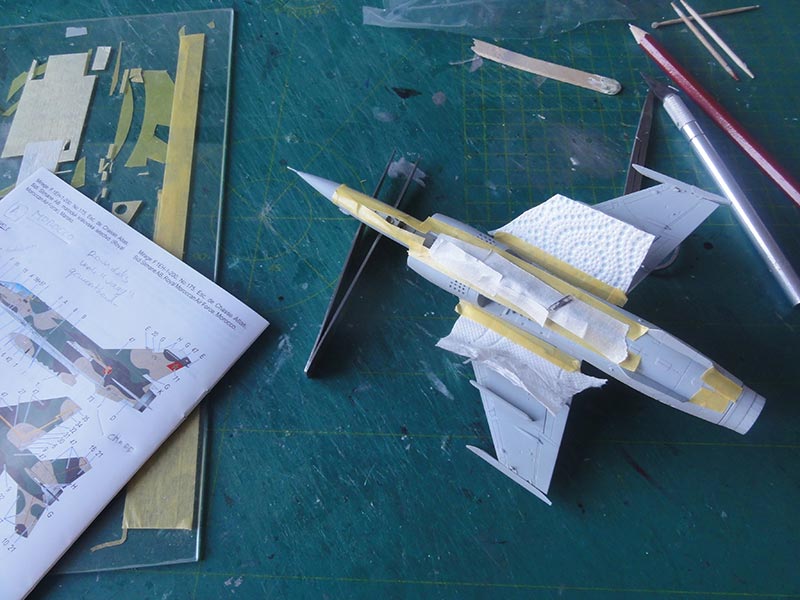
All parts needs to be carefully separated from the sprues with a fine cutter. There are many tiny parts as well.
Assembly of the kit is a bit complex but the result is a nice detailed model. Most of the cockpit interior is black, a tyre black colour is better used here. For the main instrument panel a decal is provided but it also has raised details so decalling combined with drybrushing was done.
 port (left) console
central instrument panel with gun display
 starboard (right)
Seat types vary and these are in the kit.

Parts #1, 14, 19, 20 are for probably early Martin Baker (SEMMB licensed built) mk.4 seat; parts #2, 15, 27, 28 are for the MB mk.10 seat. The parts with the tiny stubs at the top are for the later mk.10 as used in the F.1 CT. Install the seat later on.
NOTE: early F.1 seats had a 2 hand pull handles at the seat head rest/top that was yellow with black stripes. (later seats did not have these).
Installing the coaming parts #7 and 35 needs to be done accurate, otherwise it will interfere with the windscreen installment. For the gun display a transparant part is provided.

The nose needs a bit ballast inside and for a bitter fit the nose parts' lips can be reduced a bit in size. There is also a part with the refuelling probe moulded. Fitting the air brake parts #45, 46 needs a bit sanding on their insides for a better fit. The main air intakes have a good fit. The single seater has recesses for the DEFA canon on each side of the forward lower fuselage next to the gear bay.
The wing is in port and starboard halves. Both have a lower half and upper half. Sanding the lower half thinner gives a better fit though still putty is needed at the lower joint. Check out the wing tip configuration that depends on sub-variant. On most F.1, the small wing tip antennas were not seen so cut than these off.
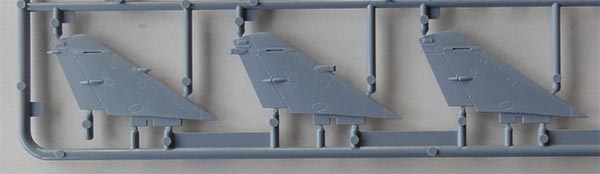
Different vertical tails are in the kit, with or without various Thomson-CSF radar warning fairings. At the vertical tail rudder' base, a piece of plastic card closes the rear gap. (in some kits an extra sprue is provided with an additional vertical tail with a fillet).
Better install the horizontal tailplanes at a later stage but now enlarge a bit the main locating holes. Same with the lower ventral fins, set these at 20 degrees after the fuselage has been smoothened.
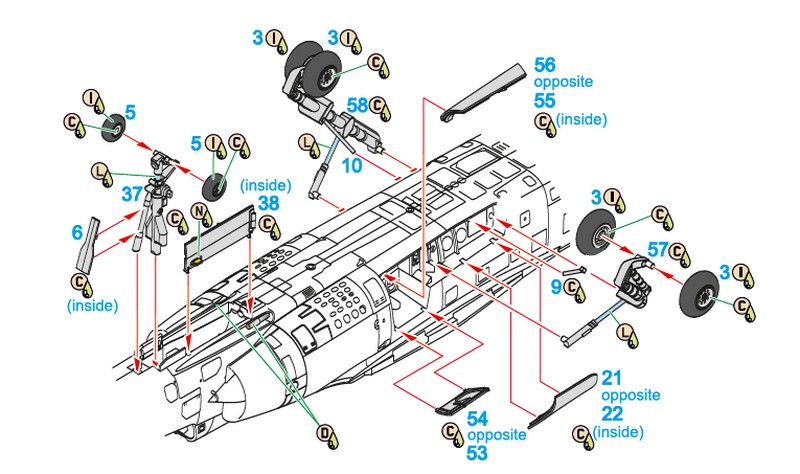
Many undercarriage gear doors are seen mostly closed with gear own on parked Mirage F.1 jets. So the large forward gear doors #21, 22 and the smaller doors #53, 56. The nose gear side door #38 is also often seen closed as well so do now. So at this build stage, set closed doors now and sand flush.
Install the landing gears after puttying, sanding and paint scheme has been applied.
After main assembly, some filler/ putty is needed in tiny spots as well at wing fuselage joints, air brakes and lower wing.

Filler / putty can be removed WITHOUT SANDING in many situations with plain "nail polish remover" from the drug store. The one without acetone is best as it avoids etching the softer plastic. Remove any putty with a cloth dipped in remover, this is an easy job.
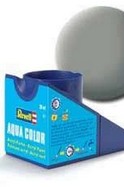
As always, airbrush a base grey coat to check for any flaws with a good primer coat. I used my favourite thinned Revell Aqua 75 steingrau acrylic for this.
Correct any flaws if needed. Than add the appropriate paint scheme for the model of the Air Force of your choice. Do not forget the pylons if these are to be installed. Also paint black nose and anti-glare panel and the various light grey antenna areas.
When the desired paint scheme has been applied, the remainder of the model assembly and decalling are done....

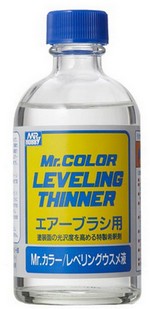
Before any decalling is done, apply on the model with the airbrush a few gloss varnish coats. This to avoid decal "silvering" that spoils model appearance. I use acrylic Johnson Future thinned 10% with Gunze Sangyo Mr.Hobby levelling thinner for better flow.
After decalling has been done in the desired scheme...
... on to the final details.
Installing the main gear legs (with large doors set closed) needs cutting a section of about 2 millimeter of the forward facing beam of the main gear legs #57, 58. The main gear struts are to be set at quite a kneed angle. When installing the main gear wheels #3, drill open a bit wider their aisle holes.
Install any pylons and stores though many F.1's flew clean. Some Special Hobby kit instructions do not really show the options but as I had many SH kits, I combined the information. The 2 DEFA canon openings at the lower fuselage got a "black dot" and gun blast weathering.
The kit SNECMA jet exhaust is fortunately deep and nicely detailed, paint with several metal coat hues.
The anti-collision lights can be painted as per kit instructions. I used drops of Tamiya Clear transparant paints.
Each canopy frame has a tiny moulded mirror in the edge which is nice. But there are 3 tiny mirrors inside the real canopy frame fitted so the missing 2 can be added from scrap. Paint the insides' of the frames black and mark the edges with a permanent marker. Paint the outside canopy frames in the appropriate camouflage colours.
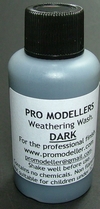

Some wash can be applied with a thinned mix of black and varnish in the recessed areas at the flaps, upper wing spoilers, rudder and lower arear such as the fuselage air brakes. This enhances the realism.
Finally, a model would get a semi-matt varnish, using a mix of Johnson Future with a few drops mixed in of Tamiya matting agent "Flat Base" X21 was airbrushed. This protects the decals and provides an even sheen.

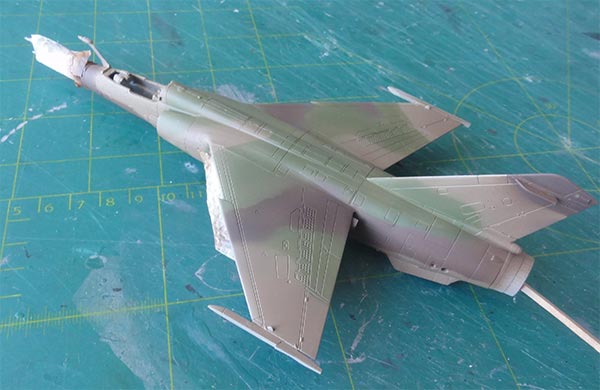
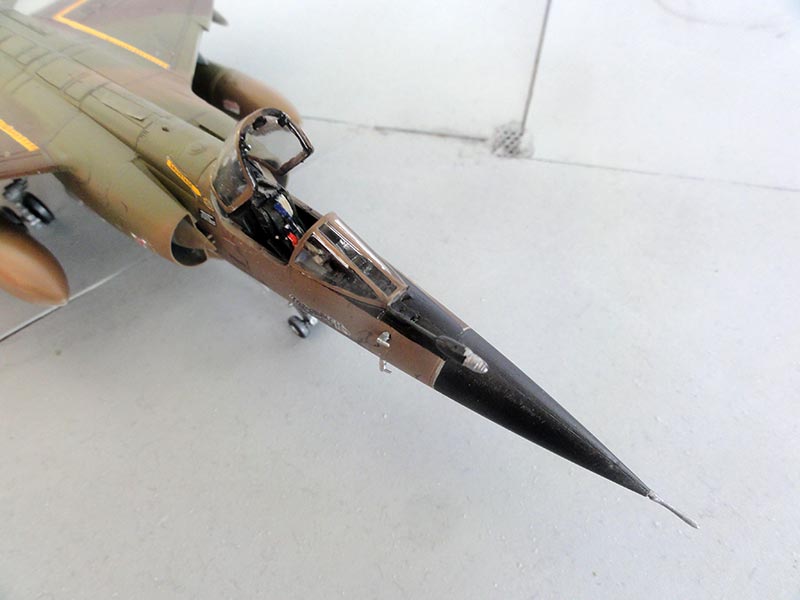
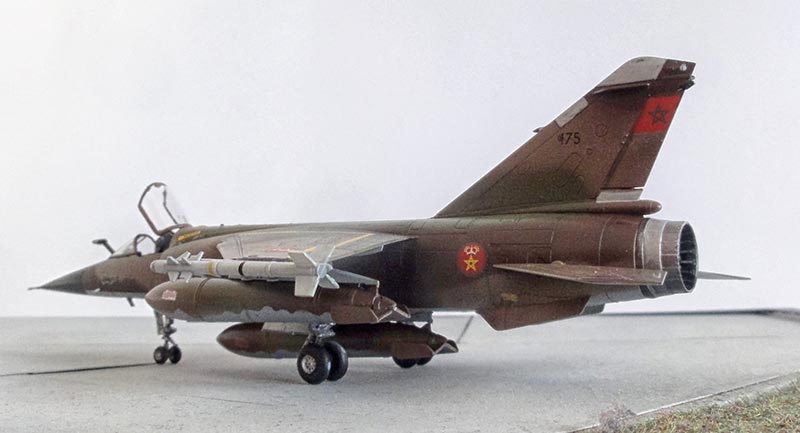
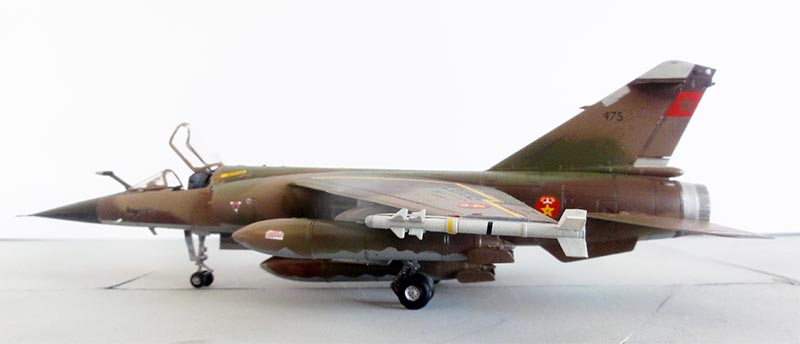
The first single seat Special Hobby F.1 kit was finished as a Morocco air force F.1 EH-200. Kit #SH72289 was made that has decals for it in scheme camo "E". It got the old style MB seat (parts #1,14, 19,20) and has the in-flight refuelling probe. The vertical tail #13 has the small fairings but the wing tips do not have the small antennas.
NOTE: I discovered later that I had installed the wrong vertical tail part without the Thomson-CSF passive radar warning fairings! Too many kits built in parallel, that is why you do not see them here in the assembly photos.
At the tail ventral fin sides' a chaff dispenser is fitted which are provided in the kit as small resin parts PUR3, 4. I lost these parts somewhere so they were suggested with plastic card.

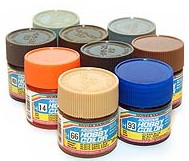
The colours airbrushed were these acrylics:
- lower surfaces light grey FS36375 with Gunze Sangyo Mr. Hobby H308
Mask with tape and than...
- sand FS30279 with Revell Aqua 381 (or use Gunze Sangyo Mr. Hobby H346)
- green FS34102 Gunze Sangyo Mr. Hobby H303
- dark green/brown with Revell Aqua 84 (or use Gunze Sangyo Mr. Hobby H406).
Camouflage masking was "loosely" done with hand held papers.
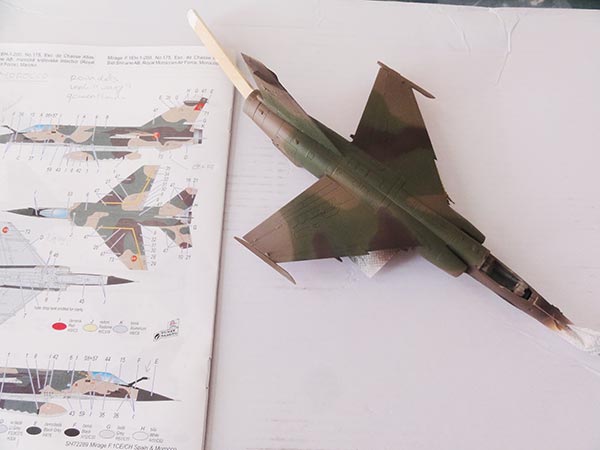
Decalling with the kit decals was done after the model got the usual gloss varnish coat. It takes quite some time and includes the yellow walk way lines with red patterns.

As noted earlier, I discovered that I had installed the wrong tail part; so added were the small tail leading edge fairing and rear fairing above the rudder from scrap.

The stores to be fitted were the 3 external fuel tanks with pylons #25,26 and central pylon #32. I also installed 2 Magic 550 AA missiles on the wing tip rails #70, 71.
A semi-mat varnish was airbrushed.
Finally the windscreen and canopy were installed and that completed my first Special Hobby F.1 model.
MOROCCO
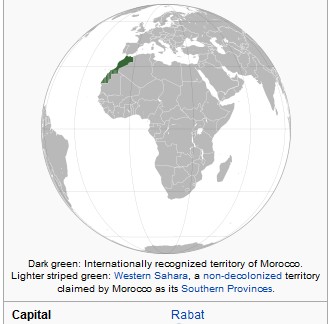

[ area: 446,300 sq.km | population: 37,2 million | capital: Rabat | GDP USD 3,400 per capita nominal ]
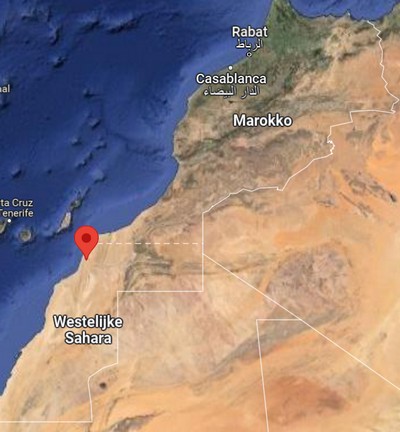
Some 30 Mirage F.1 CH fighters were ordered end 1975 with the first F.1 arriving in 1978. A few years later, additional 14 F.1 EH and 6 F.1 EH-200 fitted with refuelling probe were acquired. Deliveries were from 1978 to mid 1982 with some jets being supplied for France production batches. Many were used in the conflict with POLISARIO over the Western Sahara which Morocco annexed in 1976. The main base was at Sidi Slimane. Today, many F.1's are based at Laayoune/ Hassan in Western Sahara (red dot on map).
For more information about this air force look at the Alpha jet page here...


References:
Books:
- Mirage F.1, Francillon, Aerofax vol. 17, 1986
- Mirage F.1, Jon Lake, Internation Air Power review Vol.1, 2001
- Mirage F.1, World Air Power Journal Vol.17
- Mirage F.1, Air international, Vol. 34, pag 121--
- Mirages, Osprey publishing, 1990
Magazines:
- Airfix F.1 review, James Goulding, Aircraft Illustrated, Dec 1983
- F.1 exports, Richard Caruana, Scale Aviation Modeller Int, Aug 2003
- F.1, Mark Attrill, Scale aircraft modelling, June 2005
Internet:
- IPMS NL Mirage F.1 Walk around (photographed by me!)
- Wiki Mirage F.1 page
Back to 1/72 Models
(c) Copyright "designer"/ All rights reserved. Your comments are welcomed by webmaster
Created this page April 28, 2024