[ Page 1 ]
AMX in 1/72 scale: modelling report
page 2
page 3
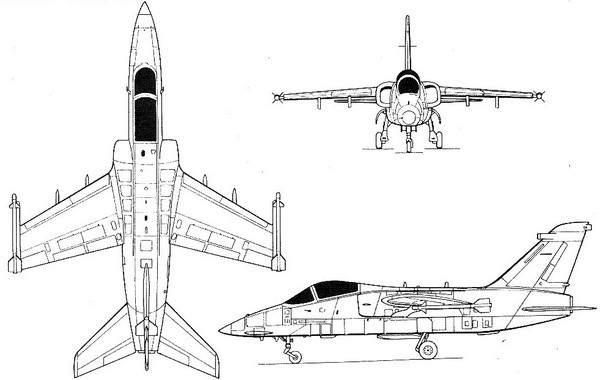
The AMX was developed as a project of Aermacchi of Italy for a light ground attack aircraft starting early 1970s. It would replace the FIAT G-91. In 1980 Brasil joined the program with EMBRAER. AMX International, an Italian-Brazilian joint venture, was formed to develop, manufacture and market the aircraft.
The AMX first flew in May 1984. Fitted with a militarized Rolls Royce Spey mk.807 jet engine it can fly at 1,000 km/hr. A single 20mm M61 canon is installed in the lower port nose and wing pylons for stores and weaponry and wing tip Sidewinder self defence missiles. It can also be used for reconnaissance when the Orpheus pod is fitted. The empty weight is about 6,700 kg and the maximum take-off weight 13,000 kg. It is called from 2012 A-11 Ghibli by the Italian Air Force. The AMX-T is the two seat trainer with the instructor seated aft (with an internal fuel tank removed). Some 110 AMX A-11 and 26 Trainers were delivered. Some upgrades were later done to ACOL standard with upgraded avionics and airframe structural life improvements. The recce pod is now the Reccelite and the first AMX ACOL flew in 2005.
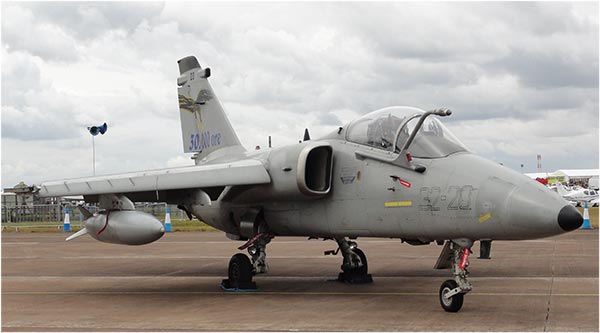
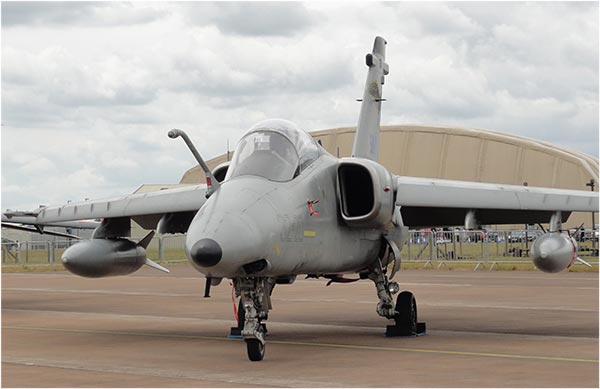
AMX Italian Air Force "Aeronautica Militare" seen by me at Fairford 2010
![]()
The
EMBRAER A-1 version for the
Brazilian Air Force is different with other systems. The U.S. M61
cannon was
at the time not available for export to Brasil so it was fitted with
now 2 DEFA type 554 30mm cannons. It got some other systems
but could fire Piranha MAA-1 missiles and got larger internal fuel
tanks. Still, externally it looks very similar
to the Ghibli. It replaced the Brazilian Air Force MB-326 and 51
A-1 and 8 trainers were put into service. From 2013 some 43 were
modernized to A-1M configuration.
(In 1985 I was at EMBRAER but did not have a camera to take photos of the A-1 prototype being in the test hangar. Great memories).
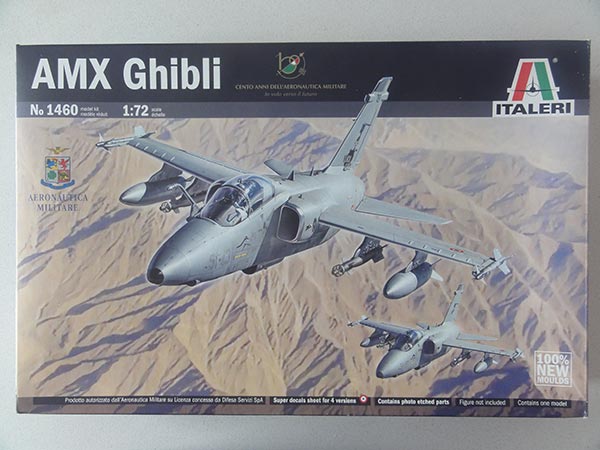
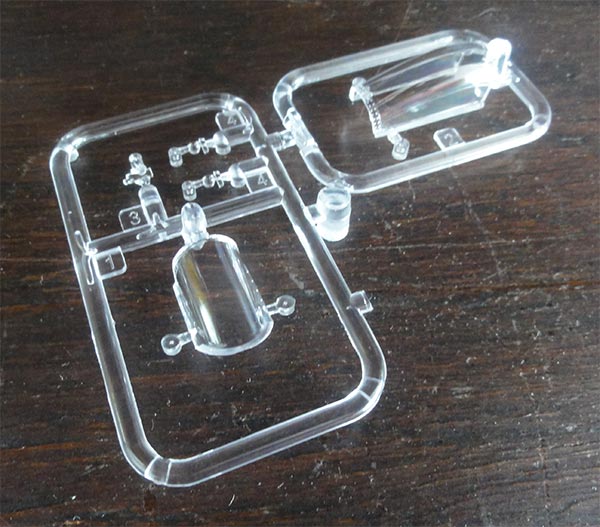
The first injection 1/72 model that was finally released is from Italeri. Kit #1460 for the AMX single seater "Ghibli" was released in 2023. It is a neat kit with fine recessed panel lines and about 100 parts in 2 plastic light grey sprues and 1 transparant sprue.
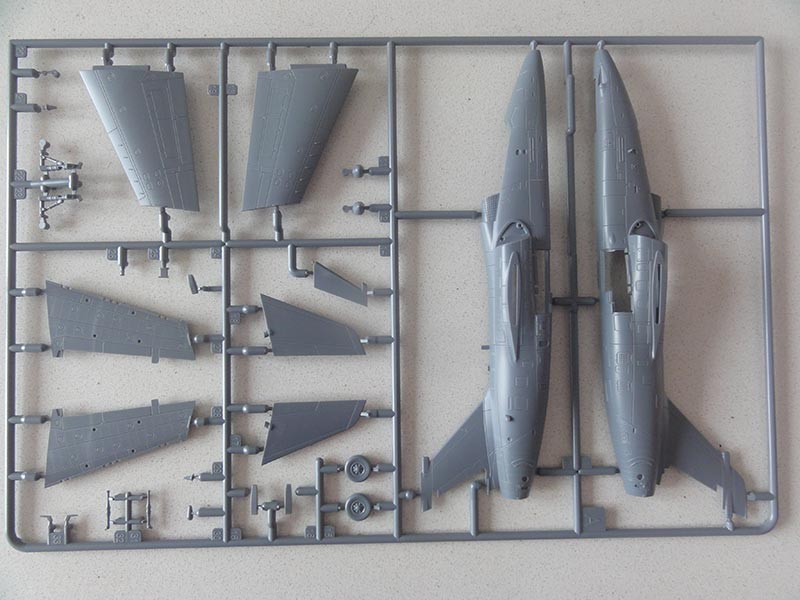
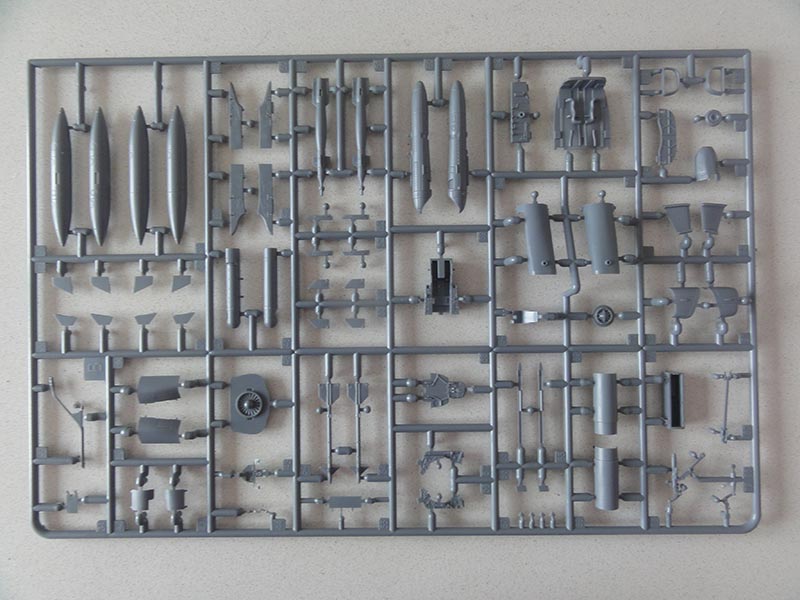
Included are pylons for some under wing fuel tanks and an Italian version of the Orpheus recce pod (also used on the Italian F-104) and the later Reccelite pod. Sidewinder AIM-9L missiles with wing tip launch rails, laserguided bombs are in the kit as well. And a refuelling probe as it was almost always fitted.
A small etched metal set is for some fuselage spine raised panels to ACOL standard. So quite a nice Italeri package.
Decals are excellent as these are printed by Cartograph.
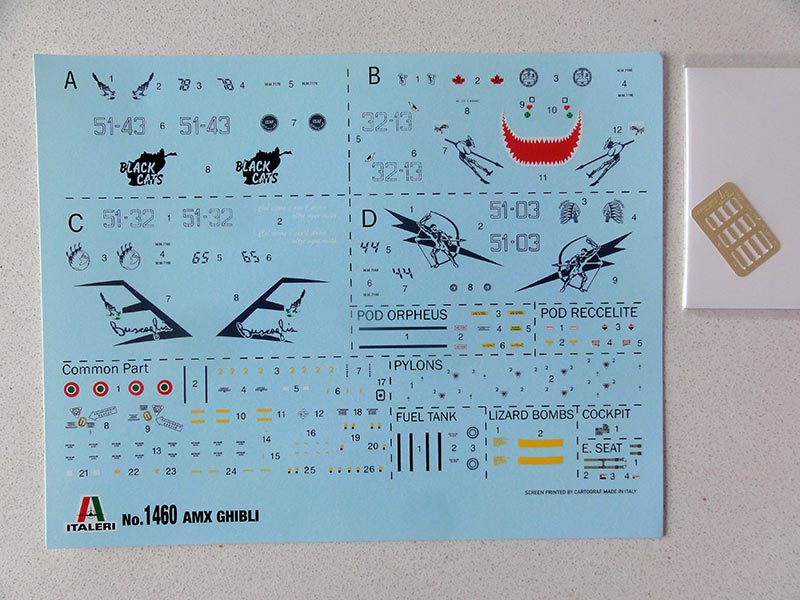
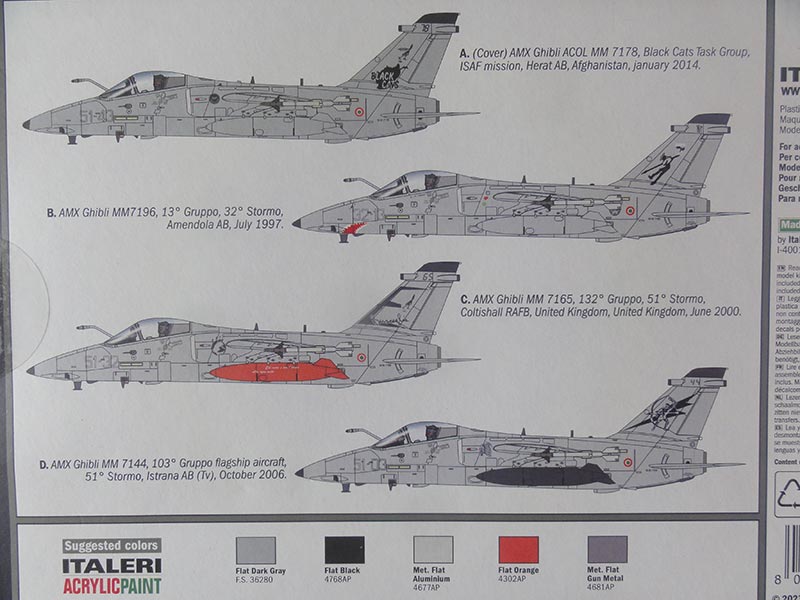
The Italeri Ghibli kit #1460 has decals for 4 schemes of Italian Air Force "Aeronautica Militare" Stormo's:
-A- AMX ACOL Black Cats task group, ISAF mission, Afghanistan 2011
-B- AMX 32 Stormo, Amendola base, 1997
-C- AMX 132 Gruppo/ 51 Stormo
-D- AMX 103 Gruppo/ 51 Stormo, Istrana base, 2006
All schemes have overal grey FS 36280 finishes with some black Gruppo markings.
See further here below...
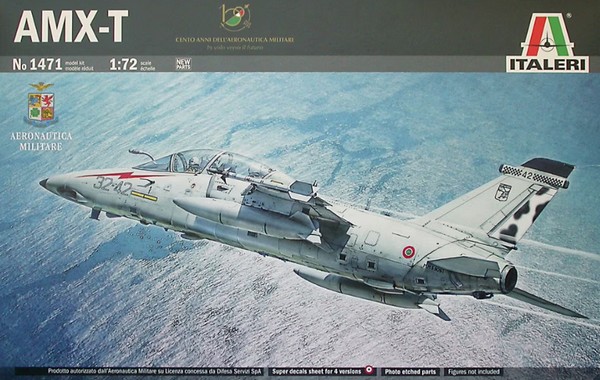
A few months later Italeri released also a 1/72 kit for the AMX-T trainer with kit #1471. It has many common parts with the single seat kit but now obviously a different dual fuselage and twin canopy.

All the other parts are still provided.
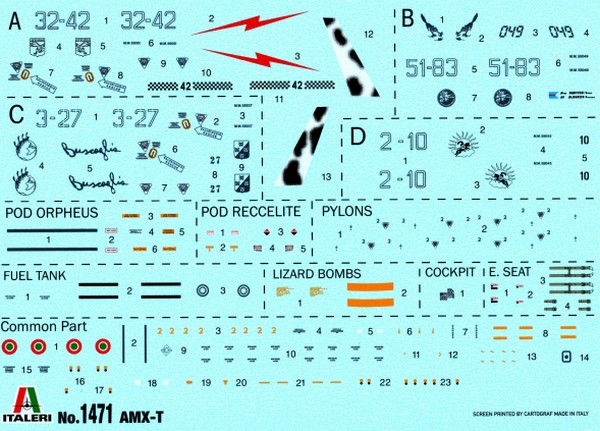
Decals are for:
-A- AMX-T 101 Gruppo OCU 32 Stormo at Amendola, 2006
-B- AMX-T 132 Gruppo/ 51 Stormo at Istrana 2020
-C- AMX-T 132 Gruppo/ 3 Stormo
-D- AMX-T 14 Gruppo/ 2 Stormo at Rivoloto, 2001
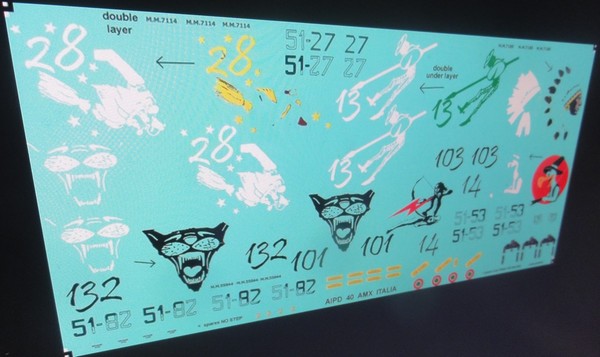
Again, schemes have overal grey FS 36280 finishes with some black Gruppo markings. The kit decals are quite good and tiny stencillings are also provided and include pylon stencils.
A small instructions Errata was added to show correct some details:
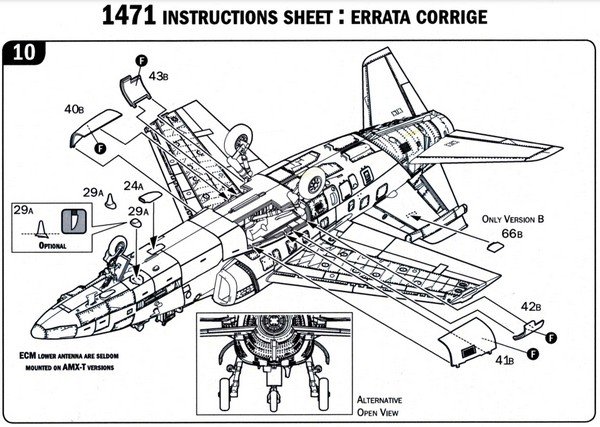
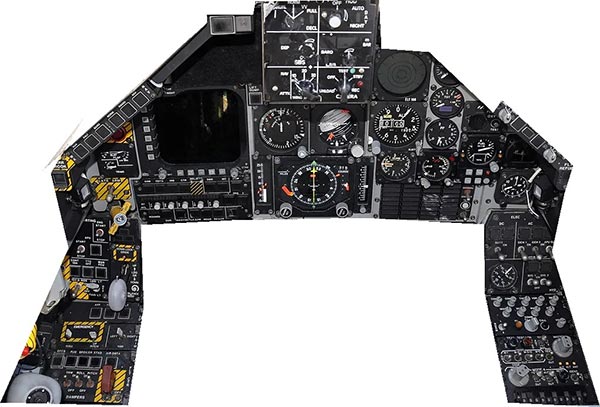
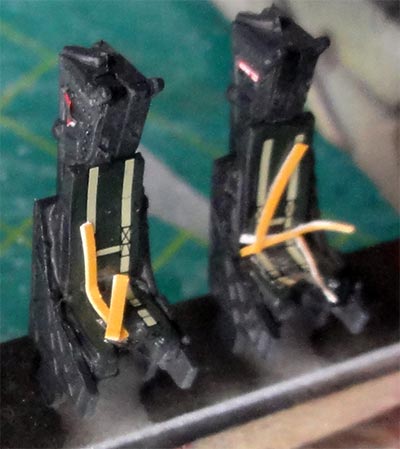
There is an air flow duct inside the fuselage and ejection seat Martin Baker mk.10L looks good. The instrument panels have raised details but need painting with only a small decal sheet for the right upper main instrument console. The landing gears look neat with a main gear bay though not a lot will be seen as the large gear doors are mostly seen closed when parked.
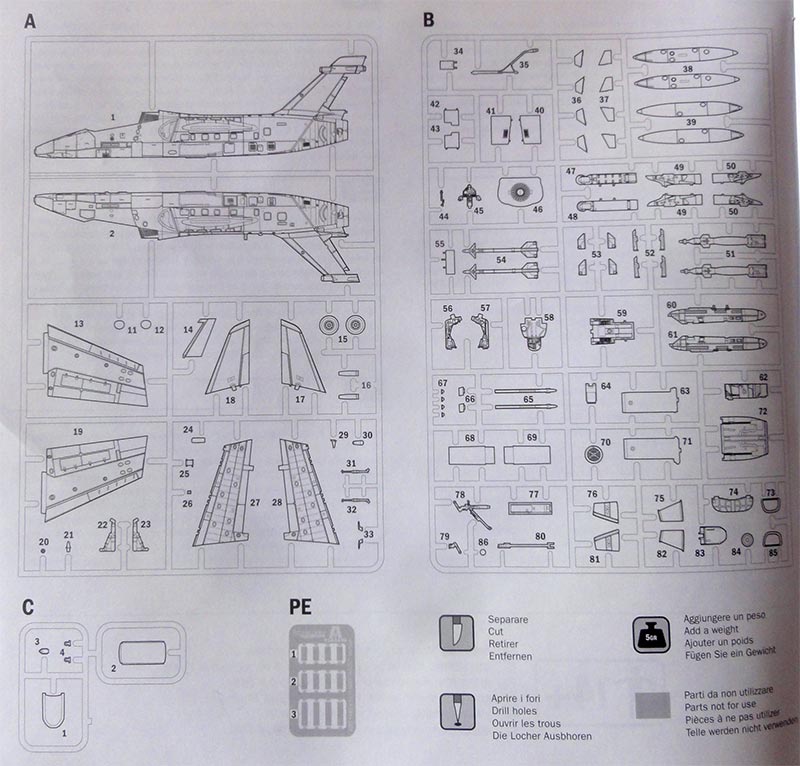
These are excellent kits. The Italeri kit instructions with some 18 steps are fine and paint instructions are included. Paints indicated are in Federal Standard and their own Italeri acrylics.
The assembly order as with many other kit instructions is not always the best sequence to build, this modelling report shows how it was done.
Several Ghibli kits will be made with other decals I custom designed and printed. These decals have more colourful tails as shown when the AMX was 30 years in Italian Air Force "Aeronautica Militare" service in 2019.
These decals AIPD 40 are available for you as well and can be ordered. See my decal page here...
(A few EMBRAER AMX A-1 Brasil Air Force "Força Aérea Brasileira" models will be made was well with some conversion. Again, a few custom Brasil decals AIPD 41 were designed and printed. To be described in the near future).
The 1/72 Italeri AMX "Ghibli" kit assembly is straight forward. The ejection seat can be installed later on. Also do not install the landing gears until after the paint scheme has been applied. Do not forget to put some weight in the nose to avoid tail sitting.
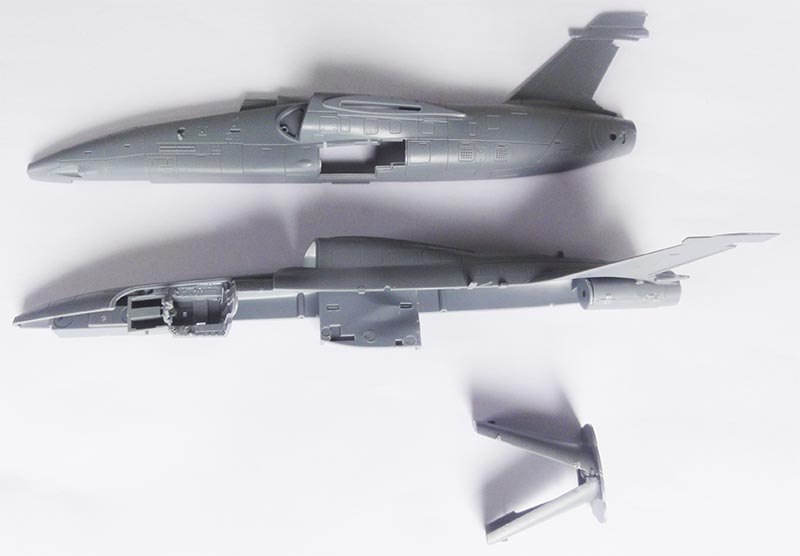
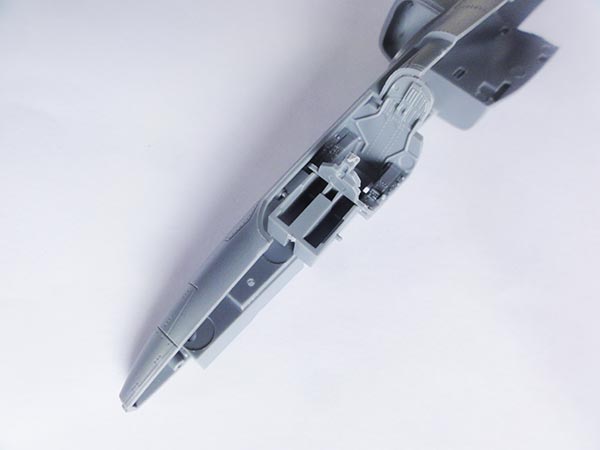
There is a nice air flown duct and tail pipe in the fuselage. Ensure correct alignment for a good fit that will mate quite good with the insides' of the fuselage.
The vulnerable air refuelling probe is better not fitted until the model is almost complete; it can be installed and painted when the canopies are set.
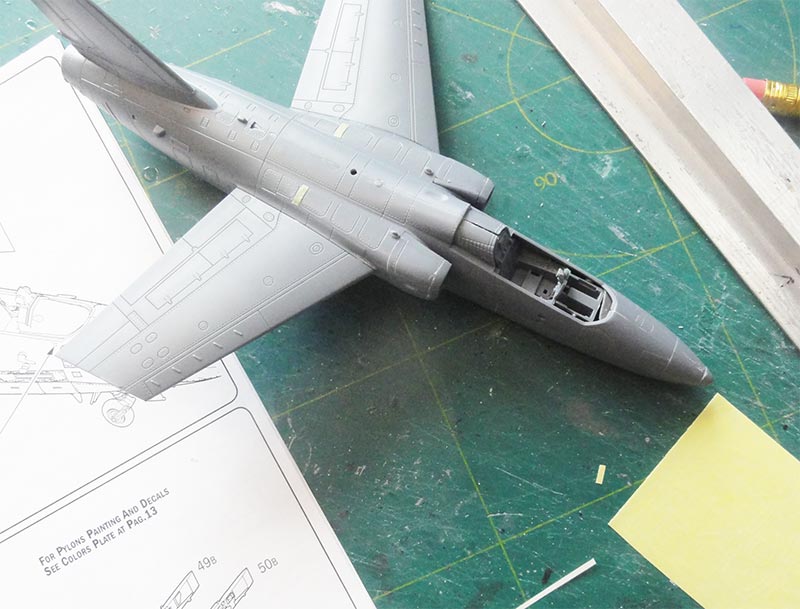
If you want pylons installed, drill open the lower wing holes. When installing the wing halves, ensure the correct dihedral. The fit is quite good at the joints. I recommend to not yet install the horizontal stabilizers, do much later.
Probably the small etched metal panels (seen in STEP 11) are for the re-enforcements for a midlife update AMX ACOL. I installed these later on after sanding the upper fuselage.
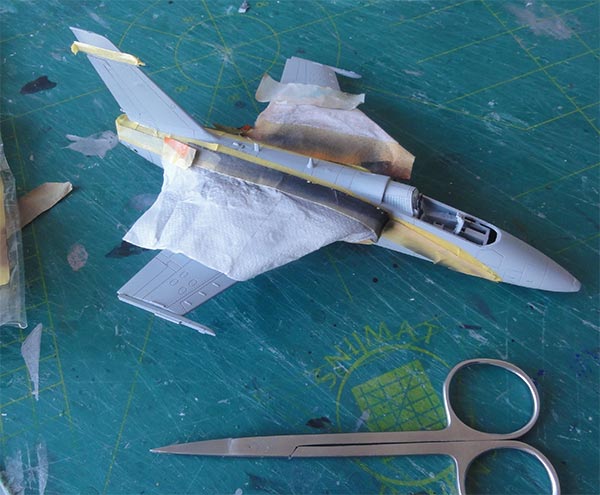
The fit of the model is good, but still I needed a tiny bit of putty and sand the fuselage halves' joints at both upper spine and lower areas. Rescribe the panel lines when done.
The small rear exhaust fairing at starboard above the stabilizer was drilled open. I also drilled a hole in the port upper recess aft of the cockpit
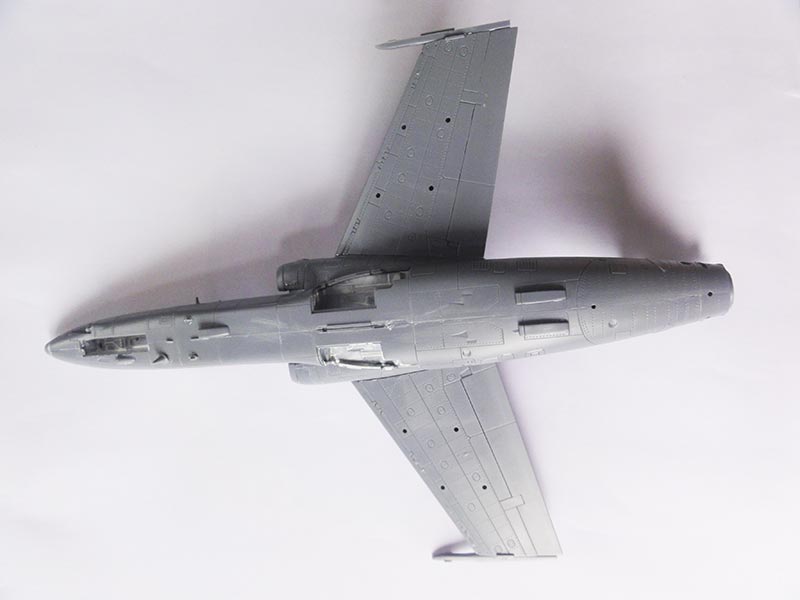
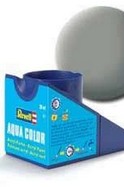
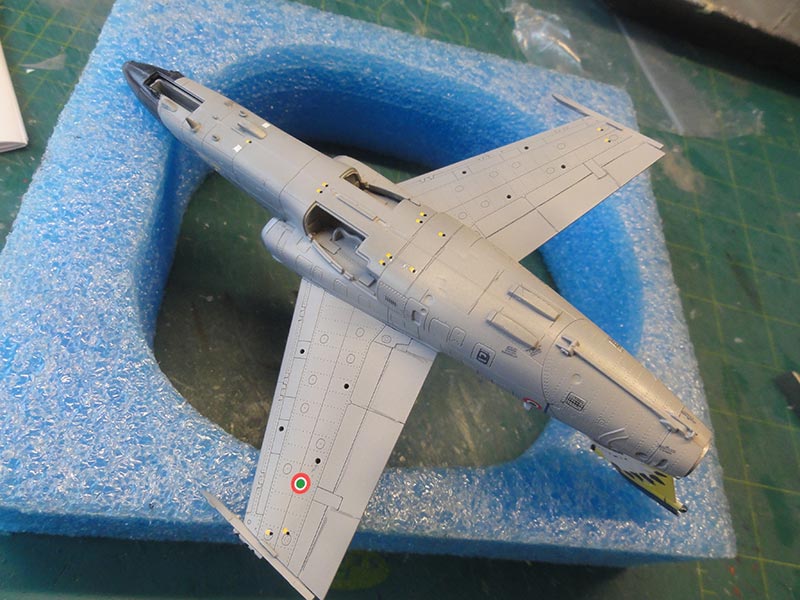
To check for any flaws, the model got a base grey paint by airbrushing thinned Revell 75 Steingrau acrylic.

Any flaws were repaired. When it looked OK, time for the paint scheme.
The overal Ghibli colour is FS36280 grey. Hataka HTK A267 acrylic and MRP have these paints. I had in the past difficulty to thin HTK acrylic paint with my usual mix of IsoPropylAlcohol and demineralized water, it clogged my airbrush nozzle.
A very similar colour compared, looking at my official US FS colours samples, to FS36280 is FS36270. So I airbrushed the latter with my favourite Gunze Sangyo Mr Hobby H306 acrylic paint. Do not forget to airbrush the gear doors, pylons and any wing fuel tanks you want as well as the still not fitted stabilizers.

After the base standard Ghibli grey paint scheme has been applied with the airbrush, the special Gruppo colours were to be airbrushed. As noted, I custom designed and printed decals for more colourful tails as shown when the AMX was 30 years in Italian Air Force "Aeronautica Militare" service in 2019. These decals AIPD 40 are available for you as well, see above...
These special 30th anniversary AMX jets had black noses and spines and different colourful tails. These were to be added through the custom decals. But first, for all schemes, the vertical tail ends, ECM fairing tips and nose tip were airbrushed mat black. The air intake edges were painted silver.
Note that the refuelling probe is not yet installed as it is very vulnerable.
Before starting decalling first....

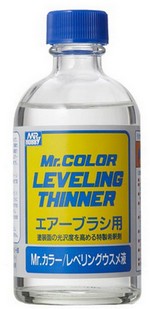
... to avoid any "silvering" (that spoils decal appearance), each model was airbrushed with a gloss varnish. I airbrushed a few layers of Johnson Future / Pledge thinned with 10% Gunze Sangyo levelling thinner. This really works out fine to avoid Future "splatters".
Than my custom decals were set for each desired AMX SCHEME. For the custom printed decals, each individual decal needs to be cut out with fine scissors....

The standard Italian stencils came from the Italeri kit. The Italeri kit instructions show these very well (* without an annex A, B, C, D etc). Some are very small. The low visibility lights are yellow decals and note the tiny ones at the wing tips. These are easily lost!
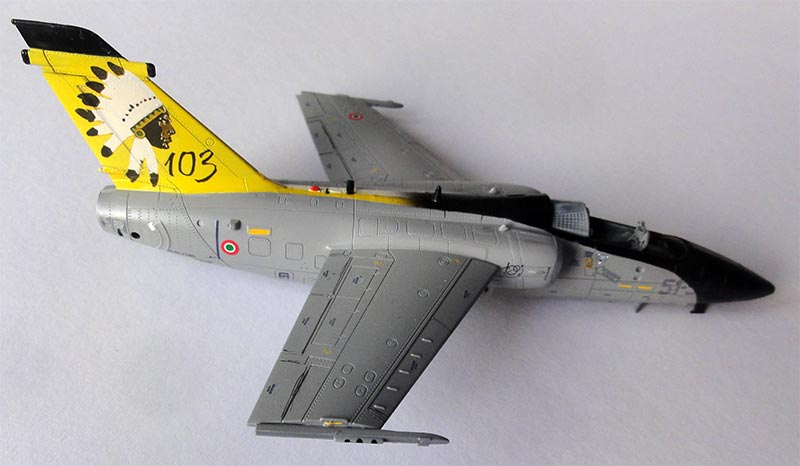
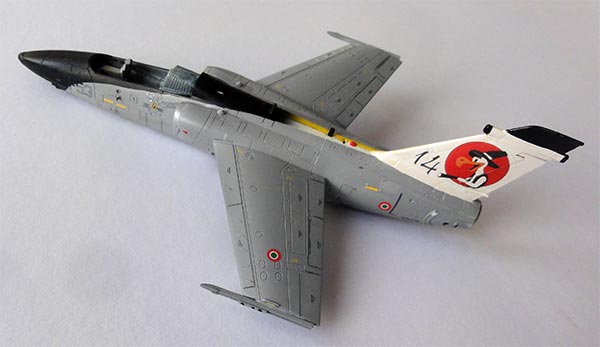
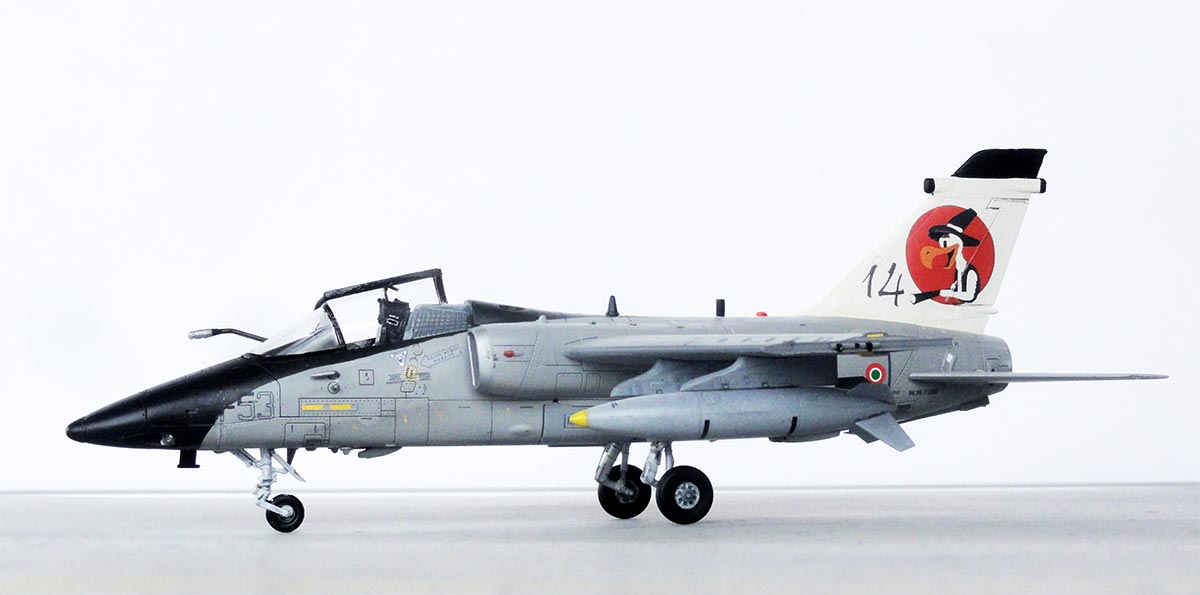
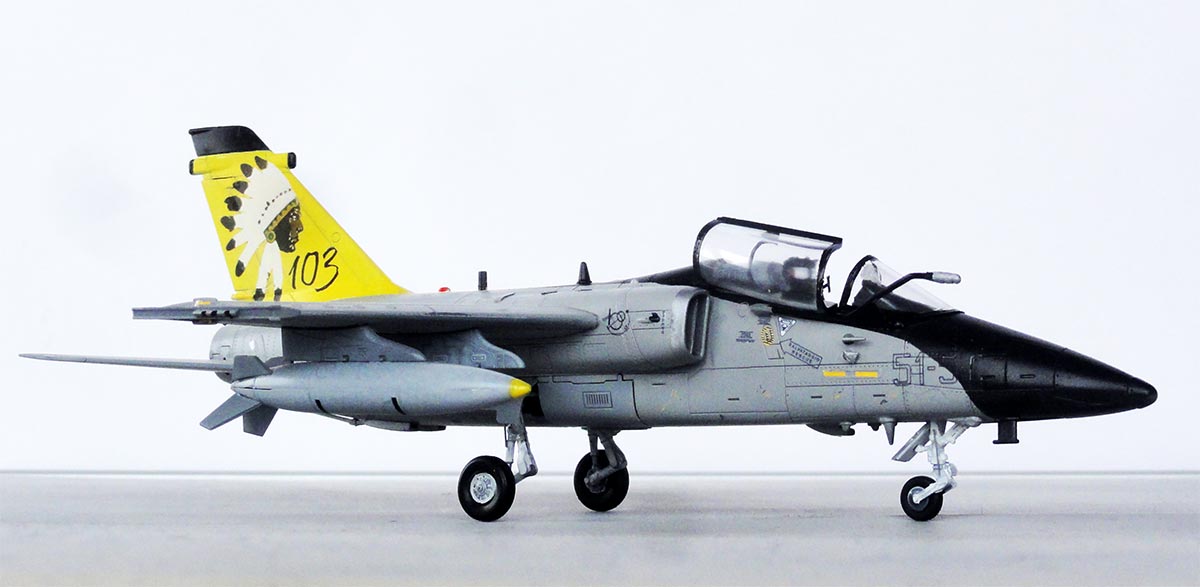
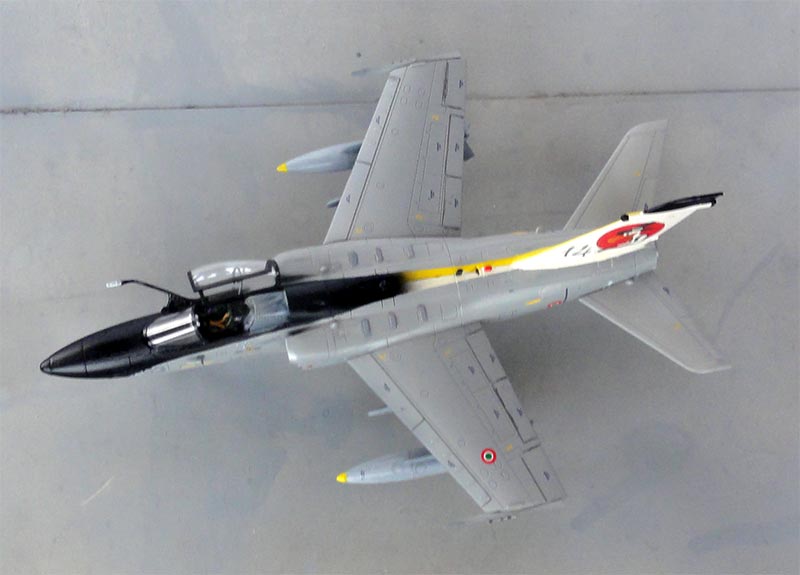
SCHEME 1 was for the AMX MM7180 with 103 Gruppo with the Indian tail at starboard and port 14 Gruppo with the Duck cartoon. (see my drawing).

The specific tail sides were masked and airbrushed white. Than the starboard tail was airbrushed yellow for which I used Gunze Sangyo H42 yellow acrylic. Note that the colours blend in with the black spine.
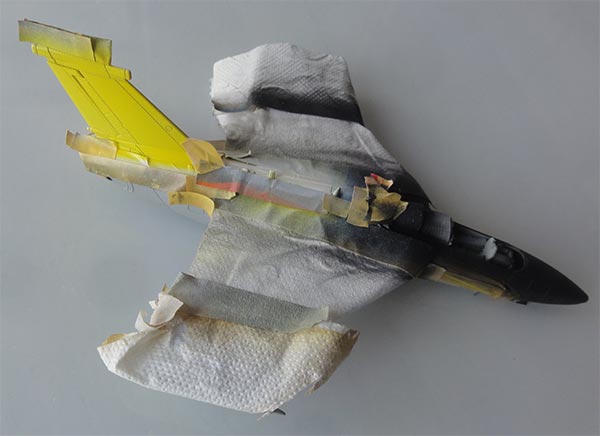
The "indian custom" decal was set: first the white decal followed by the coloured indian decal...
At the port tail side, the Duck cartoon decal was set... (the white part is not needed as the base port tail is white).
Next followed the standard Italian stencils from the Italeri kit.
For this scheme, the under wing fuel tanks with their pylons are to be installed as well, these have yellow tips. Hence the drilled open holes in the lower wing.
After the decals had been set on each model, the remainder of the built was done.
The landing gears and gear door insides' were painted "off white" but I painted the gear bays as suggested by Italeri not white but FS36495. The gears were installed (which is possible after the paint scheme is applied). The wheel hubs were also painted off white and you also get the landing lights. The 2 bigger main gear doors were set closed. At the main gear struts, a few very small hydraulic tubing was suggested with lead wire (or use black stretched sprue, not yet seen on the photo).
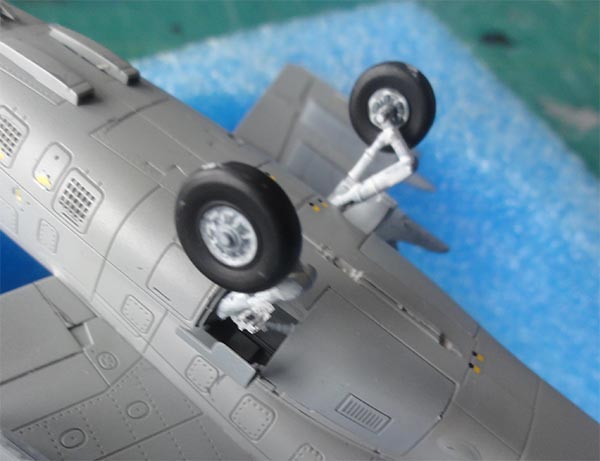
The kit nose gear is also fine but I drilled the hole inside the nose bay a bit wider. The front gear door is often seen closed so the lugs were removed, the door reduced in length 1mm and set closed. The open aft nose gear door lugs were cut 0,5mm shorter for a better installment.
The cockpit interior of each model was hand brush painted FS36495 and some custom printed instrument decals added. (on the kit decals sheet only a small panel is provided as decal). On my custom decals sheet these extra panels are provided.
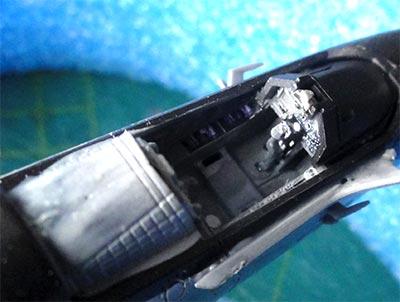
The front coaming and ejection seat MB mk.10L was painted black with olive drab cushions. The kit provided decals for the harnass which look quite nice but I added a few extra straps.
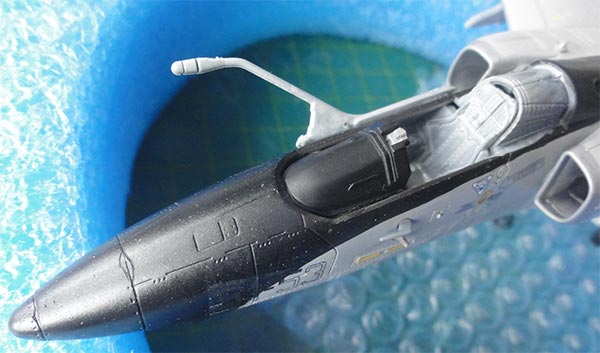
The refuelling probe was now installed at starboard. After fitting there was a tiny gap with the fuselage side, this was filled with white glue. Paint when dried.
The horizontal stabilizers were now set and are horizontal, I had to enlarge a bit their locating holes in the rear fuselage.
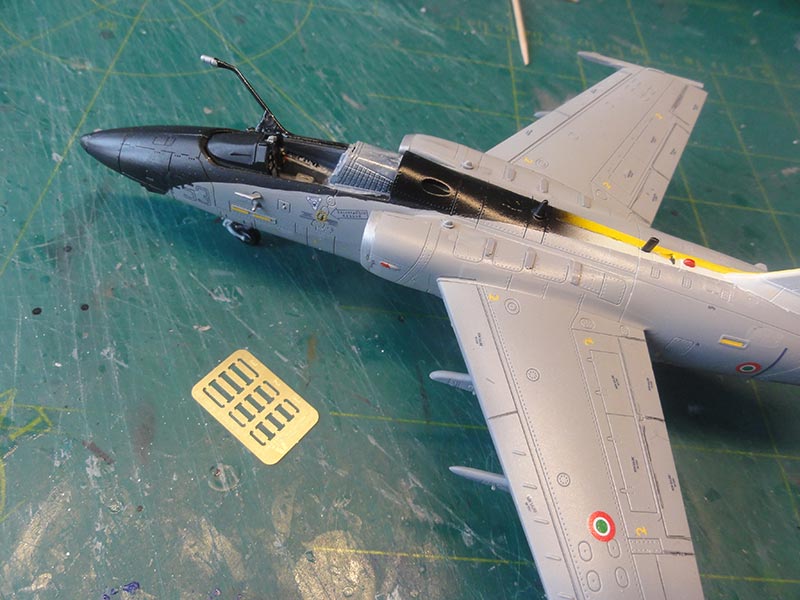
The ACOL structural plates were set on the fuselage spine with super glue and painted. As in 2019 I assumed these were appropriate. Pitot tubes and smaller antennas followed as per kit. These are tiny parts!
The port anti-collision light on the intake was painted gloss red and at starboard blue. At the spine the red collision light was painted.
Pylons were installed with the fuel tanks at the outboard pylons/ stations.
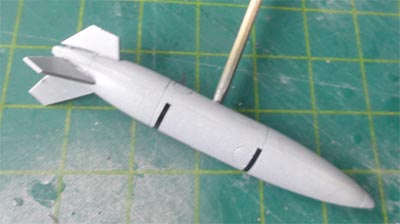
For this SCHEME 1 model, the outboard wing fuel tanks got a yellow tip painted (not yet done).
Just a little weathering was applied e.g. to the recesses of flaps, spoilers and gear doors. I also used a sharp pencil here.
When done, the model got a semi-gloss varnish coat to get an even sheen and to protect the decals. A mix was airbrushed of again Johnson Future thinned with Gunze Sangyo acrylic Levelling thinner but now with 5% mixed in Tamiya Flat Base X-21 to make it a bit duller.
Almost there. The canopy and wind screen frames of this scheme were hand painted gloss black with a fine brush. The windscreen fits OK and was fixed with white glue.
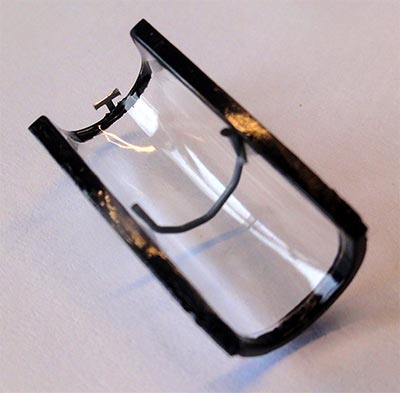
The canopy got inside a tiny mirror installed from scrap as the canopy was to be set open. Inside, aft of the seat station, is also seen a sort of frame inside the canopy, this was made from grey sprue. The canopy was set open swivelled to starboard.
That completed this neat model.
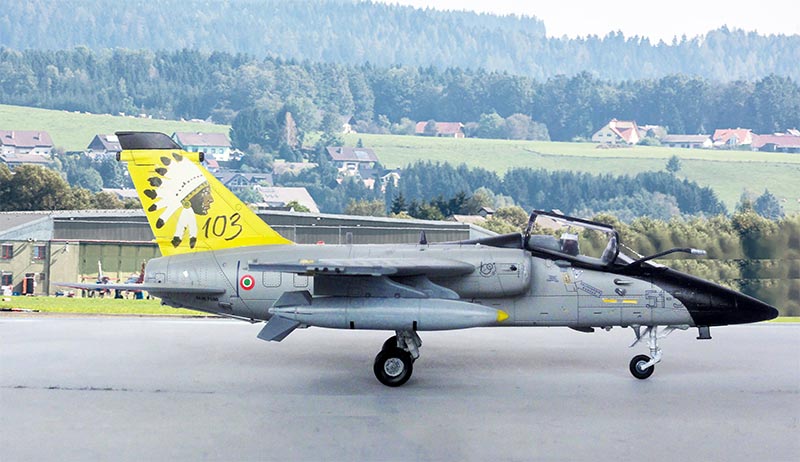
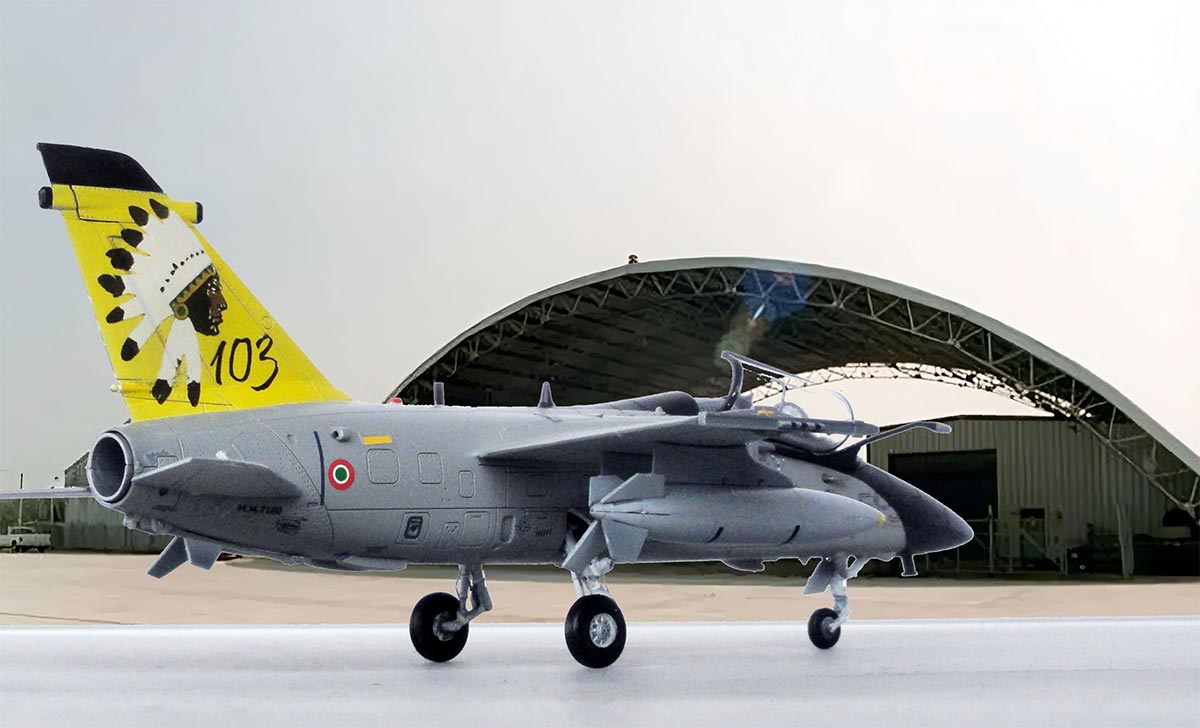
The AMX coded MM7180 with 103 Gruppo with the Indian tail at starboard and port 14 Gruppo with the Duck cartoon for the 30th anniversary in 2019.
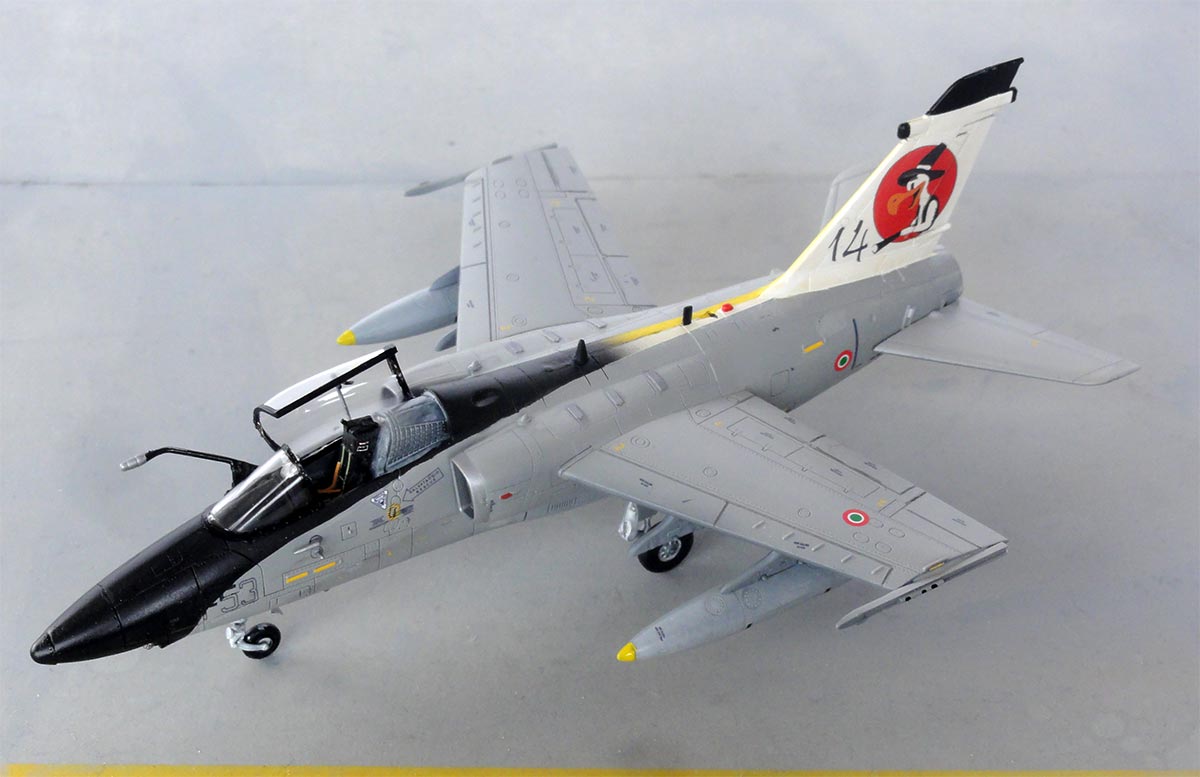
... starboard...
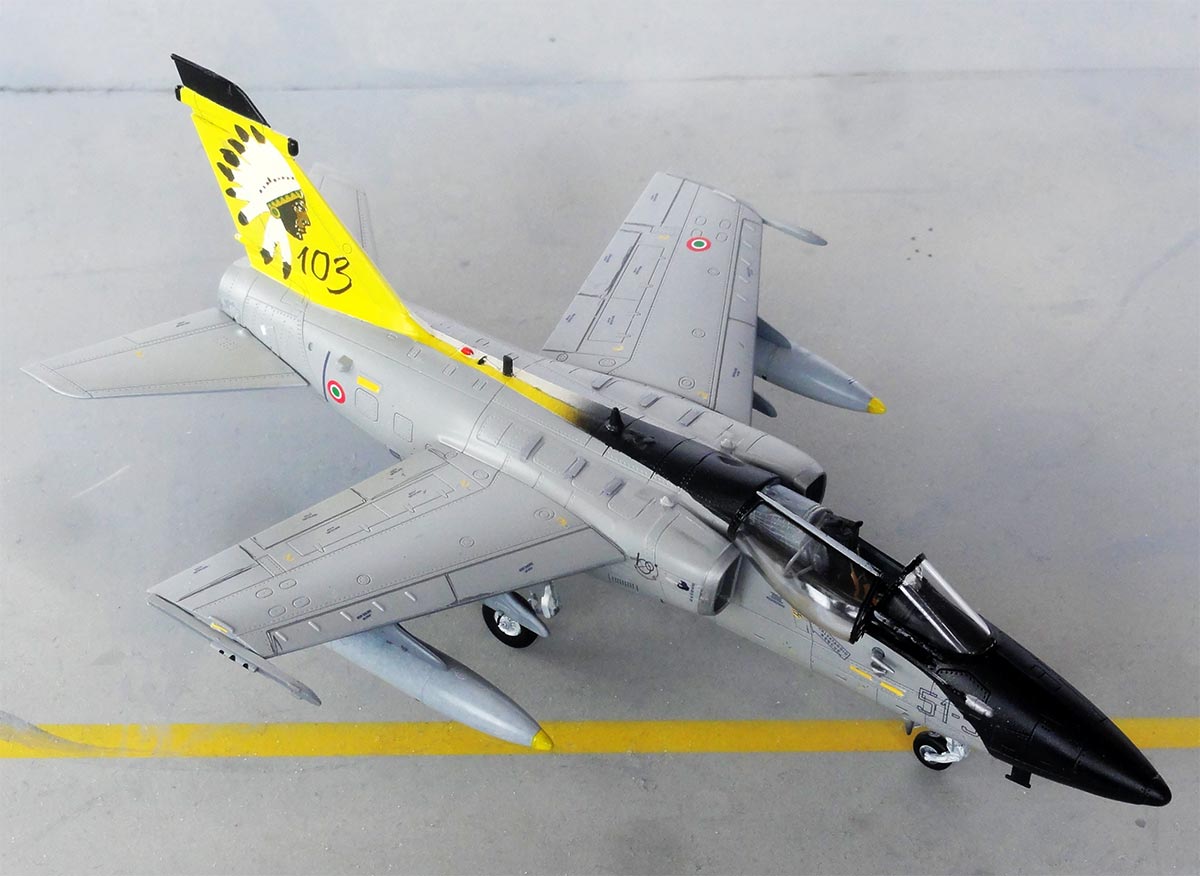
... set at an air base visit at Austria Zeltweg....
A nice model with my own custom decals is in the collection. Want a decals sheet? Look at the decal page...
On to next [ page 2... ]
References:
- AMX Ghibli, Italian aviation series, Anselmino and Gastaldi, 2012
- Air international magazine, Vol 44 pages 222 , Vol 77/ no 5
- World Air Power Journal, Vol. 5, 1991
Web:
- The Aviationist: 30 years Ghibli (Thank you Iain for the link!)
- Wikipedia
Back to 1/72 Models
(c) Copyright "designer"/ All rights reserved. Your comments are welcomed by webmaster
Created this page February 8, 2024